Who would have thought you could easily customize a functional and stylish soother clip to match any outfit your new baby or child wears?! Our very own, original, incredibly safe, step-by-step tutorial will allow you to do just this… and the possibilities (and outfits) become endless!
Supplies needed:
- 1 x round clip - stainless
- 1 x 60” White regular cord (35" is all you really need but we suggest the longer length to allow for any mistakes)
- 7 x 15mm round beads
- 1 x crafting needle
Step-by-Step Instructions:
*Please note that the recommended length for a pacifier clip in the US is 6-8" for compliance standards.
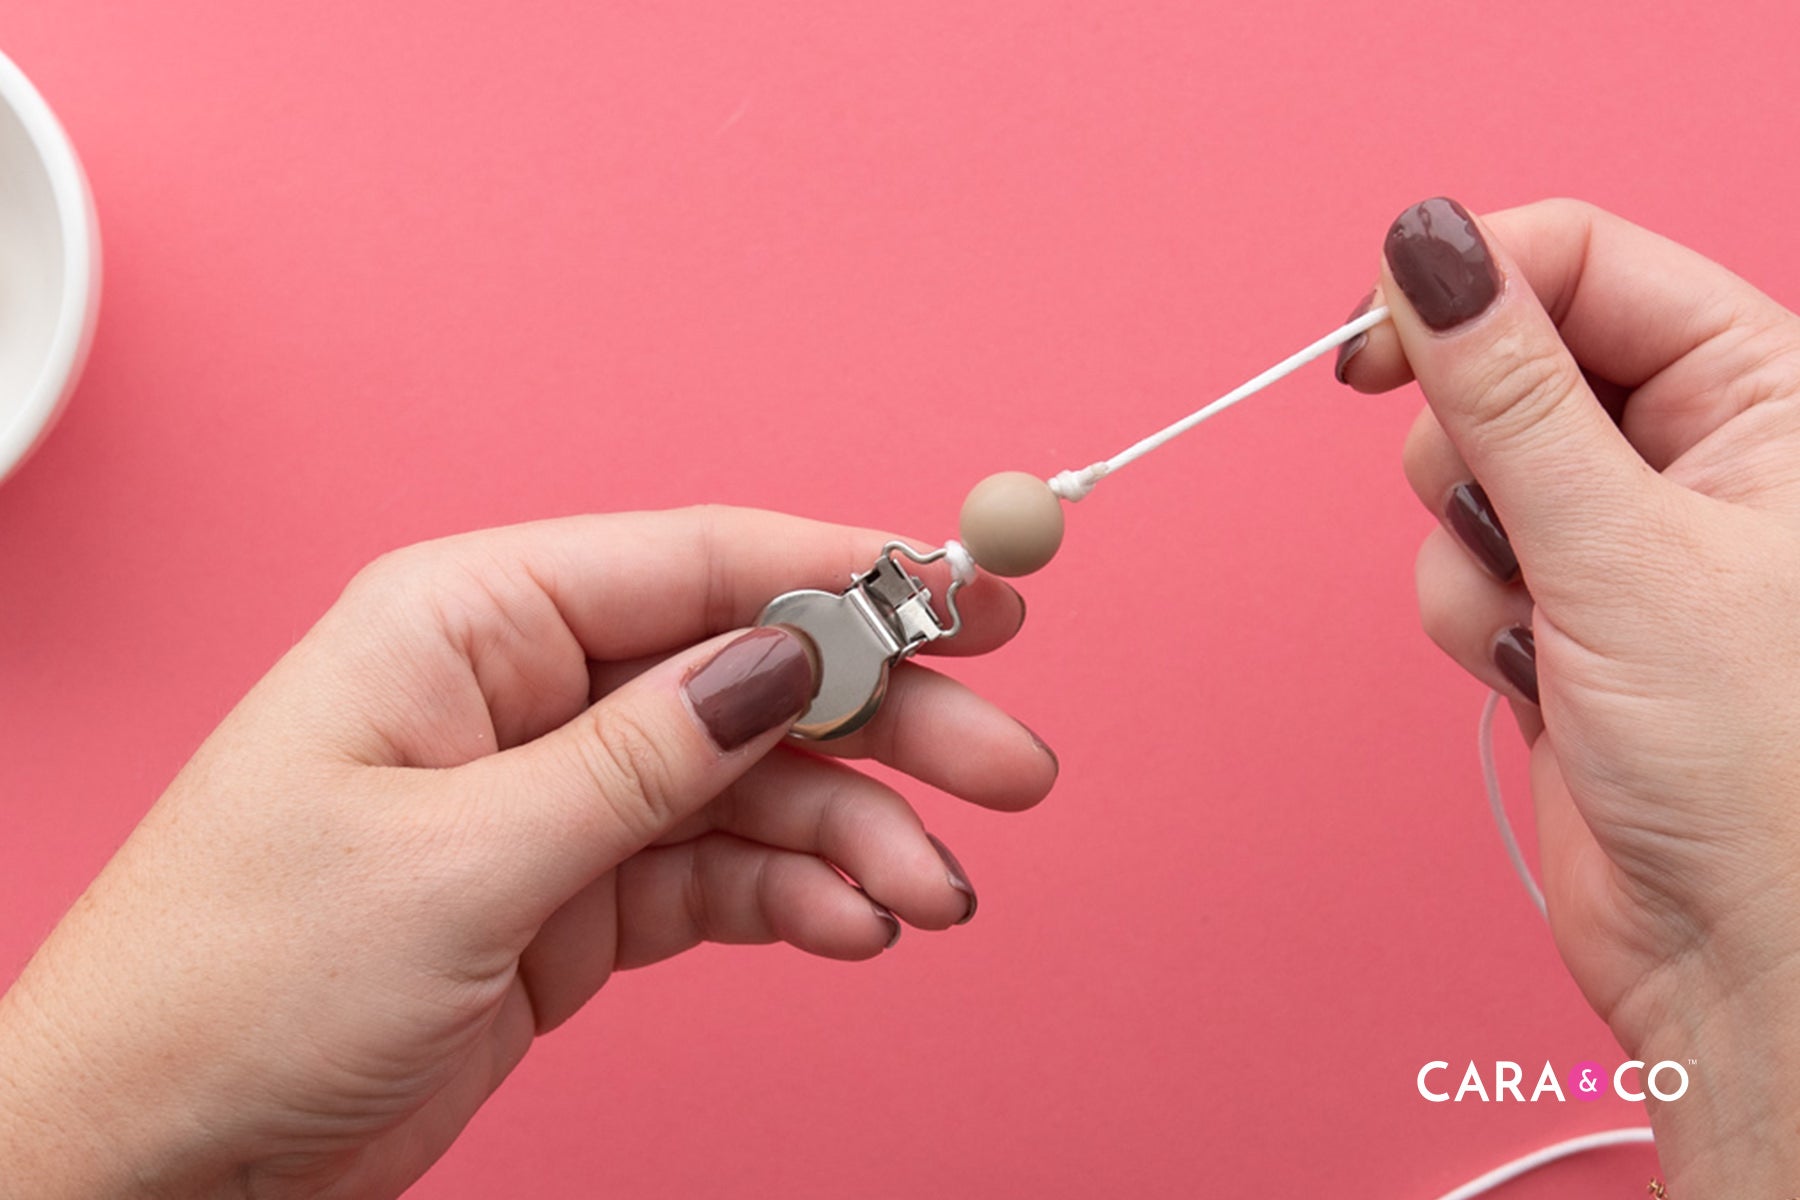
1. Loop cord through clip. Leave one side of the cord as a longer piece, and the other end of the cord with about 2.5” of length from the end of the clip.


2. Knot the cord about ½” from the bottom of the clip.


3. Run your lighter over your knot to fuse the knot.

4. Trim the excess length of the smaller piece of cord at the knot. Carefully melt the tip of the cord and press into the knot until cool and hard.


5. Slightly melt the tip of your length of the cord so that you can begin beading.

6. Pull the first bead up the cord and over the knot close to the top of the clip.


7. Pull the second bead up the cord and over top of the knot near the clip.

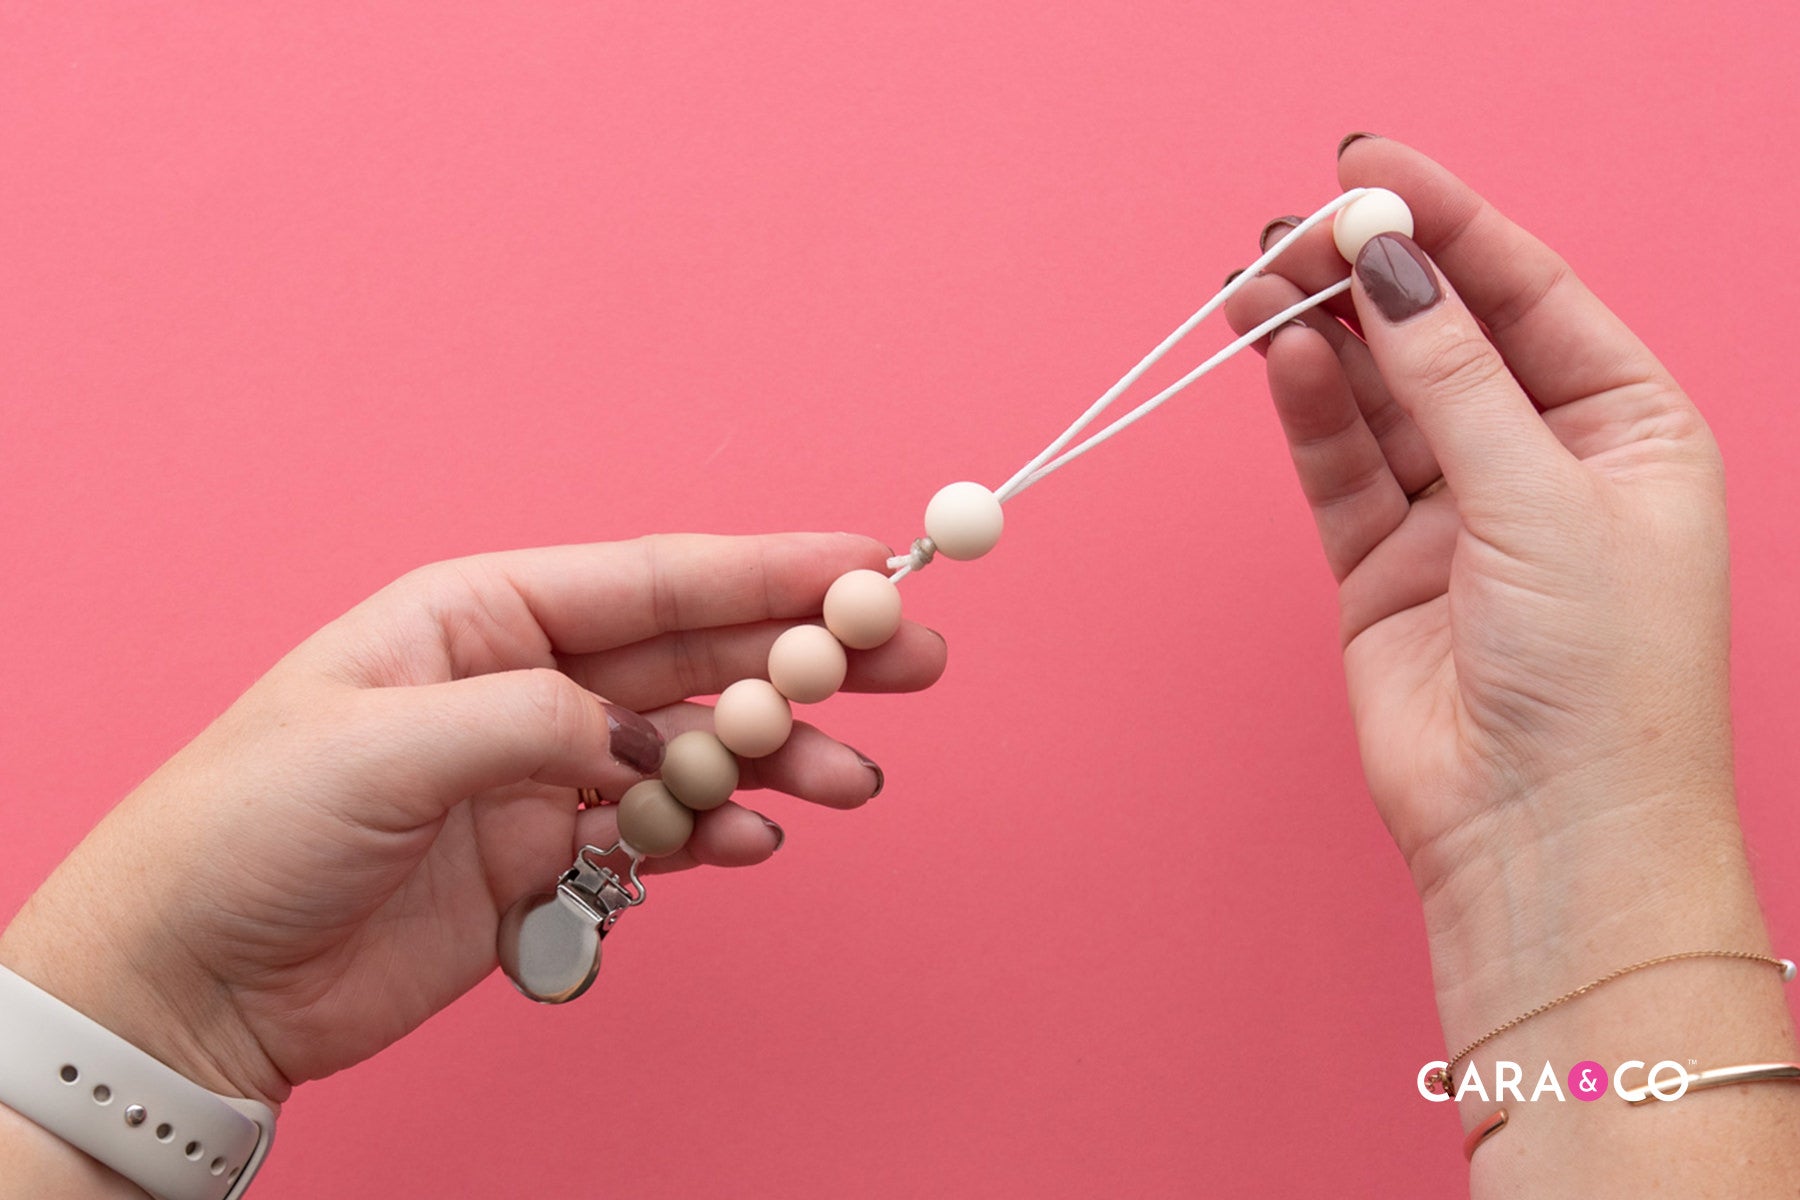
8. String the rest of the beads onto the cord.


9. Separate the last two beads on your cord from the rest of your beads.

10. Thread your cord onto your crafting needle and push it back up through the second last bead.

11. Pull the last two beads down until you have about 5 inches of doubled string length between the third last bead and the two end beads.

12. Tie a knot under the third last bead.


13. Trim the extra length of cord off at the knot so that just the loop is left. Melt the small tip of cord and push it into the knot. Fuse the knot with your lighter.


14. Pull the second last bead up and over the knot to cover it.

15. Pull the last bead up, and then knot the loop tightly underneath it.


16. It’s done! Safe and easy to use—and best of all, no more lost soothers or teethers!


We hope you enjoyed this tutorial! Be sure to tag us on instagram using #createdwithcarasuply if you make one yourself, we LOVE seeing your creations!
xo
- the girls
*At Cara & Co, we take safety seriously. We have had our custom tutorial design above third-party tested by a CPSC accredited testing lab to ensure it meets compliance standards for Canadian (SOR/2011-17) and US (ASTM F963-17) children's pacifier clip requirements. However, this does not remove the responsibility of each customer to ensure that the products they create from this tutorial are tested and meet all relevant compliance standards.
**The products, materials, and supplies sold by Cara & Co. Silicone Craft Supply are intended for use by adults and should never be left unattended with a child.
***Small objects and beads can present choking hazards to young children. Never leave a child unattended with beads or other products. Always dispose of any damaged product. No product is completely indestructible, and fully formed teeth could potentially damage product if chewed aggressively, so responsible attentiveness is needed for any user or purchaser. Customers should always inspect and monitor their products, discontinuing use at the first sight of damage.
****Once our products have been sold and shipped to our customers, Cara & Co Silicone Craft Supply Inc., waives all responsibility and liability from the use of our products. Customers are responsible that their final products made from our supplies meet the appropriate safety requirements for their region. Our buyers understand that by purchasing our products or using suggestions from the above tutorial, the buyer assumes any and all responsibility and liability for the use of the products.
*****Cords, clasps and pacifier clips are not intended to be chewed on and may present choking hazards.
34 comments
Hi Chelsea,
Thank you so much the writing and for checking out our tutorials! :)
In our written tutorial we suggested a 60” cording so that you have excess string to work with, in case any errors are made. To make the paci clip, you really only do need a total of 35”, which is what we did for the video tutorial. We apologize for the confusion that this caused! We’ll update the wording to explain this a little bit more :)
I’m a bit confused. In the video it says 35" cord but the written instructions say 60" cord. I have the 60" but the beads don’t seem to want to go over the knot.
Hey Amanda!
Thanks for writing with that great question! It can take a bit of wiggling to get the silicone bead over the cord, but generally, if you carefully pull the cord into it, it should cover the knot (even if it is a larger knot). The silicone generally expands as the knot is manipulated into it. Hope this helps!
xo Cara
Hi Janelle! We offer our 60" precut lengths of cord that can be found here: https://carasupply.com/collections/cording/products/regular-cord-60
Hope that helps!
xo
Cara
I can’t pull the beads over the knot in the cord… I bought the cord you sell on the website. Maybe it’s too thick?