When we started out on this journey of running a craft supply company, we had no idea how many amazing people we would meet along the way. We’ve worked alongside some of the most creative, caring, and talented people. We’ve supplied crafting materials to the most beautiful handmade shops - yours included!
As we grew as a business we found ourselves daring to dream a bit bigger - thinking a little more creatively. A dream of ours has always been to be able to source and make available to you high quality wood crafting kits to help you stock amazing products in your own shops.
And the timing is suddenly just right - the perfect time to support another local, handmade shop that will be supplying us with the most beautiful, high-quality wood kit products.
Meet Aaron!

We are SO excited to introduce another incredible Canadian Wood KIT Supplier.
You've already met Dave from The Wheatland Woodshop, our phenomenal wood craftsman from Alberta, Canada, who designs and supplies all of our gorgeous original wood rings and knot grippers! There is just something about the top-notch, safe quality of products made from local, skilled artisans, and we couldn't be more proud to add ANOTHER Canadian woodworker to our team!
Aaron is a local woodworker from Southern Ontario. He has a beautiful wife Alissa, 3 kids (plus one on the way!!), massive ‘puppy’ named Max, and an amazing ‘Can Do’ attitude!

We always want to find makers that value quality & craftsmanship, and we can't believe what Aaron has been able to produce! We threw him our ideas (yep, plural!!), and without hesitation he got right down to making product samples and options.
We’ve been working on getting our new wood kits JUST right. From design to functionality, we are so pleased to launch our first wood kit: Wood Rattles!

These toy rattle kits have been carefully made with beautiful hard Canadian Maple, sourced and bought from local vendors - and we can't emphasize how important local is right now! Extra, careful attention and custom detail has been given to the proportions of this rattle, we are so excited to finally make it available!
Your kit will include two end spheres with pre drilled holes and a cut-to-size wood dowel, along with step-by-step instructions for assembly. No hardware comes with this kit, but we recommend you pick up a non-toxic wood glue from your local hardware store to use when assembling your rattles (we recommend Gorilla Glue or Titebond).
WOOD RATTLE KIT COMPARISONS
A beautiful design is important to your shop!
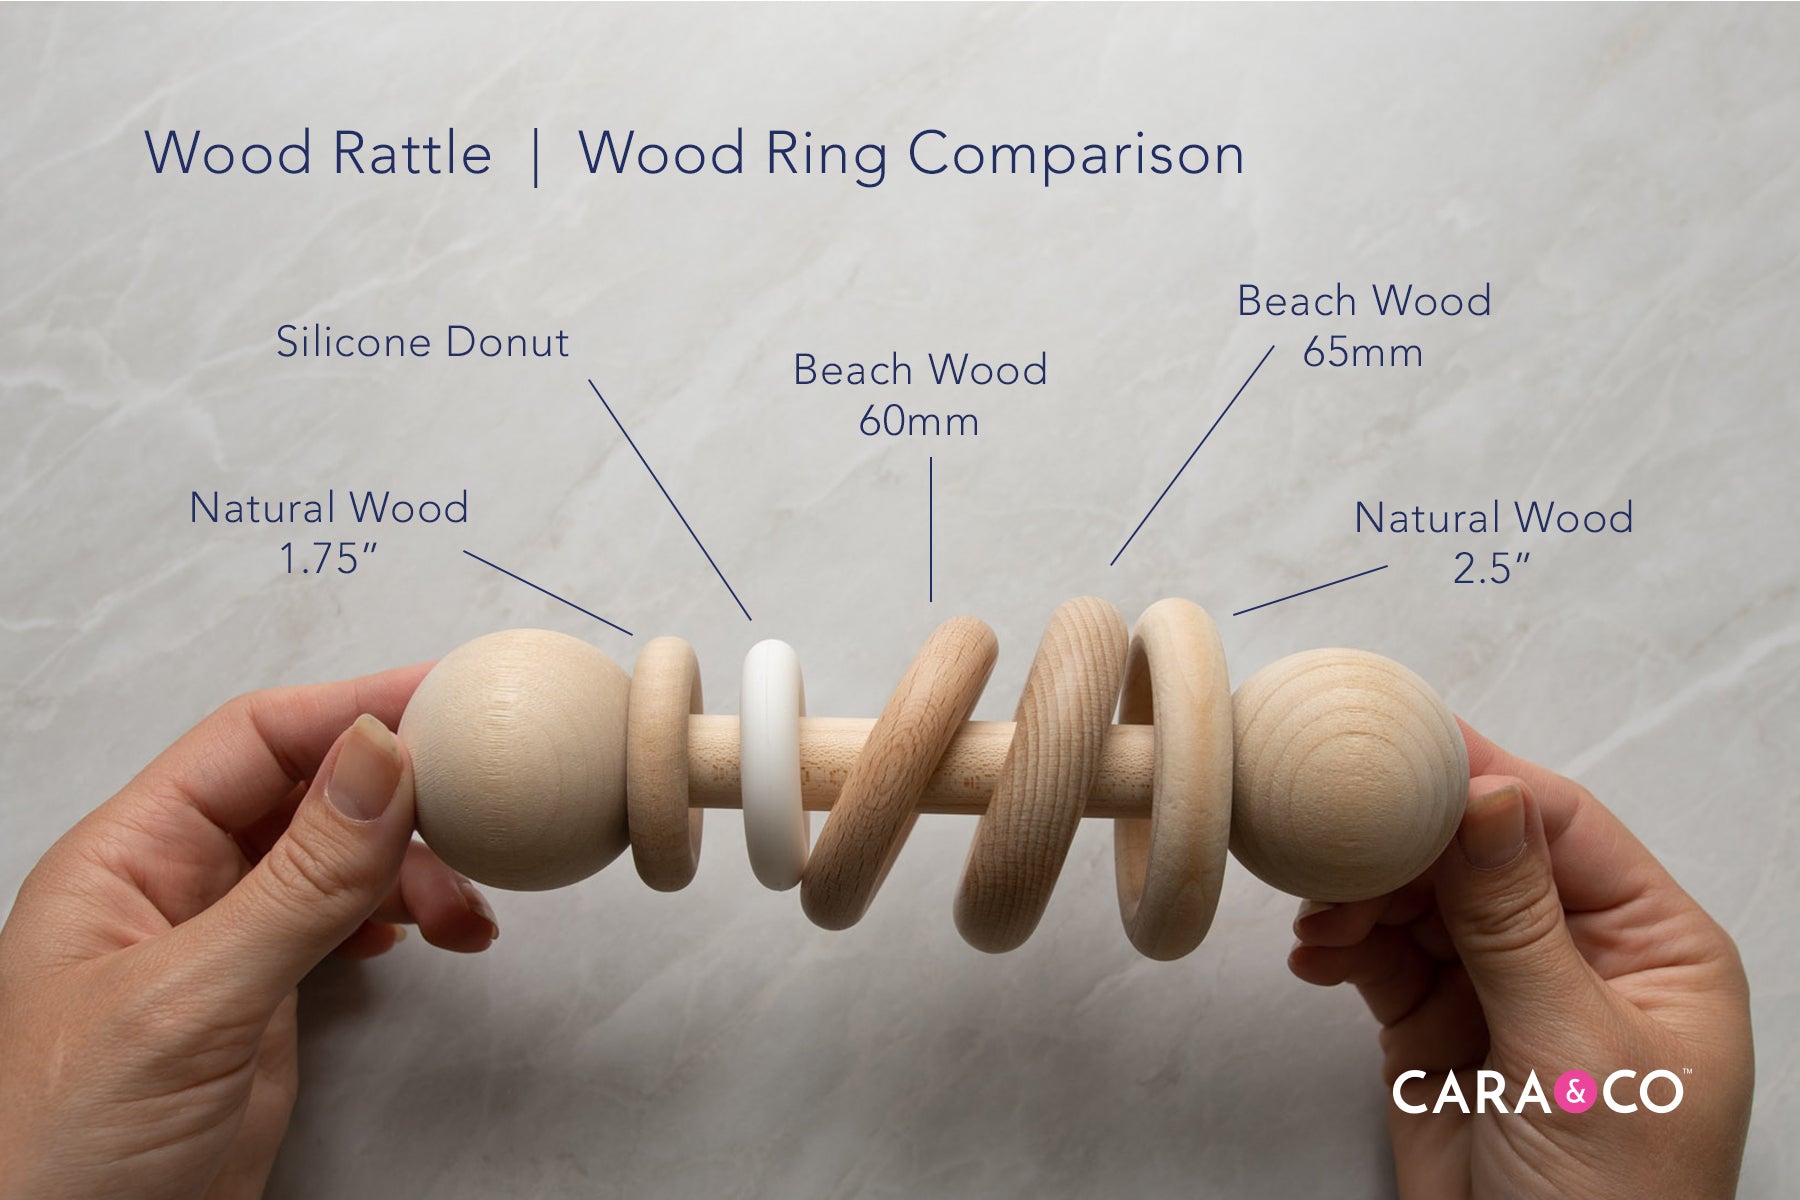
We want to make sure we give you all the information you could possibly need for these beautiful wood teething rattles. Feel free to reference the below images for comparisons of our wood rings that fit this rattle design, bead sizing, product specs, etc.


WOOD RATTLE ASSEMBLY
Your beautiful toy rattle design is only a few easy steps away! Please follow the assembly instructions carefully when putting your rattles together.
1. Insert the dowel into the pre-drilled sphere holes to test the fit.

2. The pieces should fit snug. However, because wood is a natural product, it can sometimes expand or contract. If your dowel is not fitting the hole well and seems too large, use a fine grit sandpaper to gently sand the dowel end. Check often to see if it fits, and make sure you do not over-sand the dowel. If the dowel fits but seems a bit loose, be sure to follow step 3 very carefully.
3. Dab some high quality, strong, non-toxic wood glue on only one end face of your dowel. You can also take a small crafting paintbrush to spread the glue out evenly. Try not to put wood glue on the sides of the dowel, in order to prevent too much excess glue from coming out of the joint once the pieces are fitted together.

4. Push the dowel and the sphere together tightly. You should have only one sphere on your dowel at this point.

5. You can now slide on your rattle accessories and rings. Make sure that your accessories are no larger in diameter than the sphere end so that nothing is able to slip off the rattle.

6. Once you are happy with your rattle design, repeat step 3 and glue the other sphere end to the dowel securely.

7. Set your finished rattle aside so that the glue can properly dry. Be sure to read the specific drying instructions on your wood glue bottle so that your final product is safely assembled.


For extra help with the assembly, watch our full video tutorial here!
SHOP OUR WOOD RATTLE KITS HERE!
We can’t wait to see how you put your own spin on this adorable kit! The options are endless. Make sure you tag us in your creations using the hashtag #createdwithcarasupply!
We can’t wait to show you what else we have in the works with Aaron!
This is JUST the beginning!
xo
-the girls
