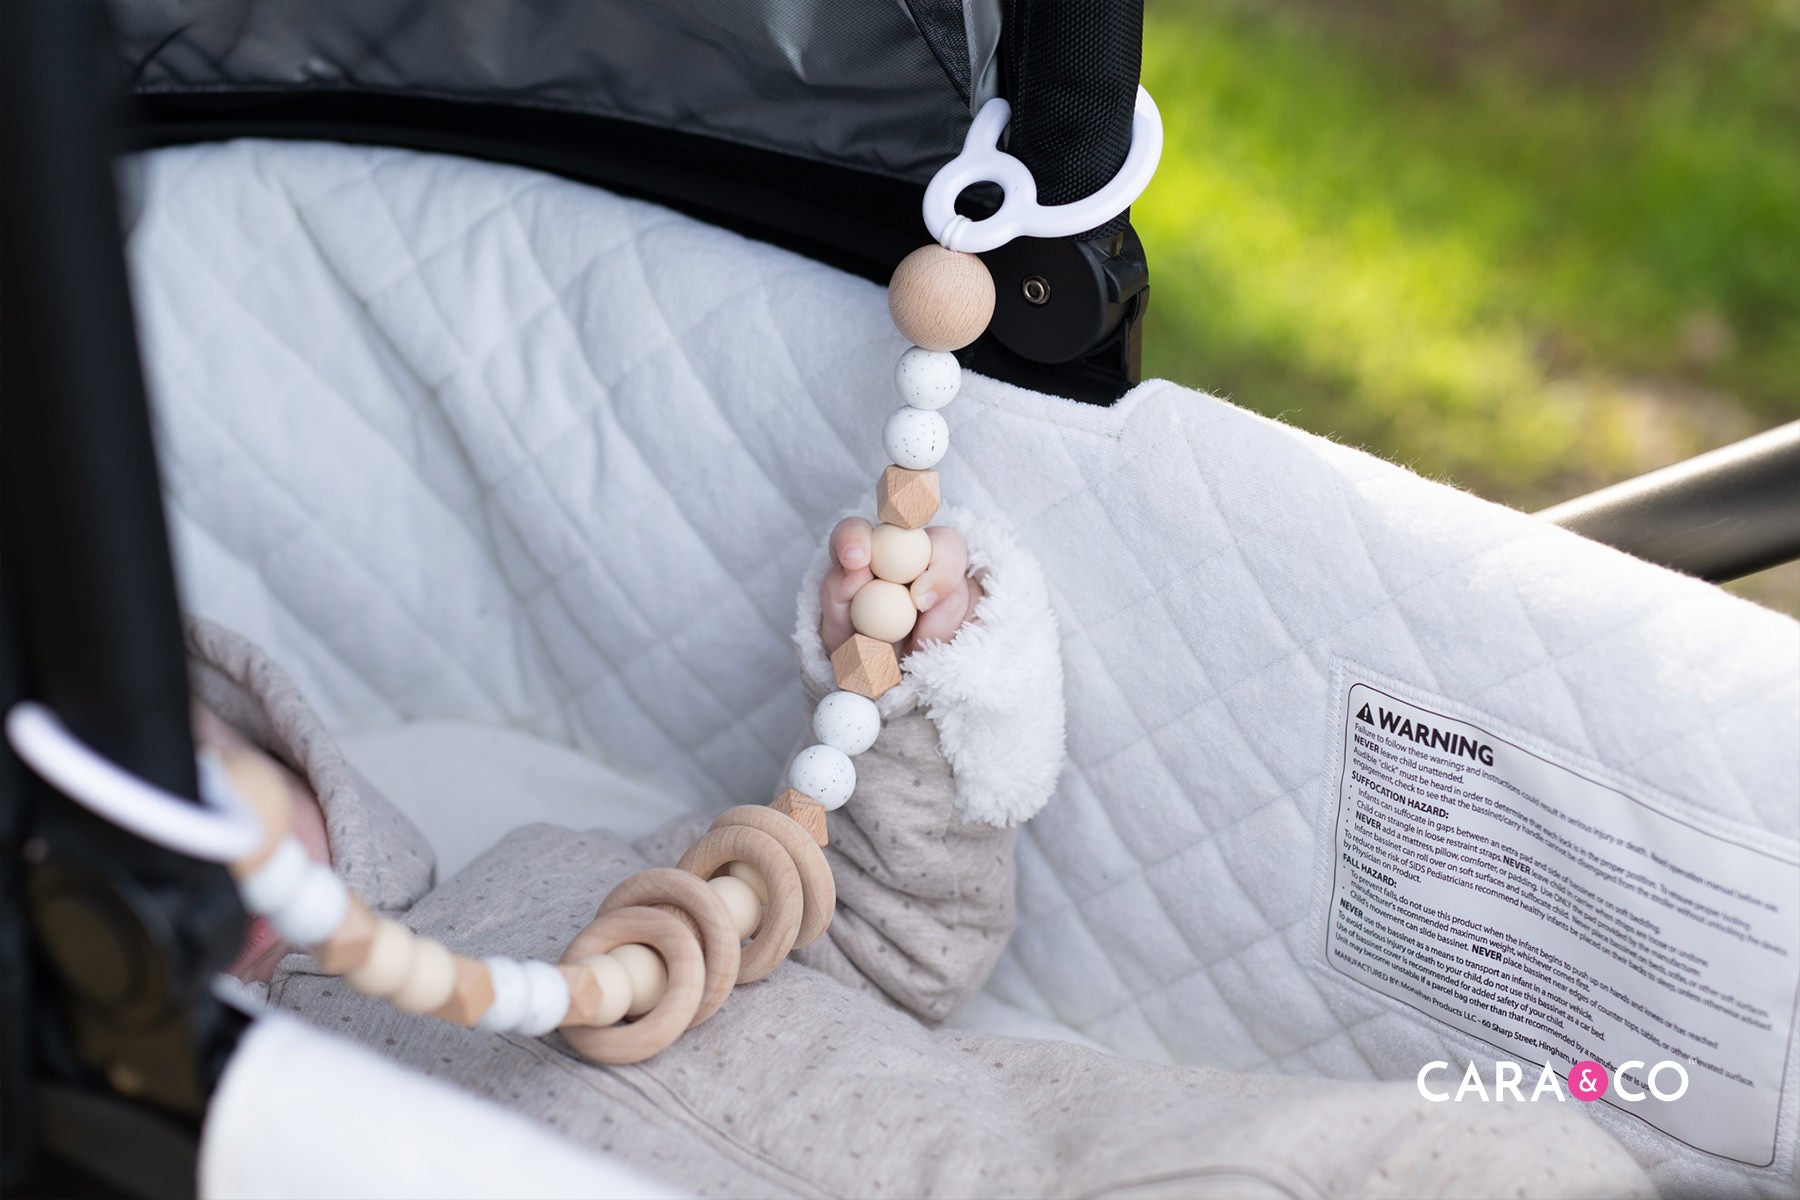
Your little one will love stroller time with this adorable garland - and mom will love that it keeps them busy ;)


Supplies Needed:
- 2 x Stroller Clips
- 1x 60” Regular Cord
- 6 x 16mm Beech Hexagon Beads
- 3 x 30mm Beech Round Beads
- 16 x 19mm Round Silicone Beads
- 4 x 1.70" beech rings or silicone donuts or 2.25"original wood rings
- Lighter
- Crafting Needle
- Scissors
Step-by-Step Instructions:
1. Take your cording and melt the ends slightly using a lighter. This will help make threading your beads easier and prevent fraying.

2. Fold your cording in half, pull one of your ends so it is 8” longer than the other one.

3. Loop your cording onto your Stroller Clip Attachment, ensuring it is pulled tight.


4. Tie a knot 1/4” away from the Stroller Clip Attachment.

5. Thread one 30mm beech round bead over both ends of the cord, and slide it all the way over the knot to hide it.

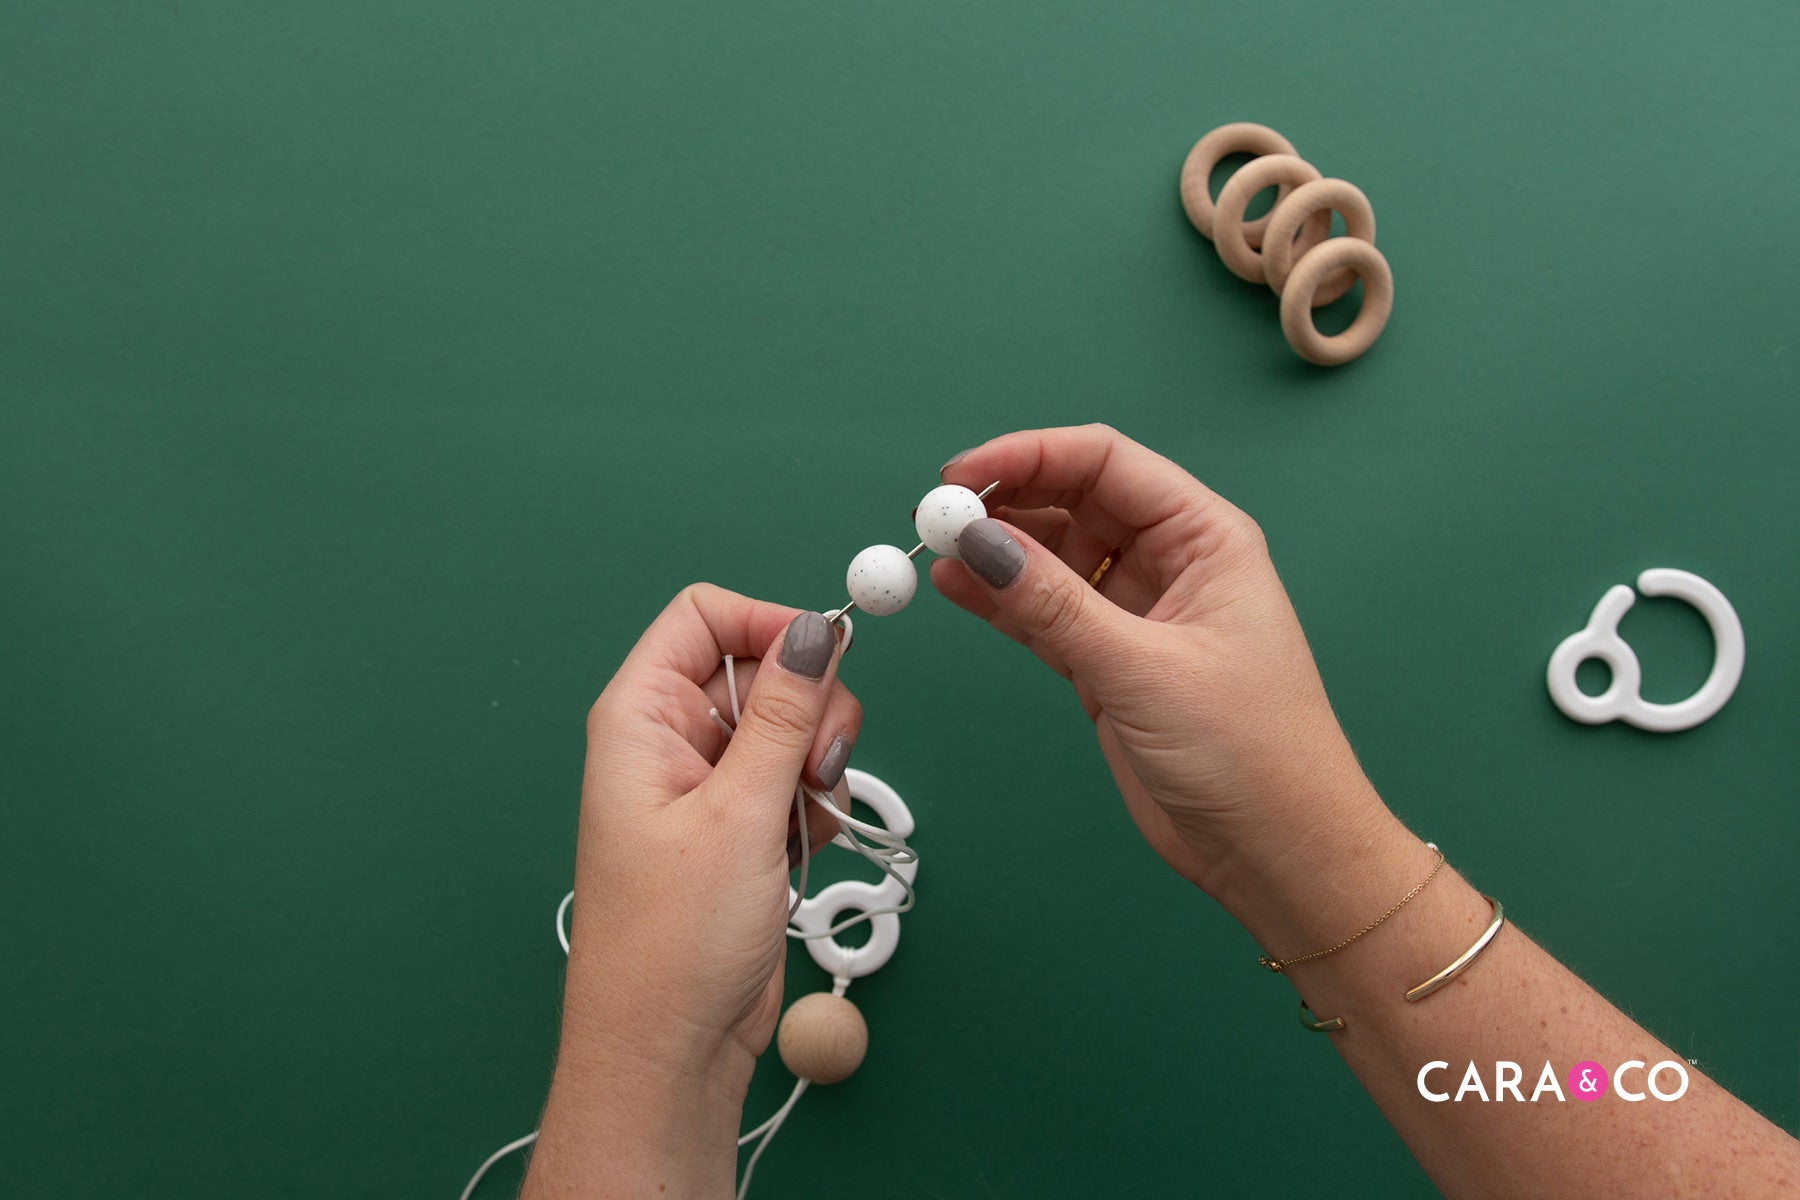
6. Thread both ends of your cord into your needle and start threading your silicone beads on. Thread in the following order: 2 x 19mm round silicone, 1 x beech hexagon, 2 x 19mm round silicone, 1 x beech hexagon, 2 x 19mm round silicone, 1 x beech hexagon, 2 x 19mm round silicone. You should have a total of 12 beads threaded at this point.
7. Take two of your rings and also thread them on to the strand, followed by your second 30mm Beech Round Bead. Note that certain rings (i.e. 1.75" beech rings or silicone donut rings) won’t fit over the 30mm Beech Bead, so it's important not to miss this step.


8. Continue threading the following: 2 x 19mm silicone round, 1 x beech hexagon, 2 x 19mm silicone round, 1 x beech hexagon, 2 x 19mm silicone round, 1 x beech hexagon, 1 x 19mm silicone round.


9. Thread on your remaining two rings.

10. Remove your crafting needle and separate your strands. On the longer strand, thread on your last 19mm silicone round bead followed by your 30mm Beech Round. Your shorter cord should be sticking out between your last 2 silicone beads. This is where we will later secure and hide our knot.

11. Make a loop with your longest end of the cord, and slip your stroller clip on it.
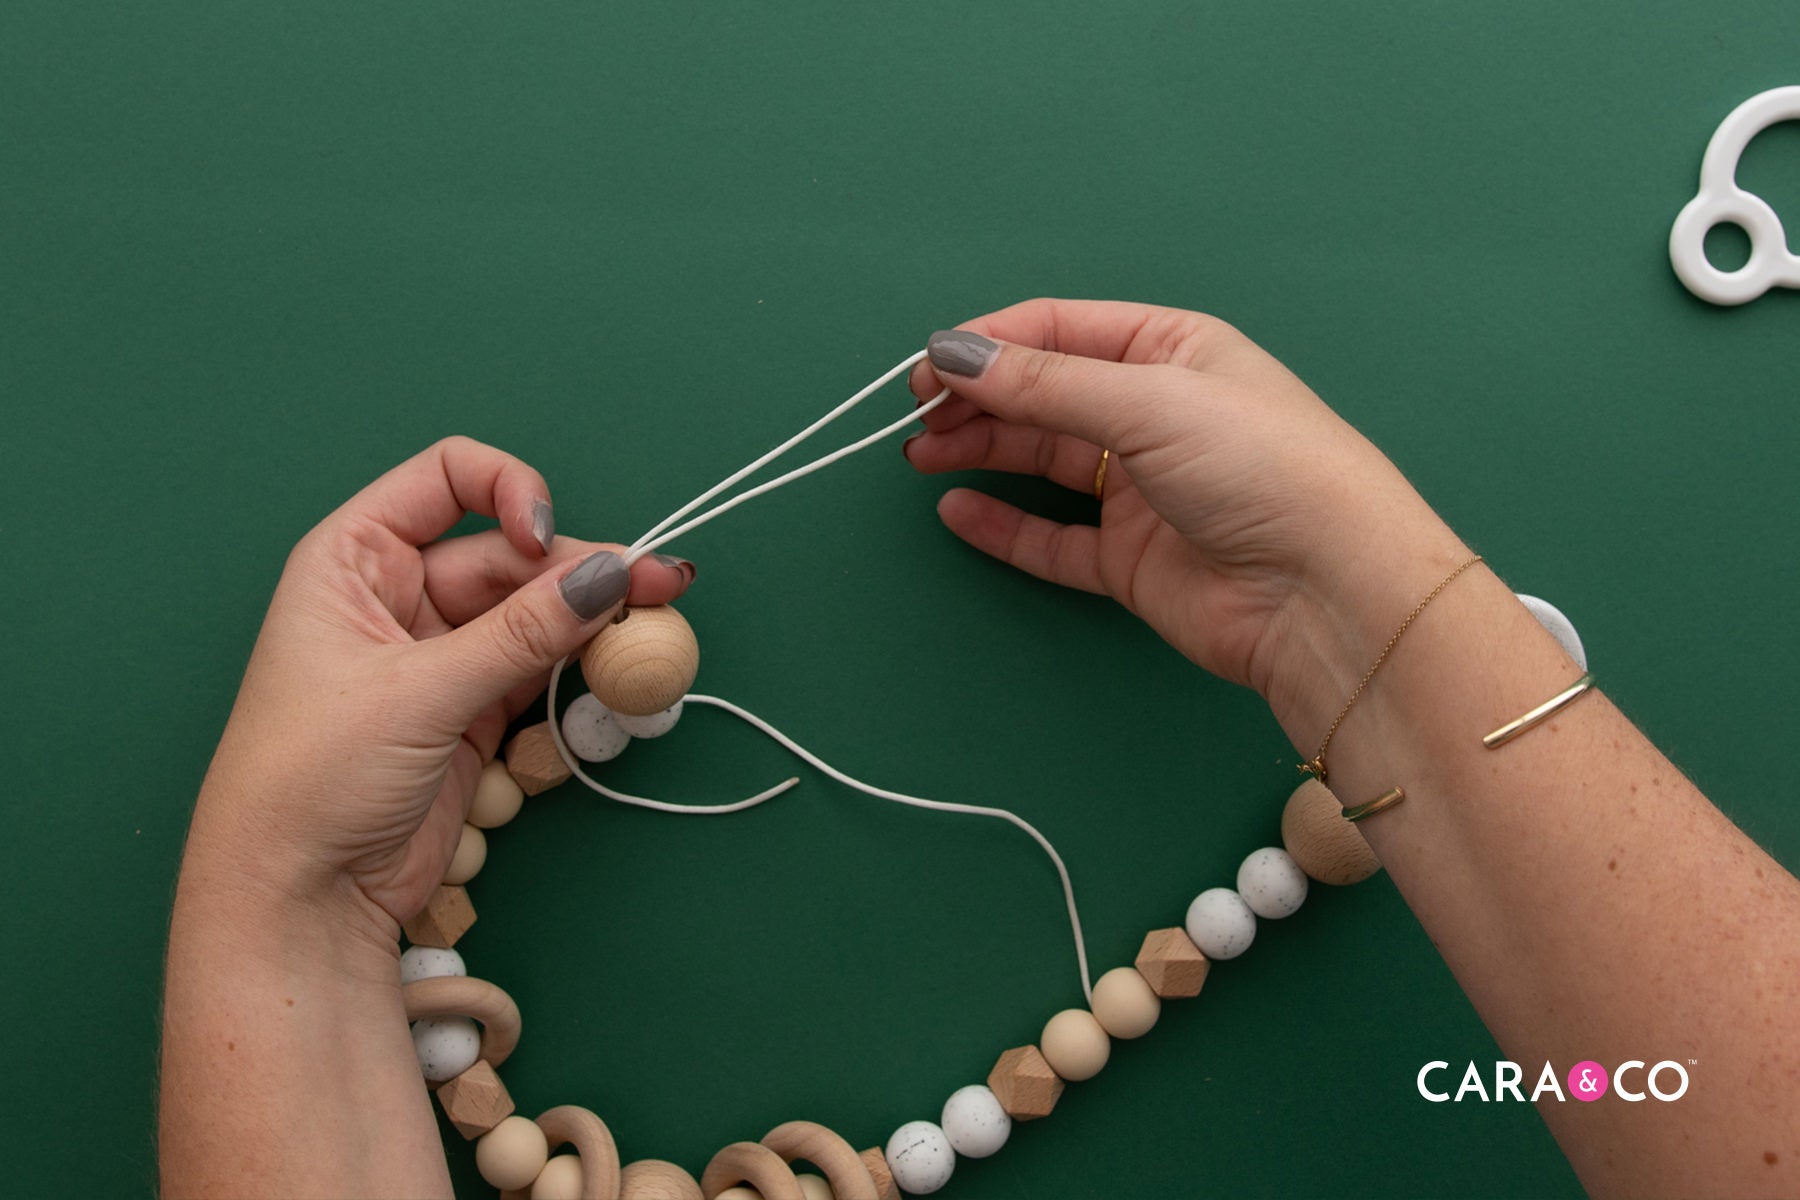
12. Tightly hold that loop in one hand, and gently pull your other end of the garland through the loop, all the way back to the stroller clip.


13. Adjust the cording till the stroller clip is as snug as possible to the wood bead.


14. Thread your cord back through the 30mm Beech Wood Bead and the first silicone bead until both cords are between your last 2 silicone beads.


15. Tightly tie a double or triple knot, lightly burning the knot with a lighter to slightly melt it together.

16. Once the knot is cool, thread one of your strings with your crafting needle. Carefully, thread your needle through one of the beads beside your current double knot. (You may need pliers to help you get the needle through!)

17. Pull your threaded cord all the way through that bead, carefully pulling that knot into the bead to help hide it.
18. You should have a string on each side of this bead. Trim them carefully, and use your lighter to melt the ends back that may be sticking out.


We hope you enjoyed this tutorial and as always, we LOVE to see your creations! If you followed along and made your own, then be sure to tag us on instagram using the hashtag #createdwithcarasupply
Happy Crafting!
Xo
- the girls
*Note that various geographical regions have different standards for stroller garland compliance. This stroller garland meets the safety compliance standards for Canadian standards; however, the design is not recommended for US customers, as ASTM F963 standards require that no children's toy be longer than 12" in length.
**Stroller garland is only to be assembled by and adult. The finished stroller garland is NOT intended to be used as a stand-alone toy. Never leave a baby or child unsupervised with this product and do NOT attach to cribs, playpens or car seats while in a vehicle.
***The products, materials, and supplies sold by Cara & Co. Silicone Craft Supply are intended for use by adults and should never be left unattended with a child.
****Small objects and beads can present choking hazards to young children. Never leave a child unattended with beads or other products. Always dispose of any damaged product. No product is completely indestructible, and fully formed teeth could potentially damage product if chewed aggressively, so responsible attentiveness is needed for any user or purchaser. Customers should always inspect and monitor their products, discontinuing use at the first sight of damage.
*****Once our products have been sold and shipped to our customers, Cara & Co Silicone Craft Supply Inc., waives all responsibility and liability from the use of our products. Customers are responsible that their final products made from our supplies meet the appropriate safety requirements for their region. Our buyers understand that by purchasing our products or using suggestions from the above tutorial, the buyer assumes any and all responsibility and liability for the use of the products.
*****Cords, clasps and pacifier clips are not intended to be chewed on and may present choking hazards.
8 comments
Hi Janelle! So if you post an image of your stroller garland on Instagram or Facebook, in the caption you would type #createdwithcarasupply and it will show up in that hashtag feed (as long as your account is public). Hope that was helpful! Xo
I am following the # just not too sure how to post to it. Can you help?
You’re very welcome Janelle! We LOVE seeing your creations so feel free to share it on social media using #createdwithcarasupply if you’d like to! Xo
Thank you for the cute stroller tutorial. I changed it up a bit because I didn’t have the same wooden beads or wooden circles. I think it turned out super pretty.
Hi Janelle! So if you post an image of your stroller garland on Instagram or Facebook, in the caption you would type #createdwithcarasupply and it will show up in that hashtag feed (as long as your account is public). Hope that was helpful! Xo