Nothing welcomes the season change more than updating your home decor! Our homes are all things spring lately, so naturally we needed to make a new door wreath ;) Follow this super sweet tutorial and add a bit of spring to your home!

Supplies Needed:
- 16" wood wreath base (can be found at most craft stores)
- Hot glue gun and sticks
- Scissors
- Cotton Twine Roll
- Ribbon of your choice (we suggest a wide ribbon!)
- Fabric Flowers of your choice (we suggest one larger flower size and one smaller)
- Approx 25 x 1.25” (with 8mm hole) wood maple beads
Step-by-Step Instructions:
1. Gather up all your supplies and heat up your glue gun.

2. Lay your wreath on a flat surface, and one by one, glue your wood beads to the ring. Make sure that your holes are laying horizontally, so that you don’t see them when glued side by side.

3. Fill your wreath about ¾ around with beads. The gap left will be where you place your flowers and ribbon.

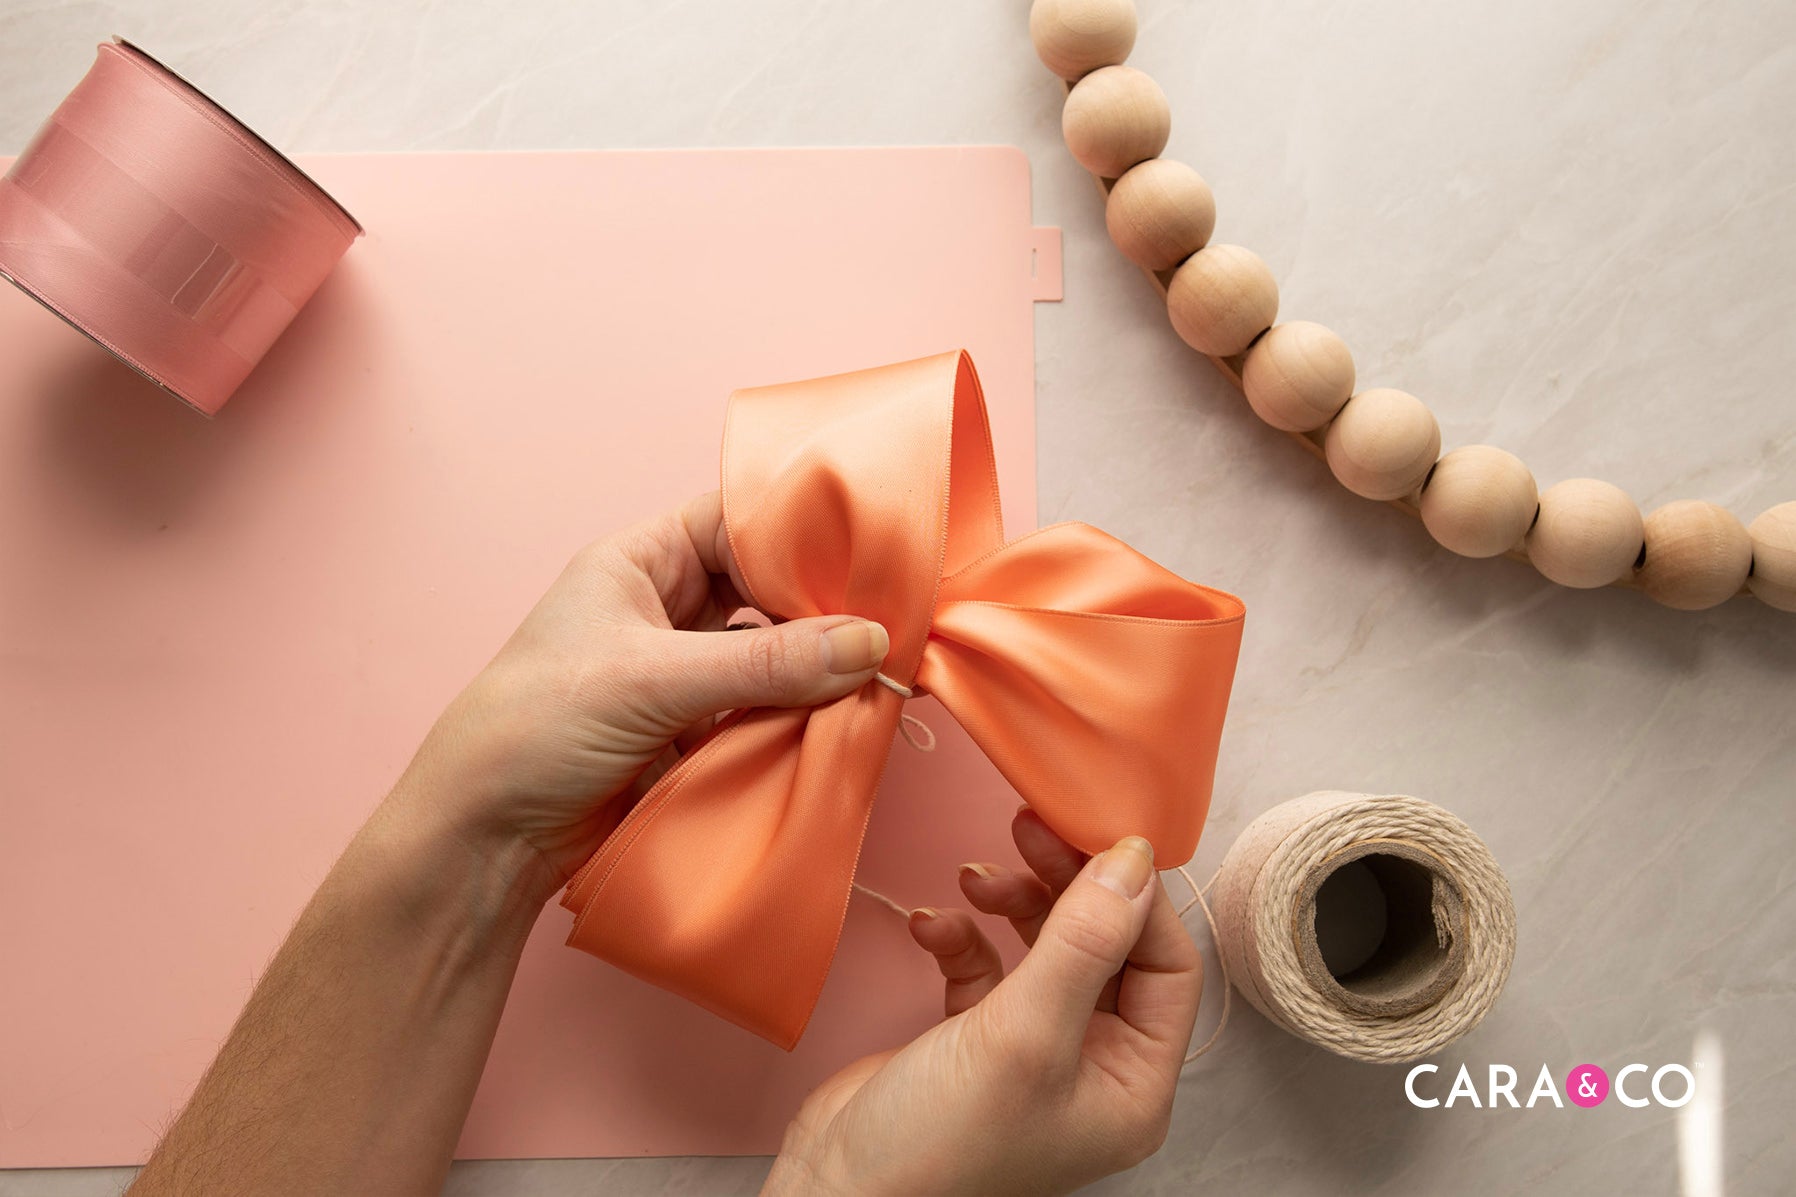
4. To make a ribbon bow to add to your wreath follow these directions: Unroll your ribbon spool and measure a section about 8” long. Wrap your ribbon around that section a couple of times (we did it 5 times) to make a layered loop. Cut off your ribbon at the end of the loop when you’re happy with the number of times you’ve wrapped your ribbon.


5. Cut a 8” length of cotton twine and lay it behind your ribbon loop in the middle position. Tie a double knot around the ribbon loop. Your loop will pucker and tighten - that’s what will hold the bow!

6. Pull your loops out of the main ribbon loop to create your bow. Tug and arrange the loops as you need.

7. Now that you have a pretty ribbon bow to add to your wreath, it’s time to start arranging and glueing your flowers! Cut the stems of your flowers to be no longer than 6” long so that the ends can be hidden and glued to the wood wreath base. We suggest placing your largest flowers on each end of your empty gap, facing opposite directions. Continue to work in your largest flowers and ribbon bows into your wreath design. Fill in the gaps with your smaller flowers. If you want to add length to your wreath, you can always curl some ribbons and let them hang down from the wreath!

8. There you go! Spring on a door :)

As always, we L O V E seeing your creations - Tag us in your photos on instagram using the hashtag #createdwithcarasupply.
Happy Crafting!
xo
- the girls
12 comments
Hello Kendrea!
You can follow the step-by-step instructions found above, and if you have any more questions please reach out! Happy crafting! Xo
Please can you do a tutorial for this project? I would love to see how its done.
Hi Samantha! You can find the wooden wreath base at most craft stores. We found ours at Michael’s! Happy crafting! Xo
Where is the wreath base from?
Thanks Kimberly!! It was so fun to put together! xo