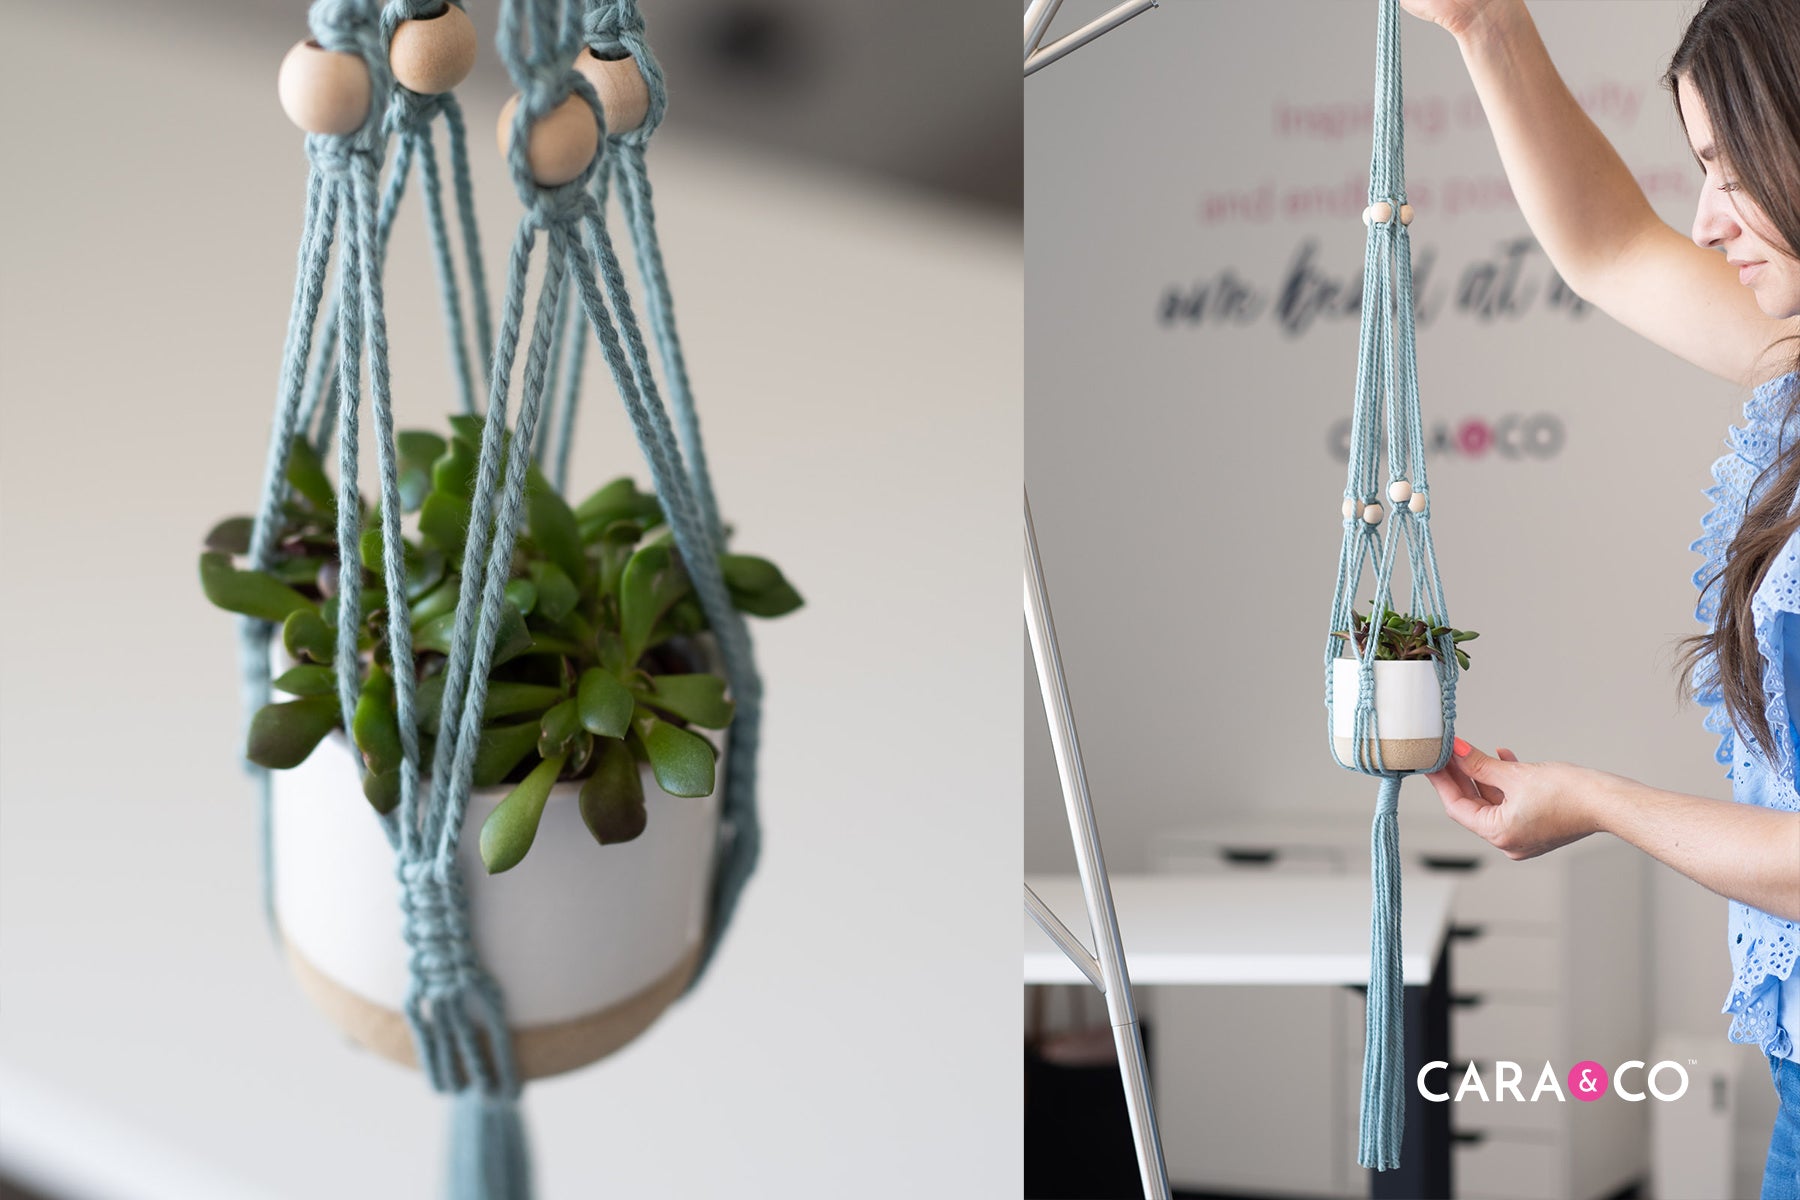
Create your very own macrame plant hanger following the tutorial below! Your plant babies will be so pleased with your handiwork!

You can follow our instructions to a T, or you can also move around your knot tiers and beads to suit your own tastes! There’s lots of extra cording for you to work with if you even want to adjust the length slightly! This plant hanger is intended for a mini pot about 3-4” in diameter, but can also accommodate a pot 6-7” in diameter as well!
Supplies Needed:
- 8 x 10' Lengths of macrame
- 2 x 2’ Lengths of macrame
- 1 x 2.35" beech wood ring
- 8 x 16mm maple wood beads
- Scissors
- Tape measure and/or ruler
- 3-4” plant pot (with no drainage hole)

Step-by-Step Instructions:
1. Measure out 8 lengths of 10 ft long cord. Cut out 2 additional pieces that are 2 ft in length - these smaller pieces will be used to secure your planter on the top and bottom.
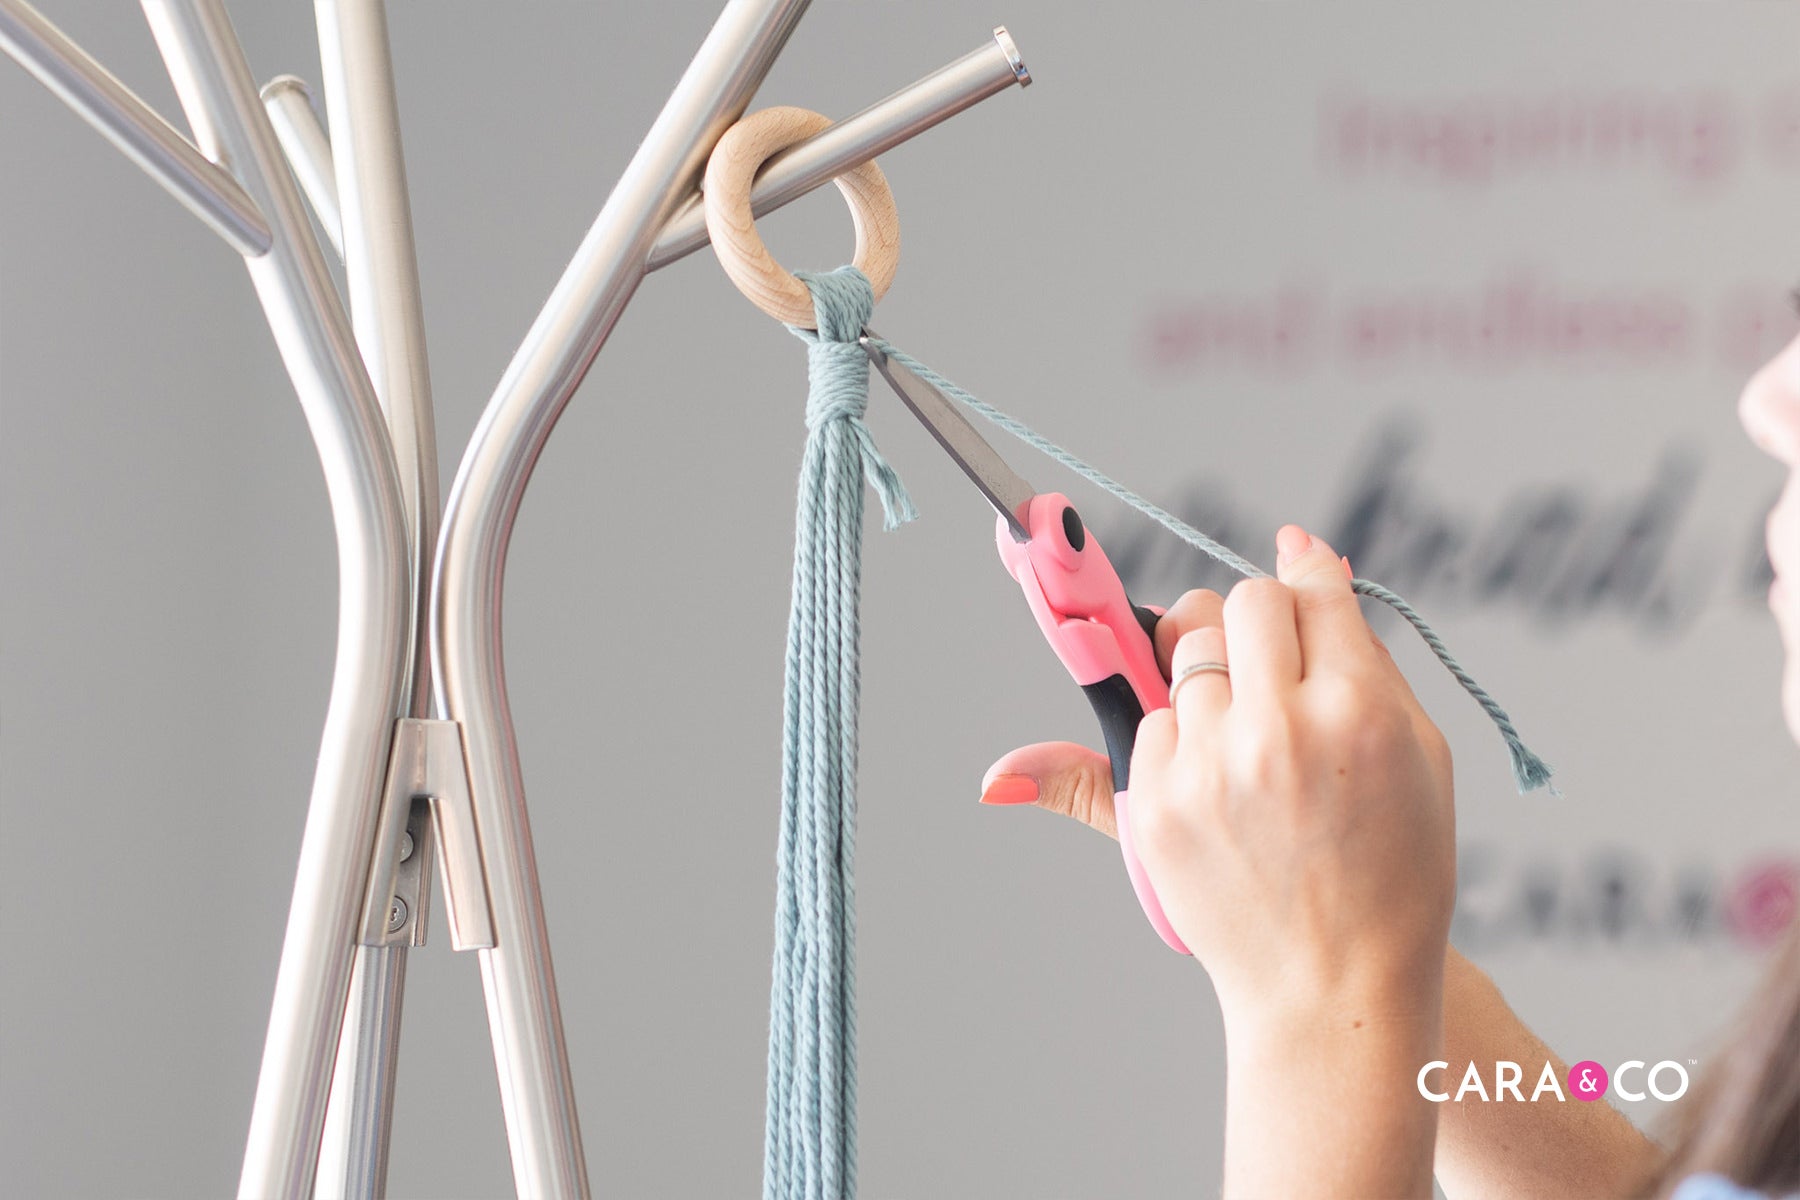
2. Line up your 8 lengths and find the center point. Loop your cording through the beech wood ring at the centre point of the macrame.


3. Line up your cording neatly beside each other so that they lay flat.

4. Take one of your smaller 2 ft lengths. While holding your longer lengths and the wood ring, loop about 3” of the smaller length with a couple inches out at the top.


5. While holding the loop you just created, wrap the longer end of the string around all of the cord pieces, starting just under your wood ring. Keep your wrapping taught.

6. Keep wrapping the cord around until you’re happy with the length of your wrapped knot. Take the end that you’ve been wrapping around and feed it through the bottom loop you made initially.

7. Reach to the top piece of cord you left out of the knot and gently pull upwards.
8. As you pull upwards, the loop at the bottom will get smaller and close around the bottom piece. Continue to pull until the loop is completely gone and starts to get pulled into the wrapped section of cord.

9. Pull the top cord until you have pulled the loop end to about the middle of the wrapped section. Your wrapped cord should cover the knot being made.
10. When your knot feels secure, trim the smaller pieces left from your 2 ft cord. You should still have 16 pieces of long cord coming out of the knot.
11. Section out 4 pieces of cord that are beside each other.

12. The following knot will be used all through the rest of the tutorial. It is called a square knot, and should be placed about 6-7” down on your string. Take the far left string and cross it OVER the middle two cords.

13. Take the far right piece of cord, loop it over and then behind the far left piece you just brought over. Pass it behind the two middle pieces of cord, and forward through the loop made between pieces 1 & 2.

14. Pull the knot taught so that the far left and right cord pieces are straight.

15. While keeping the first knot taught, take the far right piece. Cross it OVER the middle two pieces of cord and hold it there.

16. Take the far left piece, loop it over the far right piece you’ve brought over, behind the two middle pieces, and then through the loop between pieces 3 & 4. This is the opposite knot to the first one you just made.

17. Pull the knot tight up against the first one to secure it. You’ve made your first square knot!

18. Take one of your wood beads, and thread it on the two middle strands. Push your bead up against the square not you just created.


19. Carefully, create another square knot right up under your wood bead. You should have one complete square knot above the wood bead and one complete square knot below the bead.


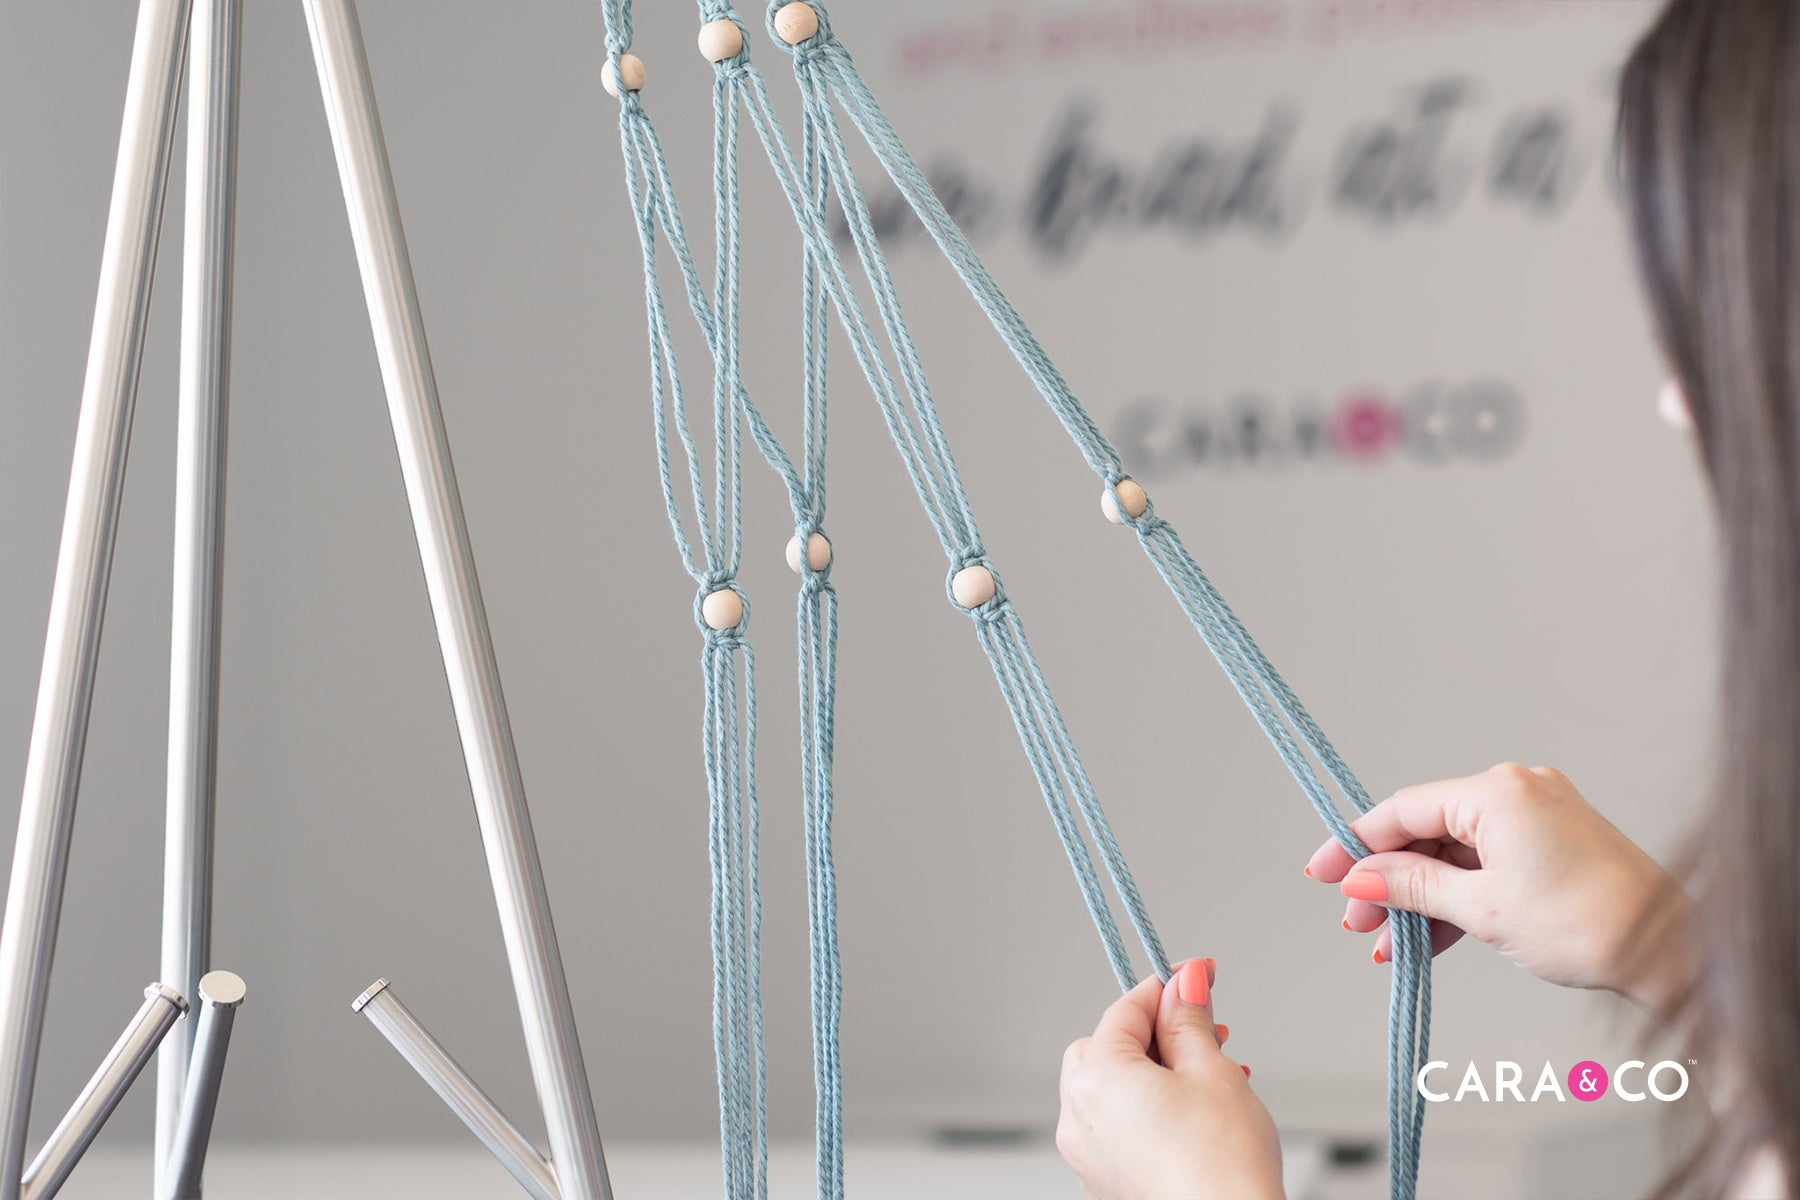
20. Grab another section of four cords beside the first four you were working on and repeat steps 12-19. Do this another 2 times. You should have four knot/bead sections created, and no extra strings. Be sure to make your knots the same length and placement of where they start and end the same to keep your hanger balanced.

21. After these steps you will have your first tier of knots! Take two side by side knot groups. Take the two far right and two far left cords from each group and pull them together to create a NEW group of four cords. Taking cords from the neighbouring group will start to create the lattice look of the plant hanger.

22. Taking these four new pieces, move down about 8 inches and create a square knot. Repeat the steps above to create sections again of macrame knots, moving the same direction around your plant hanger and using two far right and two far left cords from each group. Go around your cords until all the new knot groups are tied, and you have a second tier of macrame knots.
23. You should have 2 tiers in total of knot/beads.

24. Move down about 3 inches, from your 2nd tier. Take two side by side knot groups. Take the two far right and two far left cords from each group and pull them together to create a NEW group of four cords. Using two far right strands and two far left strands from another section, create a square knot. Repeat 3 more times to make an inch long section of knots. This tier of knots will not have any beads on it so that it sits snug against your pot!


25. After the last tier of macrame knots, gather all your strings together evenly.
26. Using your second 2ft small piece of macrame, repeat steps 4-10 to create a wrapped knot about 5” down from your last tier of knots. This knot will hold your pot secure, so be sure to make it tight enough to handle a bit of weight.


27. Once your wrapped knot is done, trim the short working ends.

28. Slip your pot into the middle of the lattice work of the cord. Gently bring it to the bottom knot to sit. We suggest a pot about 4 inches wide.

29. Your kit includes extra length on your long cords, so that you have enough material to make your plant hanger longer if you wish! Trim your length to your preference. We liked about 1’ of "tail" to our plant hanger.

As always, we L O V E to see your creations! If you tried this tutorial, make sure that you tag us on Instagram using our hashtag #createdwithcarasupply.
Happy Crafting!
xo
-the girls
*The products, materials, and supplies sold by Cara & Co. Silicone Craft Supply are intended for use by adults and should never be left unattended with a child.
***Small objects and beads can present choking hazards to young children. Never leave a child unattended with beads or other products. Always dispose of any damaged product. No product is completely indestructible, and fully formed teeth could potentially damage product if chewed aggressively, so responsible attentiveness is needed for any user or purchaser. Customers should always inspect and monitor their products, discontinuing use at the first sight of damage.
****Once our products have been sold and shipped to our customers, Cara & Co Silicone Craft Supply Inc., waives all responsibility and liability from the use of our products. Customers are responsible that their final products made from our supplies meet the appropriate safety requirements for their region. Our buyers understand that by purchasing our products or using suggestions from the above tutorial, the buyer assumes any and all responsibility and liability for the use of the products.
*****Cords, clasps and pacifier clips are not intended to be chewed on and may present choking hazards.