If you love a getaway into the great outdoors, we’ve got the tutorial for you to do before you leave! For all the fun that camping is, there’s nothing fun about scrounging in the dark for your flashlight for a late night trip to the bathroom!

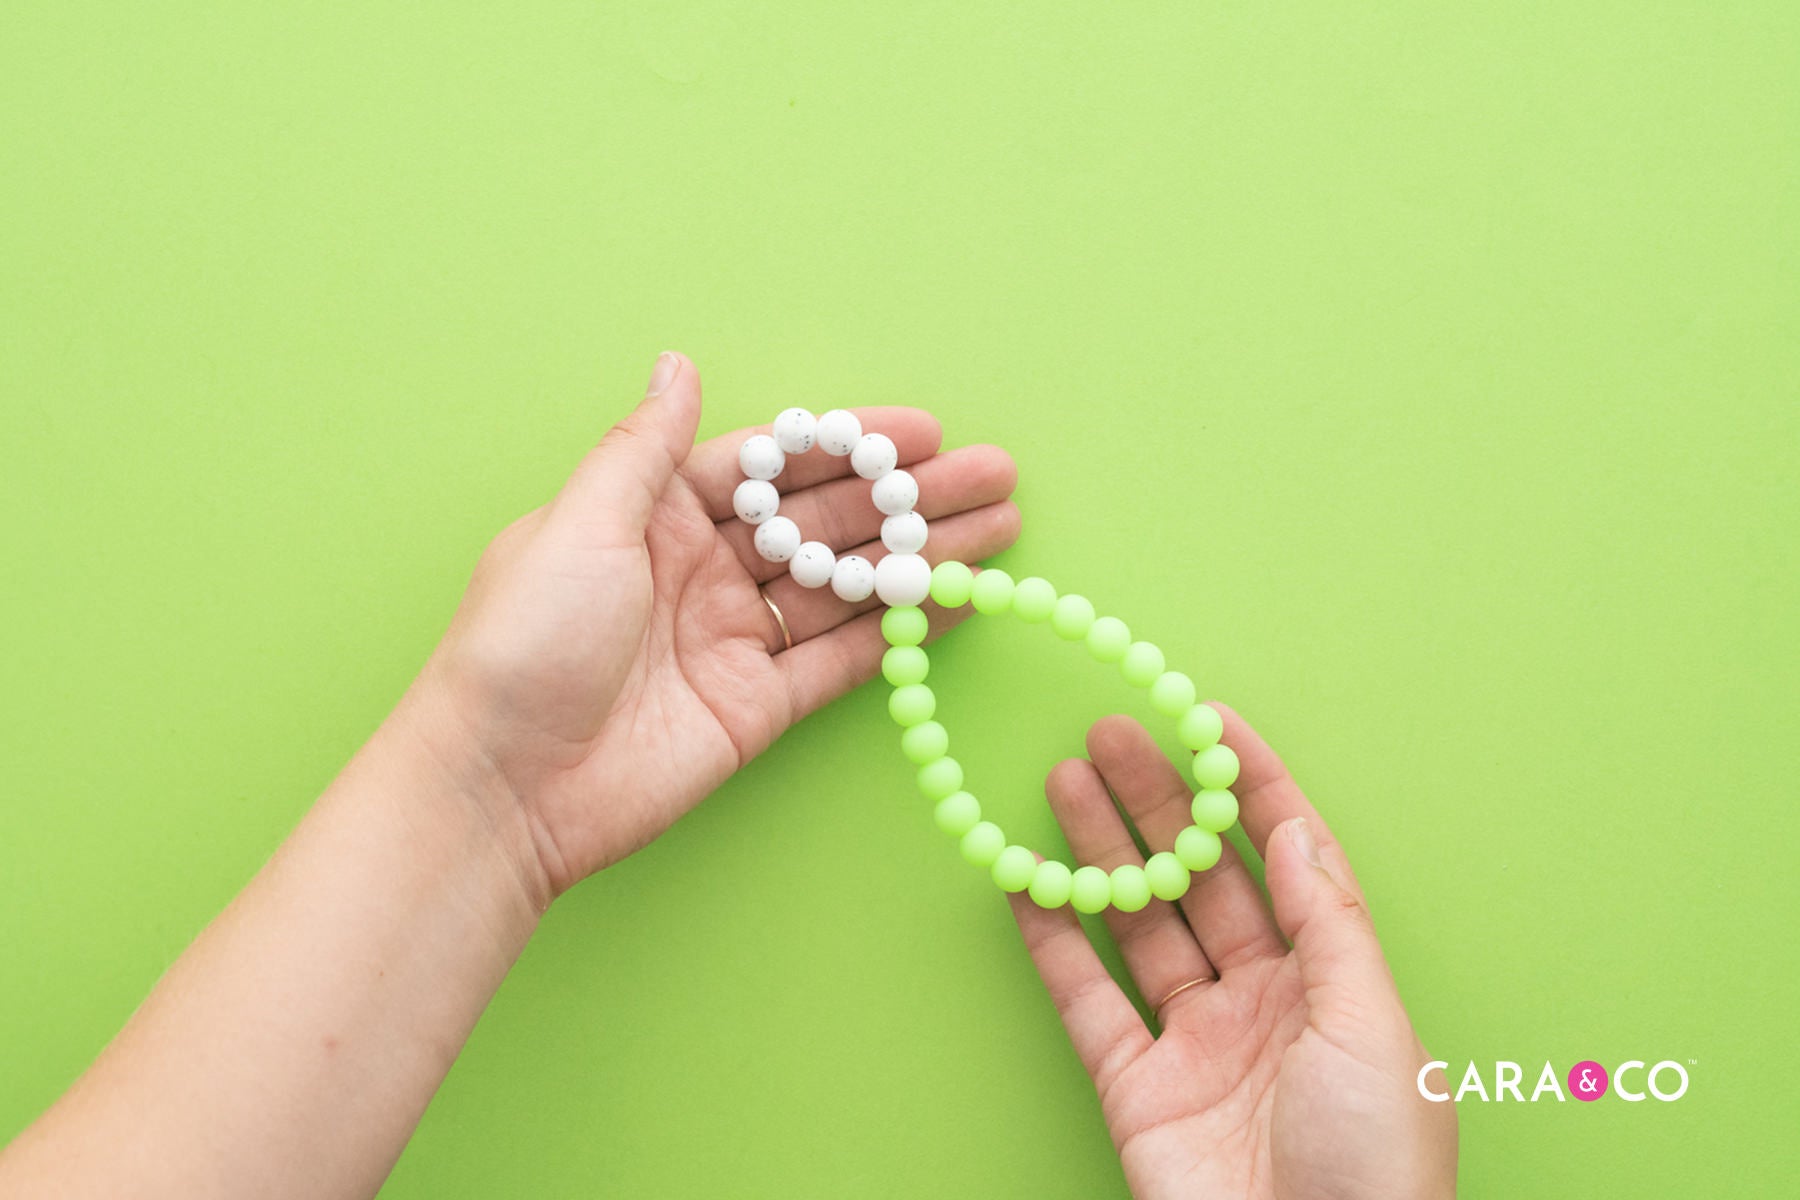
We’ve made these Flashlight Holders for our kids and they’re a game changer! An easy figure eight shape loop clipped onto your Flashlight of choice - it couldn’t be simpler.

Supplies Needed:
- 1x 60” length of Nylon Cording
- 1x 15mm Double Hole Silicone Bead
- Approx 35x 12mm Silicone Beads (can be a mix of Glow-in-the-Dark Silicone & regular Silicone!)
- Crafting Needle
- Lighter
- Scissors
- Pliers (can be purchased as a part of our Crafting Tool Set)

Step-by-Step Instructions:
1. Take your lighter and lightly melt one end of your cord so that you can easily thread your beads onto it.

2. Take your 12mm silicone beads and thread them onto your cord. Slide them to the middle point of your cord. (If you are using a flashlight that doesn’t have an opening clip, you may need to thread the flashlight ring onto the strings at this step. These beads will create the first small loop before adding your double hole bead.)

3. Slide your one double hold bead onto one thread and push it up to the other 12mm beads on the string.

4. Thread your crafting needle on the opposite end of your string. Push your needle through the opposite channel of your double hole bead so that the cording makes an X shape within the bead. You should have both sides of your cord coming out of your double hole bead.


5. Slide the remaining 12mm beads onto the two cords coming from the double hole bead. Make sure that you split this number as evenly as you can on either side. (eg. If you have 24 beads, thread 12 on each side)

6. Tie a tight double knot to secure the beads and form your loop. The tighter you pull your strings, the more your beads will tighten and squish together.

7. Take your lighter and run it lightly over the double knot to fuse it. When cooled, slide your crafting needle onto one side of the cord and feed it through a neighboring bead.


8. When your cord is through the neighboring bead, pull it gently into the middle of that bead. This will hide and secure your knot.

9. Trim your ends, and lightly melt them with your lighter to prevent them from fraying.


10. If you are using a flashlight similar to ours, simply open the clip on the flashlight and slide the smaller loop end of your holder in.


We hope you love crafting these flashlight holders! Perfect for camping, sleepovers, and glow-in-the-dark parties - we know your kids will love them!


Be sure to tag us on instagram using #createdwithcarasupply. We love seeing your creativity!
Happy Crafting!
Xo
-the girls
*The products, materials, and supplies sold by Cara & Co. Silicone Craft Supply are intended for use by adults and should never be left unattended with a child.
***Small objects and beads can present choking hazards to young children. Never leave a child unattended with beads or other products. Always dispose of any damaged product. No product is completely indestructible, and fully formed teeth could potentially damage product if chewed aggressively, so responsible attentiveness is needed for any user or purchaser. Customers should always inspect and monitor their products, discontinuing use at the first sight of damage.
****Once our products have been sold and shipped to our customers, Cara & Co Silicone Craft Supply Inc., waives all responsibility and liability from the use of our products. Customers are responsible that their final products made from our supplies meet the appropriate safety requirements for their region. Our buyers understand that by purchasing our products or using suggestions from the above tutorial, the buyer assumes any and all responsibility and liability for the use of the products.
*****Cords, clasps and pacifier clips are not intended to be chewed on and may present choking hazards.


