Teenie weenie? Check. Adorable? Check. Quiet kids on a long car drive? CHECK!! Kids love anything mini, so, of course, an adorable tin of our cutest silicone accent beads will most certainly be a hit.

Before you make one of these, please be aware that loose beads and loose crafting materials can be dangerous for 4 years of age and under! Crafts are for hands, not for mouths!!!
Before you begin, you’ll need a couple materials. Depending on what kind of tin you’re making, your supplies may change or vary.
Supplies Needed:
- Crafting scissors
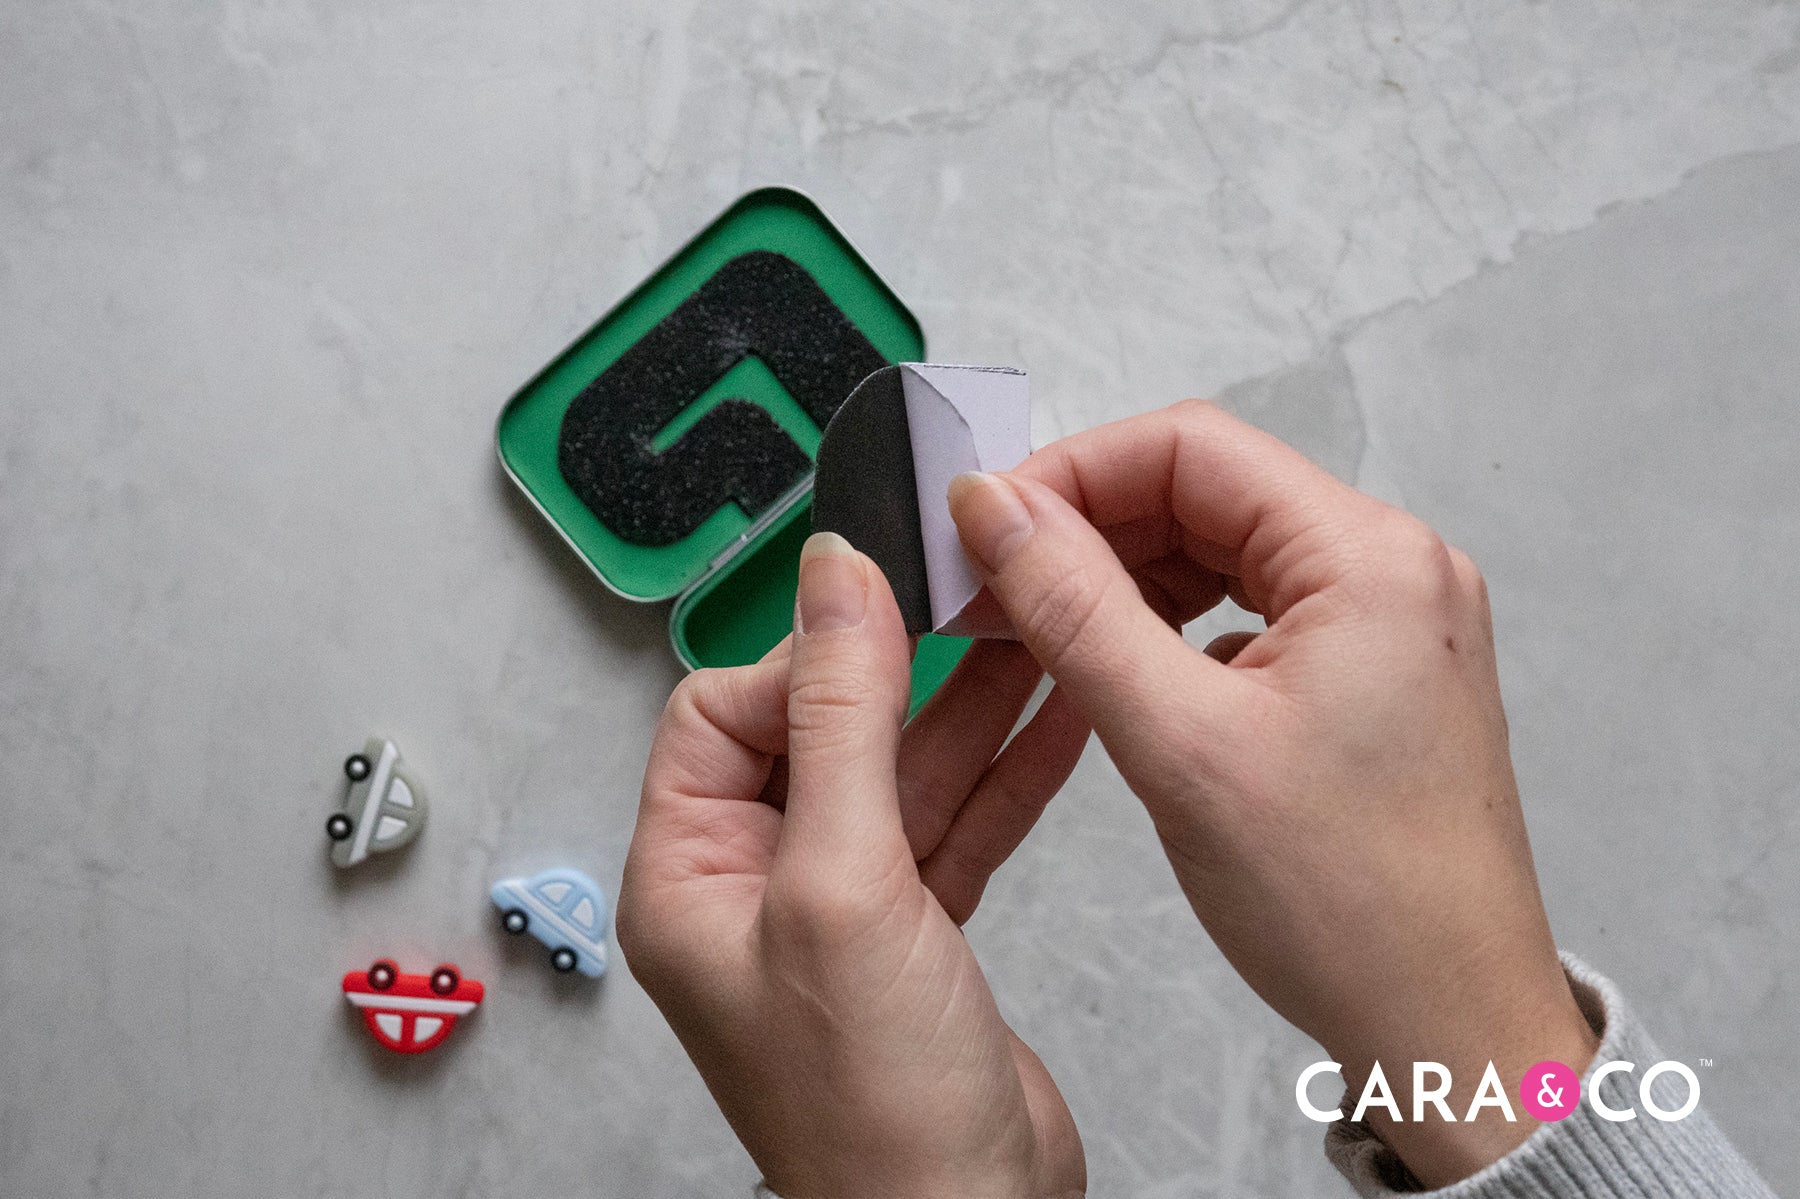
- Empty Altoid Tin, cleaned
- Colored crafting foam (bonus if you can find adhesive backed foam!)
- Your choice of loose, CaraSupply silicone accent beads
- Hot glue gun and glue sticks
- Miniature items
Step-by-Step Instructions:
1. Trace your clean tin on the crafting foam and cut it out; this will be the bottom of your tin. Flip the tin over and trace the lid side; this will be the top of your tin (the back side of the lid).


2. After your top and bottom pieces are cut out, cut a long, rectangular shape at least 11” long and as wide as the depth of your tin.

3. Place the bottom and top pieces in your tin and secure with hot glue. Be careful not to over-glue! Too much hot glue will melt the foam. Make sure to trim an extra ⅛” off the bottom of your lid piece so that the tin can close properly. Also make sure that your long side piece does not go higher than the walls of the tin.

4. Loosely put your long rectangular piece in the tin. Starting on one corner, glue it in place. Continue to sparingly glue and push the piece into the corners of the tin. When you come to the corner where you started, carefully trim the piece and glue in place.

5. Cut out a rounded road shape from your textured black foam that will fit across the lid and base of the tin. Cut this piece in half so it creates a continuing road way.

6. If you are lucky enough to find foam with an adhesive backing, remove the adhesive paper and secure in place. Try to place your road ⅛” away from the side of the tin wall so that you have enough clearance to close the tin as well.

7. Take a lighter piece of green foam and cut a long narrow rectangle shape. Make sure this piece is no taller than the depth of your tin. Score the piece with small cuts, without cutting through the other side. Cut the scored piece into a section about 1.5” long.


8. Roll the small section on itself, securing with a dot of glue at the end.

9. Glue the bottom of the rolled foam and stick to the bottom or lid of your tin. Be careful with your placement so that the tin can still shut and the car beads can still be stored in the tin. Consider your tin craft finished!


There are SO many adorable variations you can make, and we have many cute accent bead characters that need homes! ;)


We can’t wait to see you try this tutorial! Tag us with your beautiful creations using the hashtag #createdwithcarasupply
xo
- the girls
**The products, materials, and supplies sold by Cara & Co. Silicone Craft Supply are intended for use by adults and should never be left unattended with a child.
***Small objects and beads can present choking hazards to young children. Never leave a child unattended with beads or other products. Always dispose of any damaged product. No product is completely indestructible, and fully formed teeth could potentially damage product if chewed aggressively, so responsible attentiveness is needed for any user or purchaser. Customers should always inspect and monitor their products, discontinuing use at the first sight of damage.
****Once our products have been sold and shipped to our customers, Cara & Co Silicone Craft Supply Inc., waives all responsibility and liability from the use of our products. Customers are responsible that their final products made from our supplies meet the appropriate safety requirements for their region. Our buyers understand that by purchasing our products or using suggestions from the above tutorial, the buyer assumes any and all responsibility and liability for the use of the products.
*****Cords, clasps and pacifier clips are not intended to be chewed on and may present choking hazards.