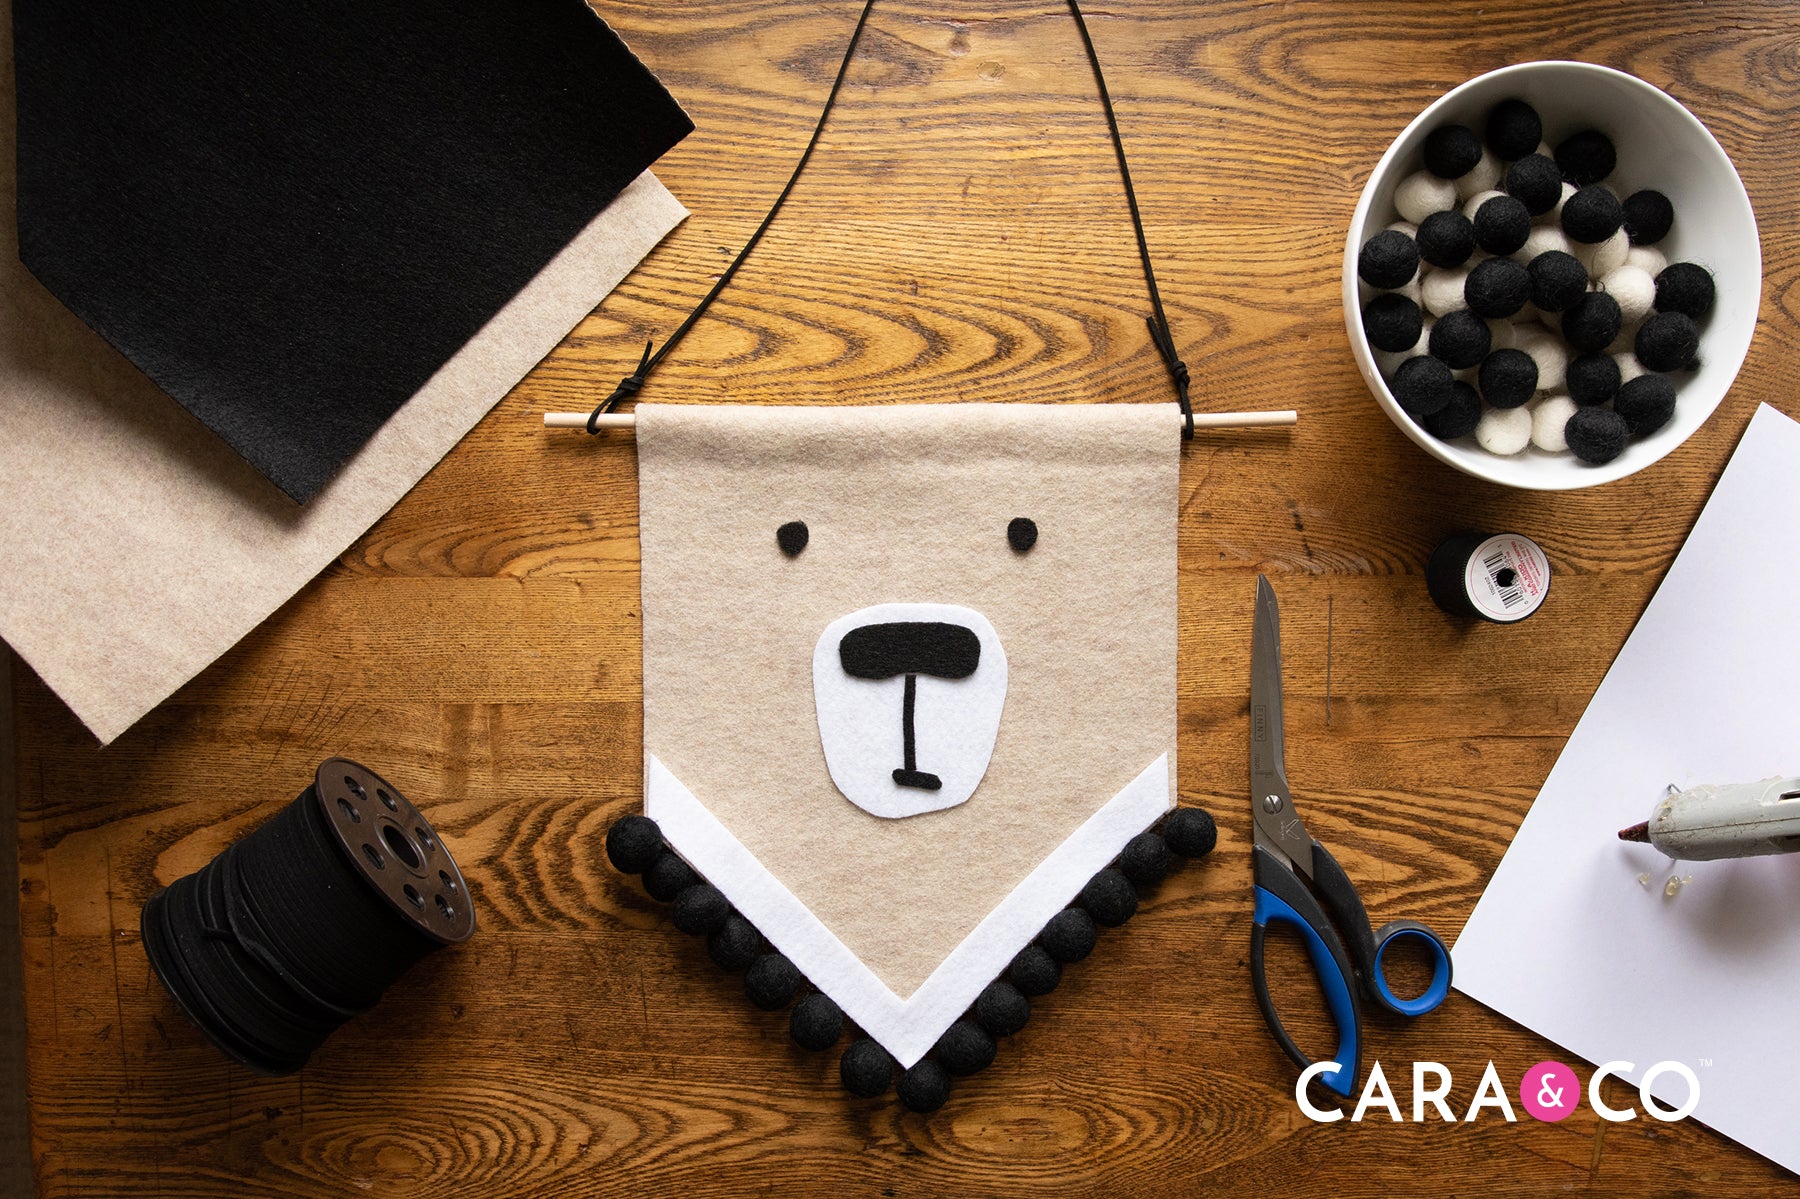
Can your kid's room decor even BE complete without one of these cute little banners?? We’ve got an adorable tutorial for you to try your hand at, and it couldn’t be simpler.
You’ll need a couple items from your local craft supply store, and of course, some key supplies from your favorite online DIY supply shop- Cara & Co! ;)

Supplies Needed:
- One pair of fabric scissors
- Hot glue gun and glue sticks
- Wooden dowels, approximately 12” in length
- Crafting needle
- Thread
- Felt fabric
- Jersey Yarn OR Suede Cord
- Felt Balls

Step-by-Step Instructions:
1. Gather your supplies, and heat your glue gun. Cut out a felt piece approximately 8.5”x11”, and trim the bottom edge to the shape that you want your felt banner to be.
CaraTip: Avoid wasting fabric by sketching your shape out on a piece of paper first before you cut into your felt pieces!

2. Lay a dowel about ¾” down from the top edge, centered widthwise on the banner. Run a line of hot glue on the top edge of the banner, above the dowel, but not touching the dowel.

3. Working quickly so your glue doesn’t dry, fold the top edge down and over the dowel. Press the edge to the back of the banner to create a long narrow channel for your dowel to sit in.

4. String your needle and thread. Thread on a felt ball and secure to the bottom edge of your banner, about ½” from the edge.

5. As you thread on the felt balls, make sure that you leave a bit of thread so that the balls can hang slightly. Don’t worry about seeing your sewing stitches! They will be covered with a piece of felt.
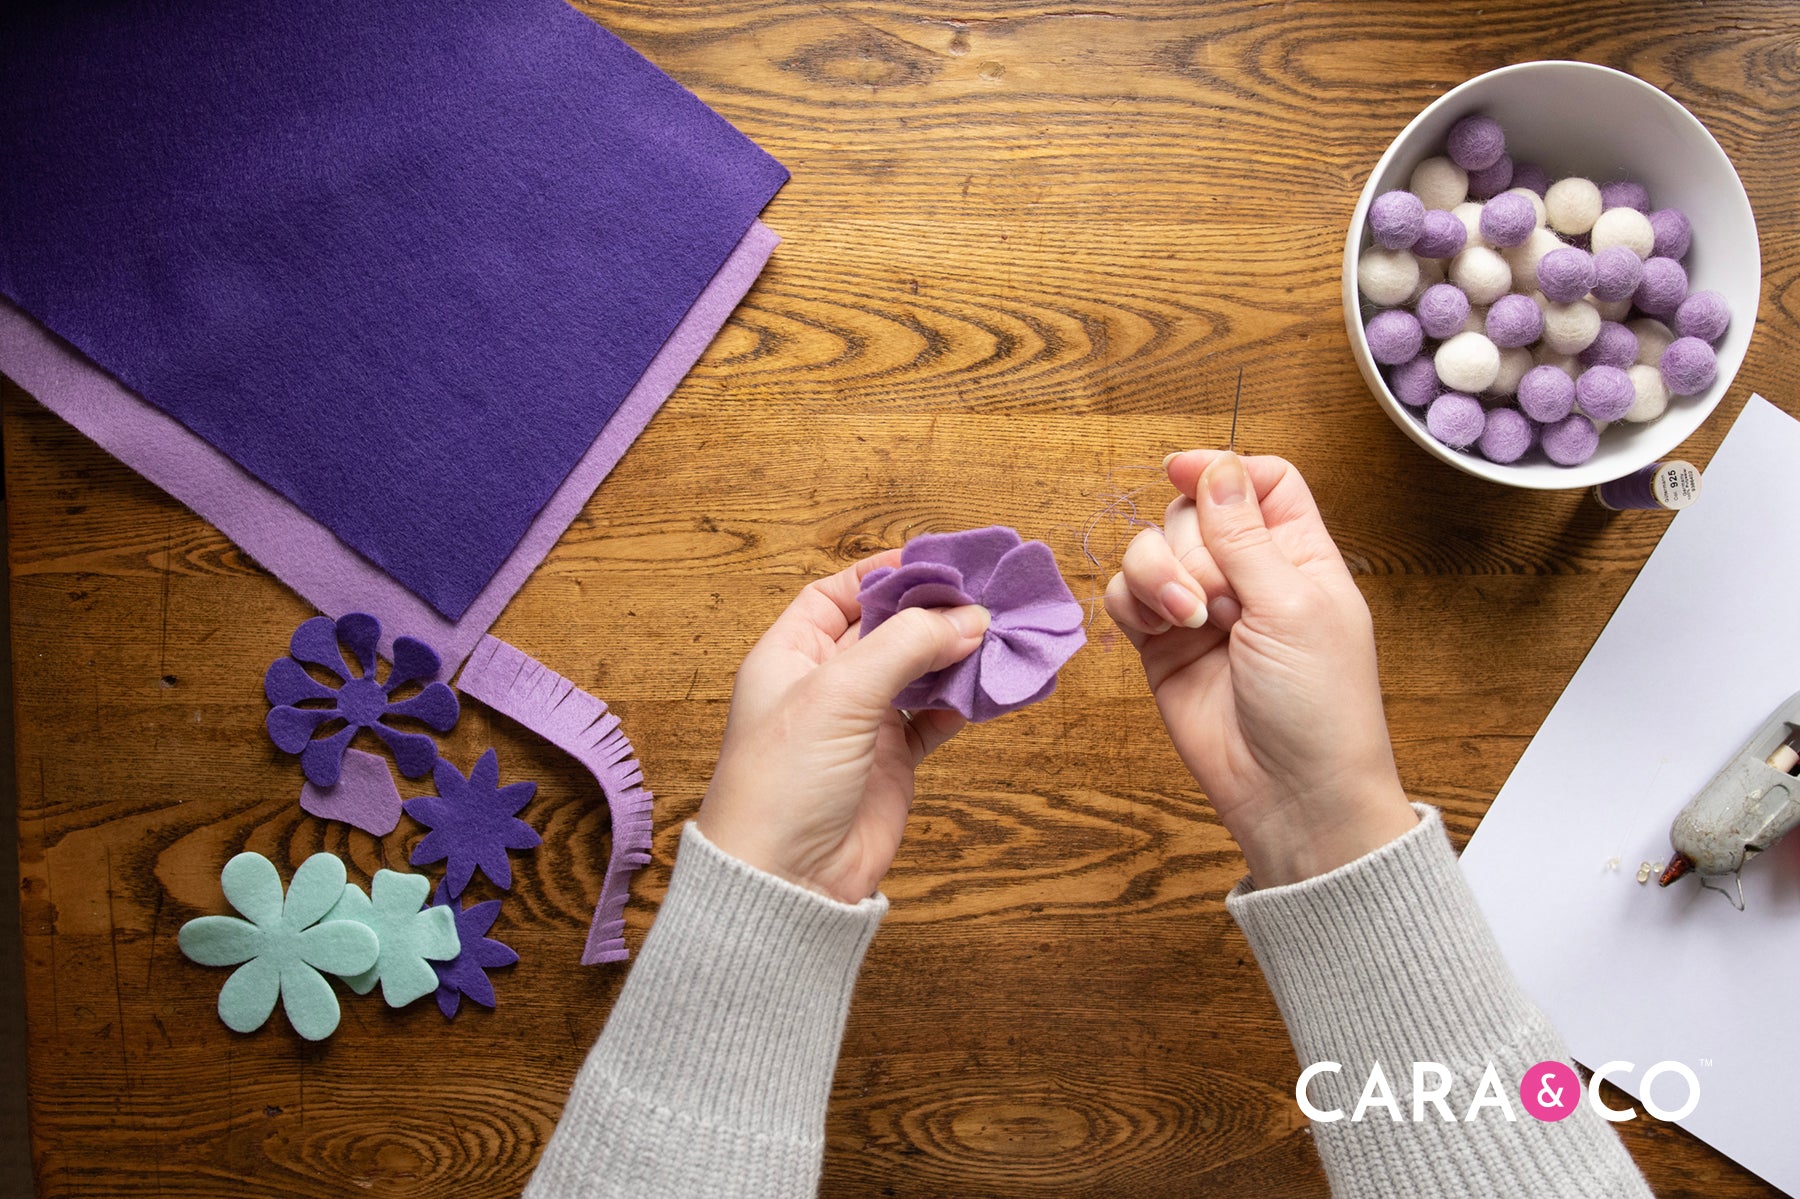
6. Take your felt fabric and cut out your shapes and various flowers. There are so many amazing tutorials on Pinterest for making felt flowers! Follow along below to create our favorite flower shape!

7. Using your fabric scissors, cut out 10 rounded triangle shapes. The shape should be wider at the top and narrow towards the bottom. Thread your needle and knot the string to the bottom of one flower petal. Stitch a couple stitches through the narrow bottom side.

8. String 5 flower petals going from one petal to the next as shown.

9. Pull your string through the petals so that they begin to pucker; knot at the end of the 5th petal so that they hold this shape.

10. After the first 5 are secured, string the next 5. Also pull the string tight to pucker the bottom edge and knot at the end of the last petal.
As you pull the string tight, the petals begin to curl into a circular shape. Curl the petals so that they overlap each other, and when you’re happy with the shape, push your needle through the layers of felt to the back side.

11. On the back of the flower, cross your needle through the layers of petals pulling the back of the flower closed. Repeat this until you feel that the flower shape is secure and won’t unwind.


12. Cut an inch-wide long rectangular piece. Cut small lines into the shape without cutting all the way through it. Then cut a piece roughly 3-4” long.

13. Roll the piece onto itself and secure with a dot of hot glue.


14. Hot glue the bottom of the rolled felt and quickly push into the middle of your flower.


15. Spread out the middle felt pieces, and voila! The cutest flower you ever did see! You can repeat these steps with smaller petal pieces or larger ones.

16. Once you’ve made the flowers and pieces that you want for your banner, place them on your large felt piece. When you’re happy with your composition, glue the flowers in place.
CaraTip: If you want to create smaller, delicate pieces like sprigs or branches, use felt fabric that already has a sticky backing! It’s much easier to work with when making smaller details!

17. Using your original paper that you made your banner shape with as a guide, cut out a narrow piece of felt that will cover up the stitching where your felt balls are fixed. Hot glue that piece in place.
18. Using your CaraSupply Jersey Yarn, knot a length with a loop knot at both ends.

19. Slide your loops onto the wooden dowels on either side of the banner.


And you’re done! There are so many adorable variations you could make!
Following this tutorial? We would LOVE to see what you come up with! Tag us with the hashtag #createdwithcarasupply
Happy crafting!
xo
- the girls
**The products, materials, and supplies sold by Cara & Co. Silicone Craft Supply are intended for use by adults and should never be left unattended with a child.
***Small objects and beads can present choking hazards to young children. Never leave a child unattended with beads or other products. Always dispose of any damaged product. No product is completely indestructible, and fully formed teeth could potentially damage product if chewed aggressively, so responsible attentiveness is needed for any user or purchaser. Customers should always inspect and monitor their products, discontinuing use at the first sight of damage.
****Once our products have been sold and shipped to our customers, Cara & Co Silicone Craft Supply Inc., waives all responsibility and liability from the use of our products. Customers are responsible that their final products made from our supplies meet the appropriate safety requirements for their region. Our buyers understand that by purchasing our products or using suggestions from the above tutorial, the buyer assumes any and all responsibility and liability for the use of the products.
*****Cords, clasps and pacifier clips are not intended to be chewed on and may present choking hazards.