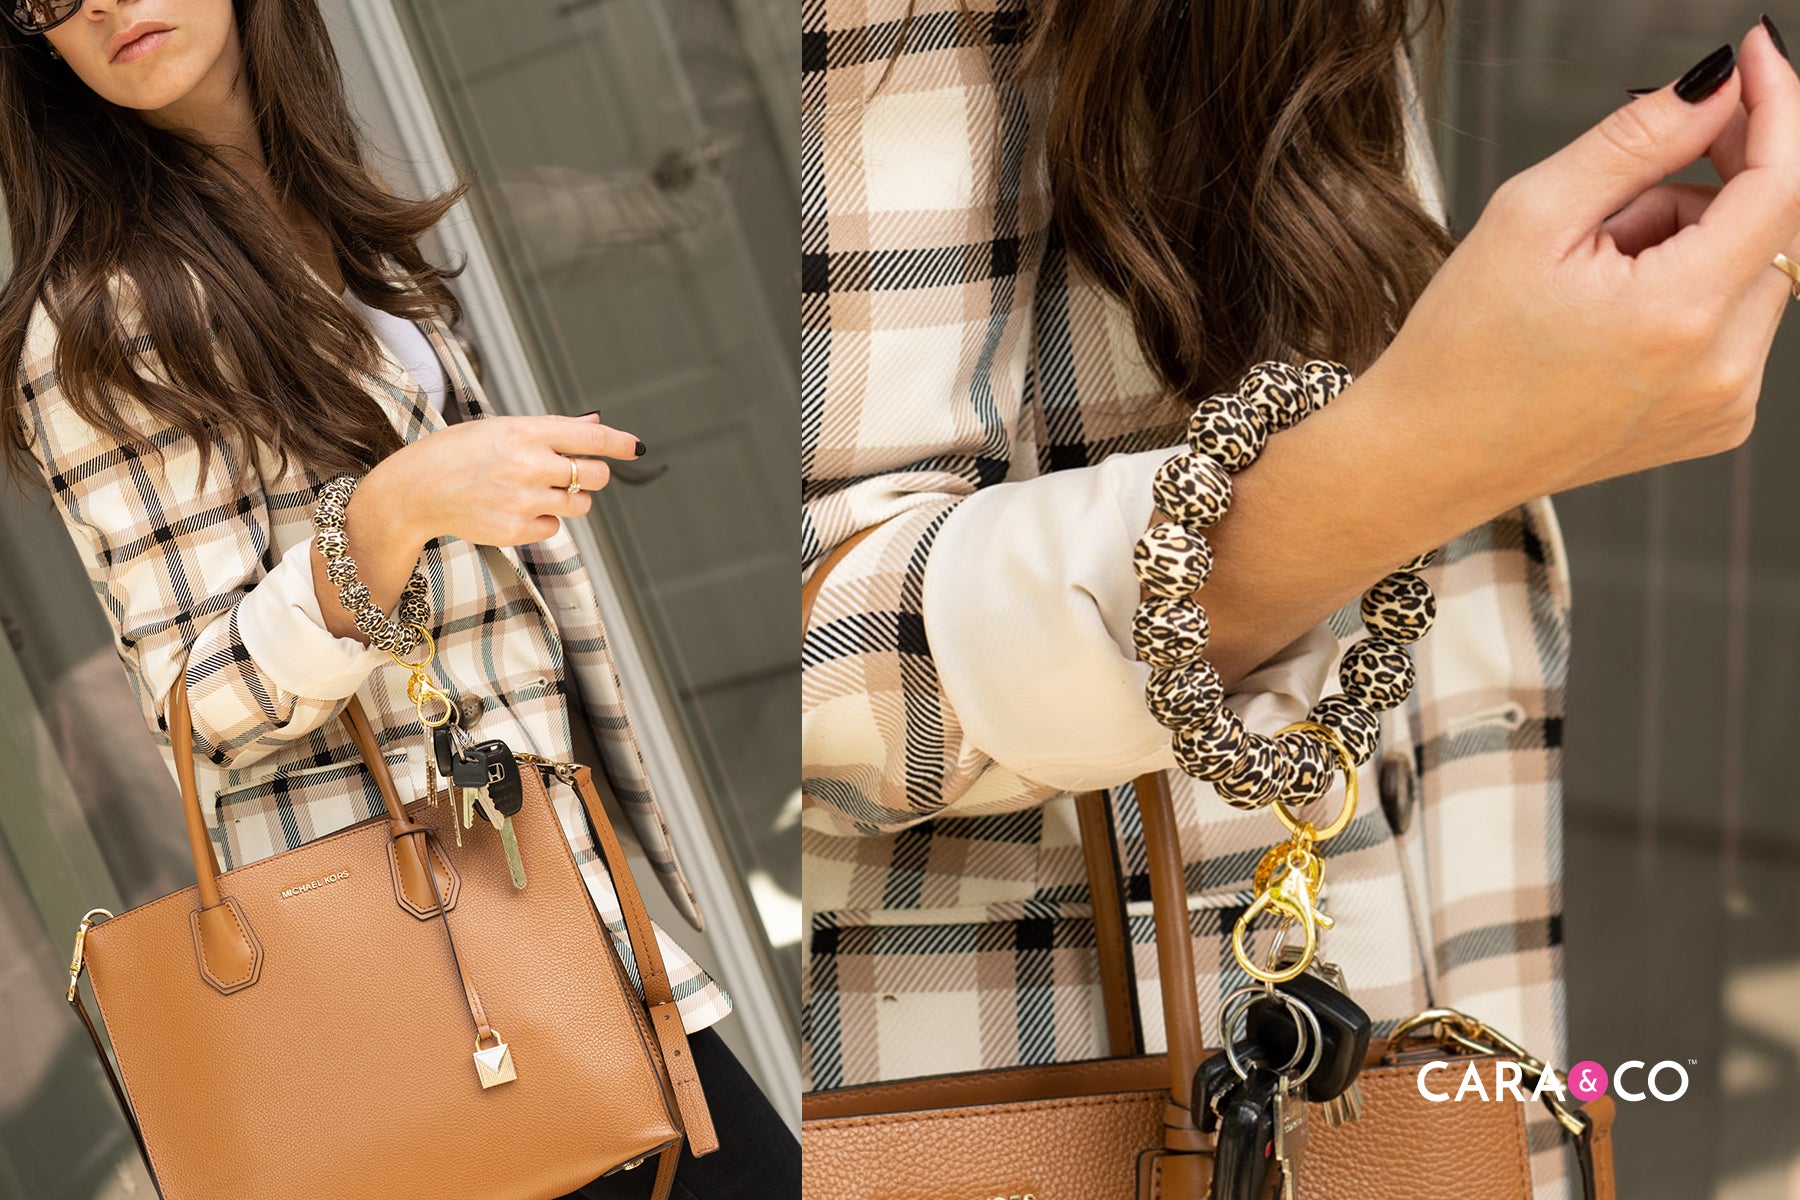
Sometimes you see an idea in the crafting world and it just hits you - of course! That’s exactly what we felt with silicone beaded wristlets! OF COURSE you want your keys on a cute silicone ring! They’re much harder to lose, easier to throw on your wrist as you wrestle a toddler out the door (it’s not just us, right?), and they’re sooo cute!
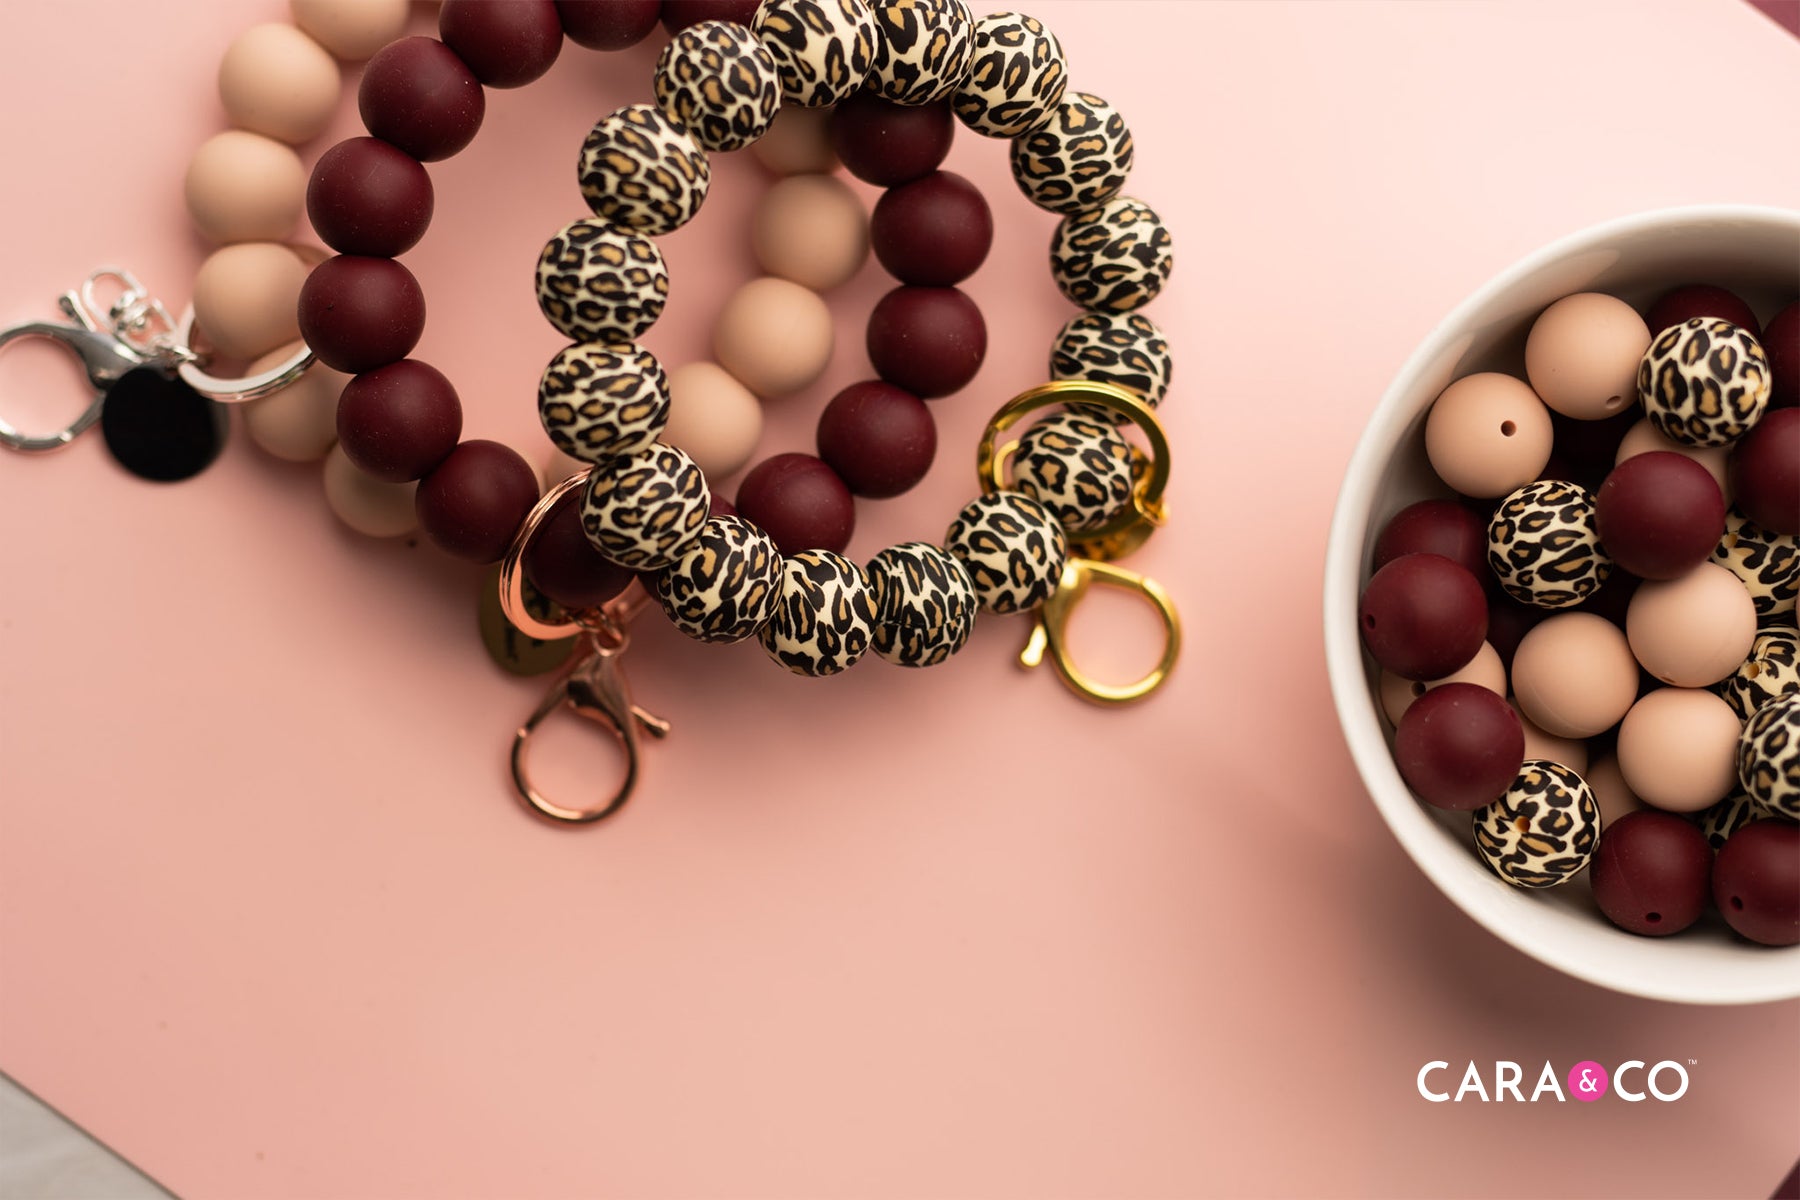
And what better bead to use, than one of our brand new printed beads from our Printed Silicone Crafting Bead line! These beads are gorgeous, and so perfect for your wristlet! We used the ever so cute leopard print, because… of course we did.
We’ve never felt so cool ;)
All the information for how to make your very own wristlet is below - and you can now buy a DIY Wristlet Kit with all the supplies included here! Head to our YouTube to see this tutorial in action.
Supplies Needed:
- 16 x 19mm Silicone Beads
- One length of 60” cording
- Scissors
- Crafting Needle
- Lighter
- Metal Keyring and Clip
- Metal Charm
Step-by-Step Instructions:
1. Take your cording and lighter and melt about a 1” length of cord so that it's hard and able to string beads easily.


2. String 16 of your 19mm silicone beads onto the cording.

3. Also string your Metal Keyring and Clip onto the same cord, through the Keyring.

4. Tie the string in a double knot, as tightly as you can.


5. Making a small single knot on each hanging string, use your knot grippers to tighten the knot even further.


6. Take your lighter and run it over your double knot to slightly melt it. Once the knot is cool, thread one of your strings with your crafting needle. Carefully, thread your needle through one of the beads beside your current double knot. (You may need pliers to help you get the needle through!)


7. Pull your threaded cord all the way through that bead, carefully pulling your knot into the bead to hide it.

8. You should have a string on each side of this bead. Trim them carefully, and use your lighter to melt the ends back that may be sticking out.


9. Take your small metal charm and add it to the Keyring for an extra little bit of sparkle!

10. Your wristlet is done! Add on your keys and you’re good to go!

We hope you love making your own wristlet! We would love to see the combinations you make or how you use your wristlet! Send us your photos by tagging us with the hashtag #createdwithcarasupply.

Happy Crafting!
Xo
- the girls
*The products, materials, and supplies sold by Cara & Co. Silicone Craft Supply are intended for use by adults and should never be left unattended with a child.
***Small objects and beads can present choking hazards to young children. Never leave a child unattended with beads or other products. Always dispose of any damaged product. No product is completely indestructible, and fully formed teeth could potentially damage product if chewed aggressively, so responsible attentiveness is needed for any user or purchaser. Customers should always inspect and monitor their products, discontinuing use at the first sight of damage.
****Once our products have been sold and shipped to our customers, Cara & Co Silicone Craft Supply Inc., waives all responsibility and liability from the use of our products. Customers are responsible that their final products made from our supplies meet the appropriate safety requirements for their region. Our buyers understand that by purchasing our products or using suggestions from the above tutorial, the buyer assumes any and all responsibility and liability for the use of the products.
*****Cords, clasps and pacifier clips are not intended to be chewed on and may present choking hazards.
38 comments
Hi Debra,
Thank you so much for your question! We used our 19mm Silicone Round Beads and they can be found in our silicone bead section! Happy crafting! Xo
What solid color beads are use in this tutorial?
Hi Linda!
Thank you for your question! To purchase silicone beads or any other supply you might need, you can either follow the hyperlinks under “Supplies Needed” here in the tutorial, OR you can click under our “Shop” category at the top of the page and go to the “Silicone Beads” section. Once you’ve added what you would like to your cart, you can go ahead and check out! Happy crafting! Xo
where can i buy beads
Hi Connie!
Thank you so much for your question! We used our Leopard beads and they can be found in our silicone bead section under “Silicone Print Beads – Standard”. Happy crafting! Xo