What's every mom’s dream toy for her children?
One that’s slightly less abrasive on the eyes and doesn’t make any noise :)


And then?
We couldn’t find a cost effective wooden house to save our lives. Ikea? Sold out for who knows how long. Amazon? Nothing you could customize OR the prices were a little high. General store searches? Fruitless.
Now what?
Dollar Store to the rescue! Sarah tends to know her way around a Dollar Store, and on a hunch she decided to try to find something we could make into a dollhouse. After a tour of the entire store, a shelf of wood bird houses caught her eye. For a total cost of $6 - these birdhouses would fit the bill! Not only that, but Sarah spotted some extremely cost efficient dollhouse furniture! For $2 per piece of furniture, suddenly the dream dollhouse for our Peg People was feeling much more doable.

Our supplies list could best be described as a ‘manic free-for-all in the dollar and craft store’. We grabbed whatever we thought would be helpful - that ended up being every size package of little wooden shapes, dowels, balsa wood strips (more on this!), scrap booking paper, foam sheets and a little wish that it would somehow all turn out nice. Okay, a BIG wish.

 The bird houses came with little hooks on the backs of them, so with some convincing we removed the hooks and sanded the backs so that you couldn’t see the indent from them.

The plan was to glue the bird houses together, remove some walls (channeling our inner Joanna & Chip), open up some doorways, maybe even a windooowww… and it suddenly became clear that without extensive tools and time, it would be easier said than done!
As many reno’s are ;)
So we made decisions and we cut the wish list down. One wall would have to go to make room for a main ‘living space’, and the other wall would remain because cutting these birdhouses was turning into a career.
No doorways. No windows. Budget cuts.

So we glued and clamped the walls, allowed them to dry, and cut out our main wall - clearly our house is not built to code. Once the wall was out, we noticed with a small trim it actually ended up being the same size as the width of our small house -- it would make a perfect ceiling & attic combo. Some more glue and clamps, and voila! Accidental Attic!

 Next up? Making it appear watertight.


This part took a bit of dedication but it was sure to turn out, so we invested the time trimming popsicle sticks to length. We used two sizes of popsicle sticks - an extra wide stick (the kind your childhood family doctor used to have in a jar on his desk), and narrow popsicle sticks (the kind that are stuck to your kid’s clothes after a hot summer day).

We arranged the sticks so that the ‘roof tiles’ never lined up, and glued and cut and glued and cut. To cap the roofline off we simply trimmed a narrow popsicle stick and glued it face down on the roof line crest.
Remember that Balsa wood? If you’ve never heard of Balsa wood, it's an extremely lightweight wood. It's perfect for wooden models and crafting because it's also extremely soft. You can cut it easily with a crafting knife, and it generally comes in a variety of sizes and shapes. We found a square ‘beam’ looking strip and decided to trim it down into a bit of an architectural feature in our vaulted ceiling.

What a fancy bird house we have ;)
 You’ll never beat our per foot cost on this flooring ;) When we were in the scrapbooking aisle at our local craft store, we spotted the perfect wood grain paper. The pattern was oversized, but because the grain was fairly detailed it would look pretty believable when cut down into small strips.
We cut the entire page up into 1cm widths and glued them down one by one. If you’ve ever taken a good look at hardwood floors, you’ll notice that none of the seams line up. We did the same thing and made sure to vary the lengths. Instead of measuring them to size, we glued them all down using regular white crafting glue, and trimmed the edges with a sharp crafting knife after it was all dry.


Our finishing details on the walls were also scrapbook paper cut to size. We managed to find a cute miniature wood mantle as well that we white washed and glued in place once the floor was dry. And of course floor trim. Because of course!


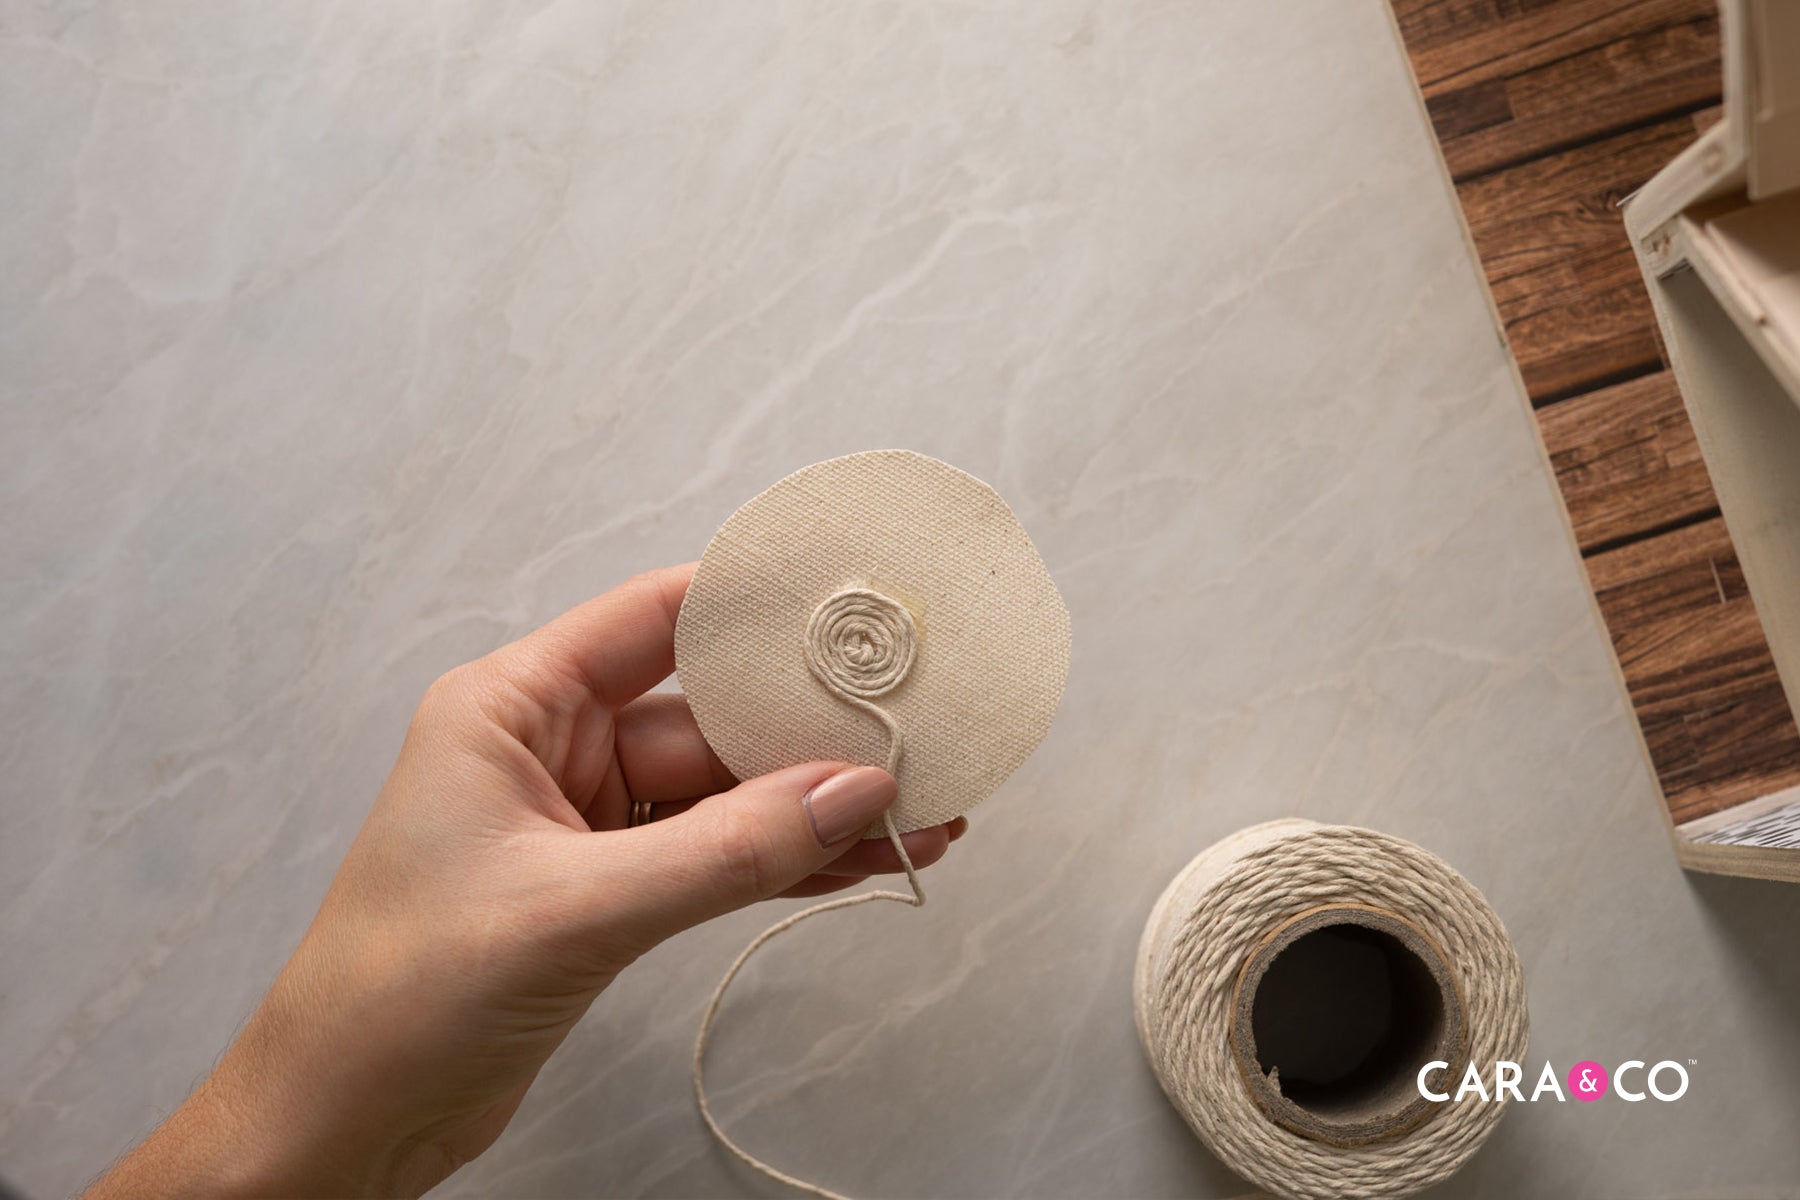
 The magic is in the details. We wanted to come up with a few fun ways to make our dollhouse look current, and we all love a good jute rug. Our twine rolls were the perfect string to use.
We started by cutting out a fabric circle about 2.5” in diameter, tied a knot in our twine, and glued that knot to the middle of the fabric circle. Using that knot as the centre of our rug, it was a simple glue, stick, repeat, until we had the rug size as large as we wanted it. We glued off the end so that it didn’t fray, and made little trim marks all the way round the excess of the fabric circle. Tadaaa! Farmhouse rug.


 The kitchenette was tricky to figure out. We had purchased a pack of wood panels to use for the kitchen cabinet. After a bit of convincing, we cut down the panel into three rectangles and two squares. Gluing all the edges together, we created a hollow rectangle.

If we could offer you a tip, it would be this - buy foam that has a sticky backing! After trimming down our foam sheet for our countertop, it was such a breeze to simply stick down. Not only that, foam has a tendency to melt slightly when it comes in contact with hot glue. Our counters were going to be waterfall counters, so we just continued the foam up and down one entire side.

On the top we cut out a black foam rectangle and a couple rounds for our stove top panel.


 Remember how we had to cut a window from our budget? It was still bugging us. The Peg People Family need natural light. Solution? Faux window!
Carefully, we cut out a rectangle window panel with on-trend black framing. Because it was sticky-backed, we could draw the window design on the paper backing - much easier than eyeballing it!


A quick google search found us a beautiful view that we printed out small from our home printer. The frame was stuck to the view. The now-window was trimmed out and glued on the wall.


But there was something missing. A bit of softness.
We took our smallest size of wood dowel that we grabbed on our manic spree through the Dollar Store, colored it with a black sharpie, cut it down to size and glued it together. And it couldn't be cuter! We also found a small sample of cream velvet at the craft store, and cut some rectangle curtain panels out.


A little bit extra? Yep. But our Peg People will enjoy the view :)
 We had managed to find all the other furniture we wanted at the Dollar Store but we were missing a bed or couch or arm chair. The size of our bird houses turned dollhouse meant that a couch or bed would probably be too big. But an armchair? That we could swing.
We cut out four shapes to piece together our chair. A square seat, a rectangle backing, and two rectangles with angled ends for our arms. For the structure of the seat we used foam core, which you can find at your local craft store. (Foam core is a board that has paper front and back with a foam middle. It's super lightweight, very easy to cut, and holds its shape well.)


We wrapped each piece with some leather samples and glued down the edges. This took a bit of time to figure out - leather is a thick material, so it couldn’t be bunched up on the inside of the chair panels.


Of course nothing can escape the fact that it's Christmas, so our Peg People Dollhouse required a lit Christmas tree. Clearly! Thankfully our local craft store was already completely set up with Christmas village props and a tiny Christmas tree was easy to find. We went back to our kryptonite (the Dollar Store) and found a handy little string of mini LED battery operated lights to wrap around our festive tree.

The final touches? Miniature pans (squeeeel!), a mini potted plant (#plantlady), mini mirror for over our mantel, and a cute little basket for the attic space.


There are so many ideas and amazing dollhouse DIY’s out there - Pinterest is just brimming! If you’re looking for a craft to make for your kids, this project is just the ticket!

Are you planning to make any DIY gifts for your loved ones this Christmas?
We would LOVE to see what you’re up to!
Happy Crafting!
Xo
- the girls
Wood is a natural item and natural variations can occur; therefore it should be handled carefully and attentively to prevent any damage. Always inspect your product and never leave a child unsupervised with it. Do not submerge/soak in water - spot clean only. Do not put in the freezer. If you notice a crack or breakage, DO NOT give the item to a child. Never leave a small child unattended with the product. Not recommended for below the age of 4 as some pieces are quite small.
2 comments
Thank you so much Elizabeth! Glad you enjoyed! Xo
Absolutely beautiful, thank you for posting x