Christmas might be over, but if you live in a place like we do (hooray Canada!) you know that winter has only just begun (boo winter…). The snow has started to accumulate and snow suits, boots, hats and mitts are just part of your, and your kids day-to-day outside routine.

Another part of our routine seems to be tracking down missing snow accessories (you too?? Not just us??). Hats end up in the lost and found at school and mittens forever have a long lost pair somewhere out there.
The three little kitten’s mom? We get her frustration with the lost mittens.

Mitten clips seem to be a thing of the past (did your mom have mittens sewed to a piece of yarn strung through your jacket arms??), but now that we’re mom’s, we c o m p l e t e l y understand why our mom’s made those DIY mitten strings! No one has time to be digging through lost and found bins, and no one wants to afford a million backup gloves.
Today’s tutorial? Mitten Clips.
We came up with two designs that we think will be exactly what your kids' outerwear needs. One pair of beaded short clips, AND an update on the yarn ones our mom’s made ;)

Design 1: Beaded Short Clips
This design pairs our hard working curved round clips with durable silicone beads to create a strong and cute mitten clip solution! Snapping these clips closed is so satisfying - they’re so strong and tight! We suggest 5 beads to keep your mitten clips out of the way but still long enough, but you can make these clips as long or short as fits your child’s jacket & mittens.
Supplies Needed:
- 10 x 12mm Silicone Beads
- Two lengths of 35” Cording
- 4 x Curved Round Hooked Ring Clip
- Scissors
- Crafting Needle
- Lighter


Step-by-Step Instructions:
1. Take one length of your cording, fold it in half and loop it on to one of your Curved Round Hooked Ring clips. Make the loop by passing the folded middle portion of your cord through the clip hole and pulling the loose ends through the loop to secure.

2. Thread your crafting needle on to your ends and string on 5x 12mm silicone beads. Push all the beads up against the clip.


3. Slide the last bead down an inch or so, and carefully pull out one of the two strings.

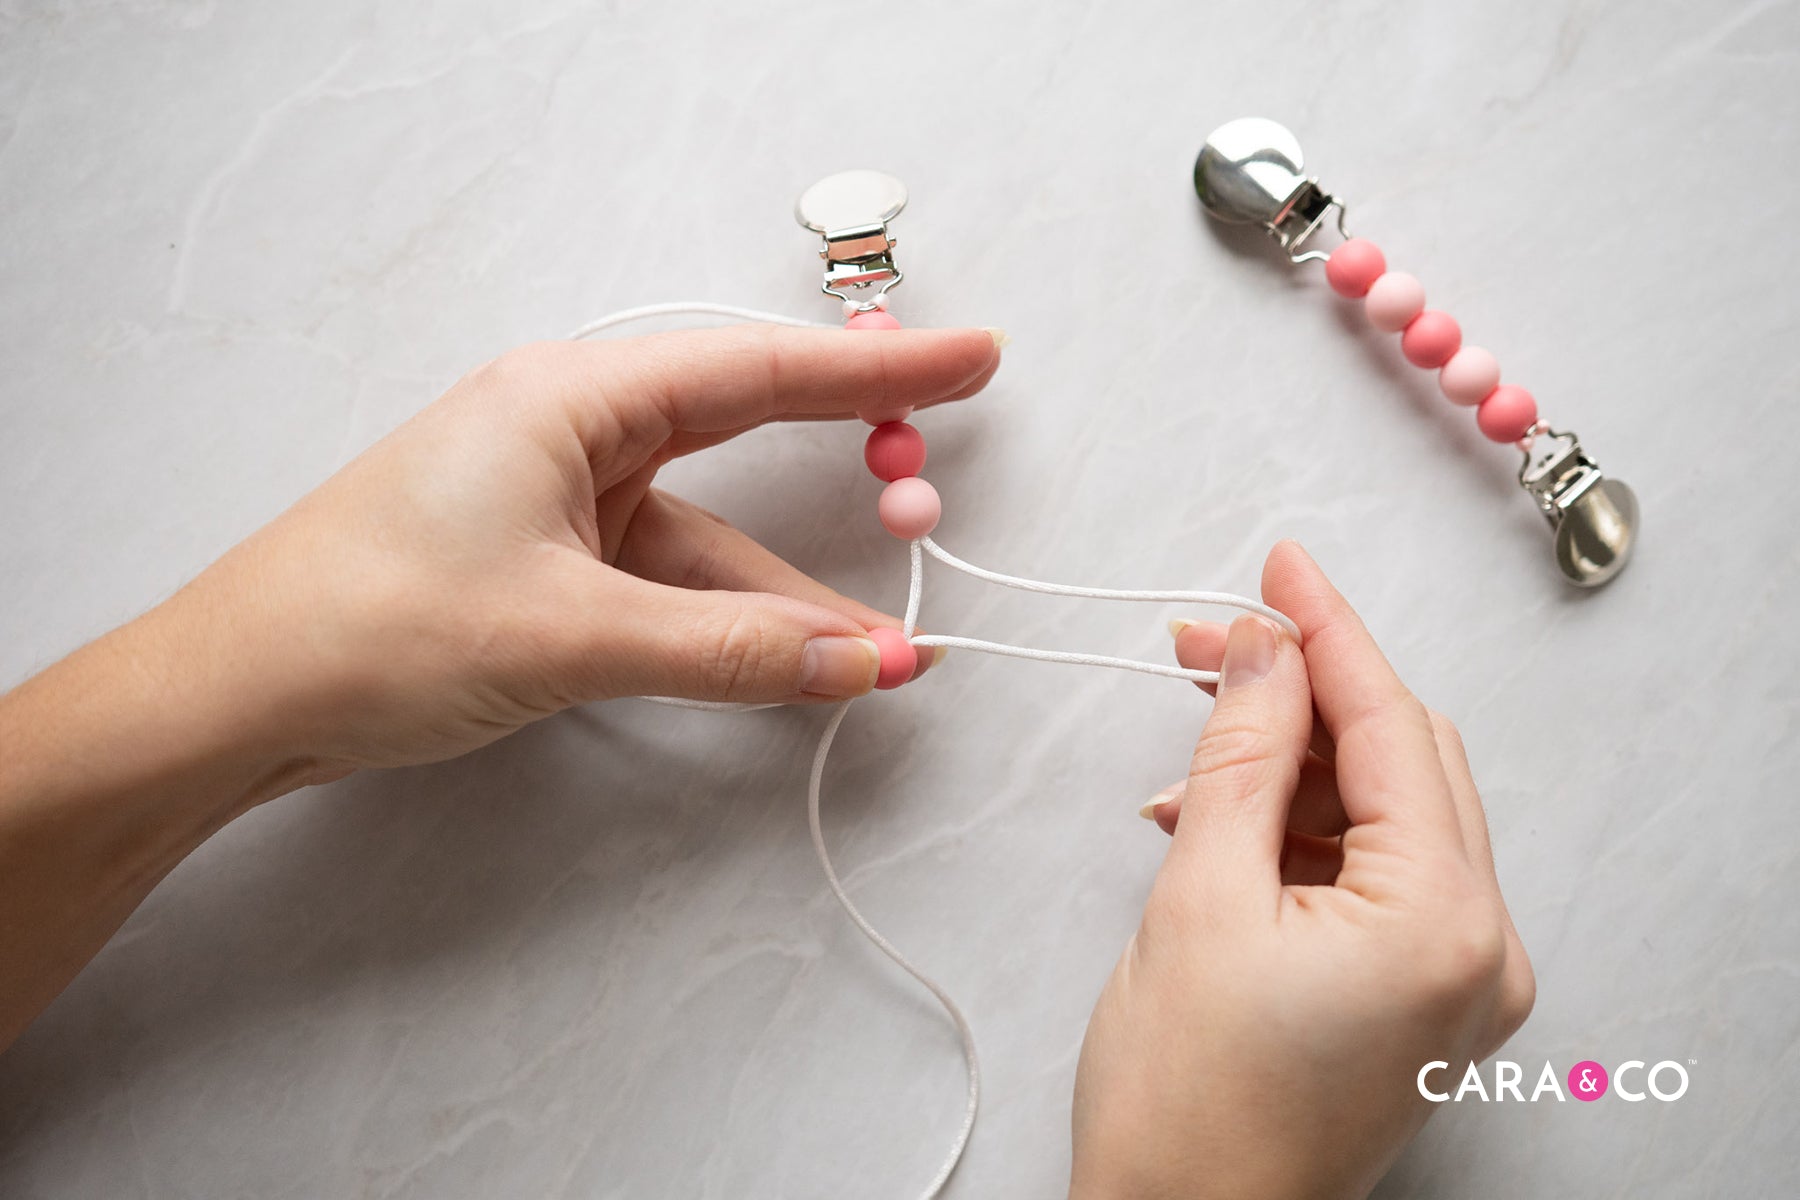
4. Push your last bead up again. You should have one string coming through this bead, and one string coming out above it.

5. Take the string that comes through the last bead, and string on your other clip. Push the clip all the way up to the last bead, and loop your string around the clip hook again. This will make the clip much more secure than if it was only looped once.


6. Snug the loop and bead up as tightly as you can.

7. String your crafting needle again onto this cording strand, and push your needle back up through just the last bead. Pull the string tight to secure the clip.

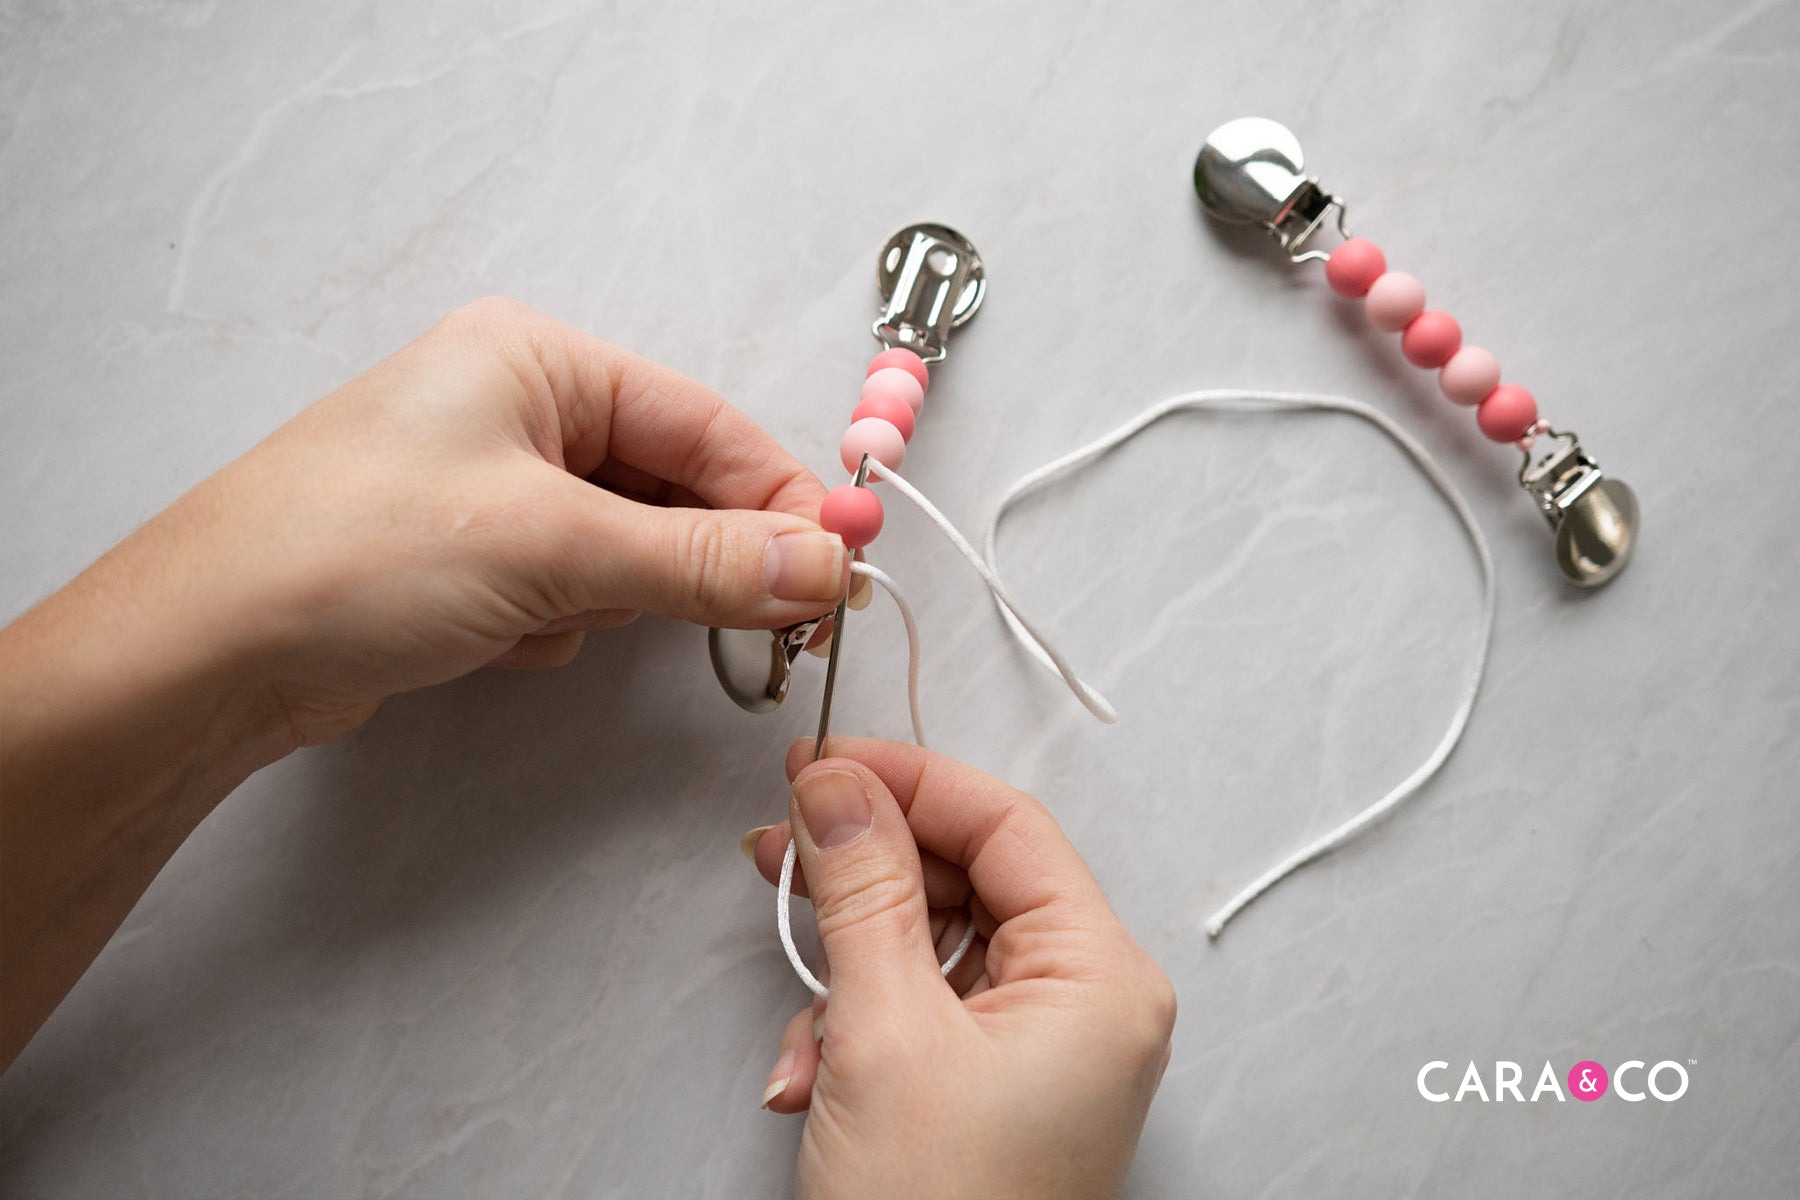
8. You should now have two strings coming out between beads 4 & 5. Tie a double knot as tightly as you can with these two ends. Run your lighter over this knot to help secure it.


9. Re string one of the ends (either will work) onto your craft needle. Push the needle up and through bead number 4.
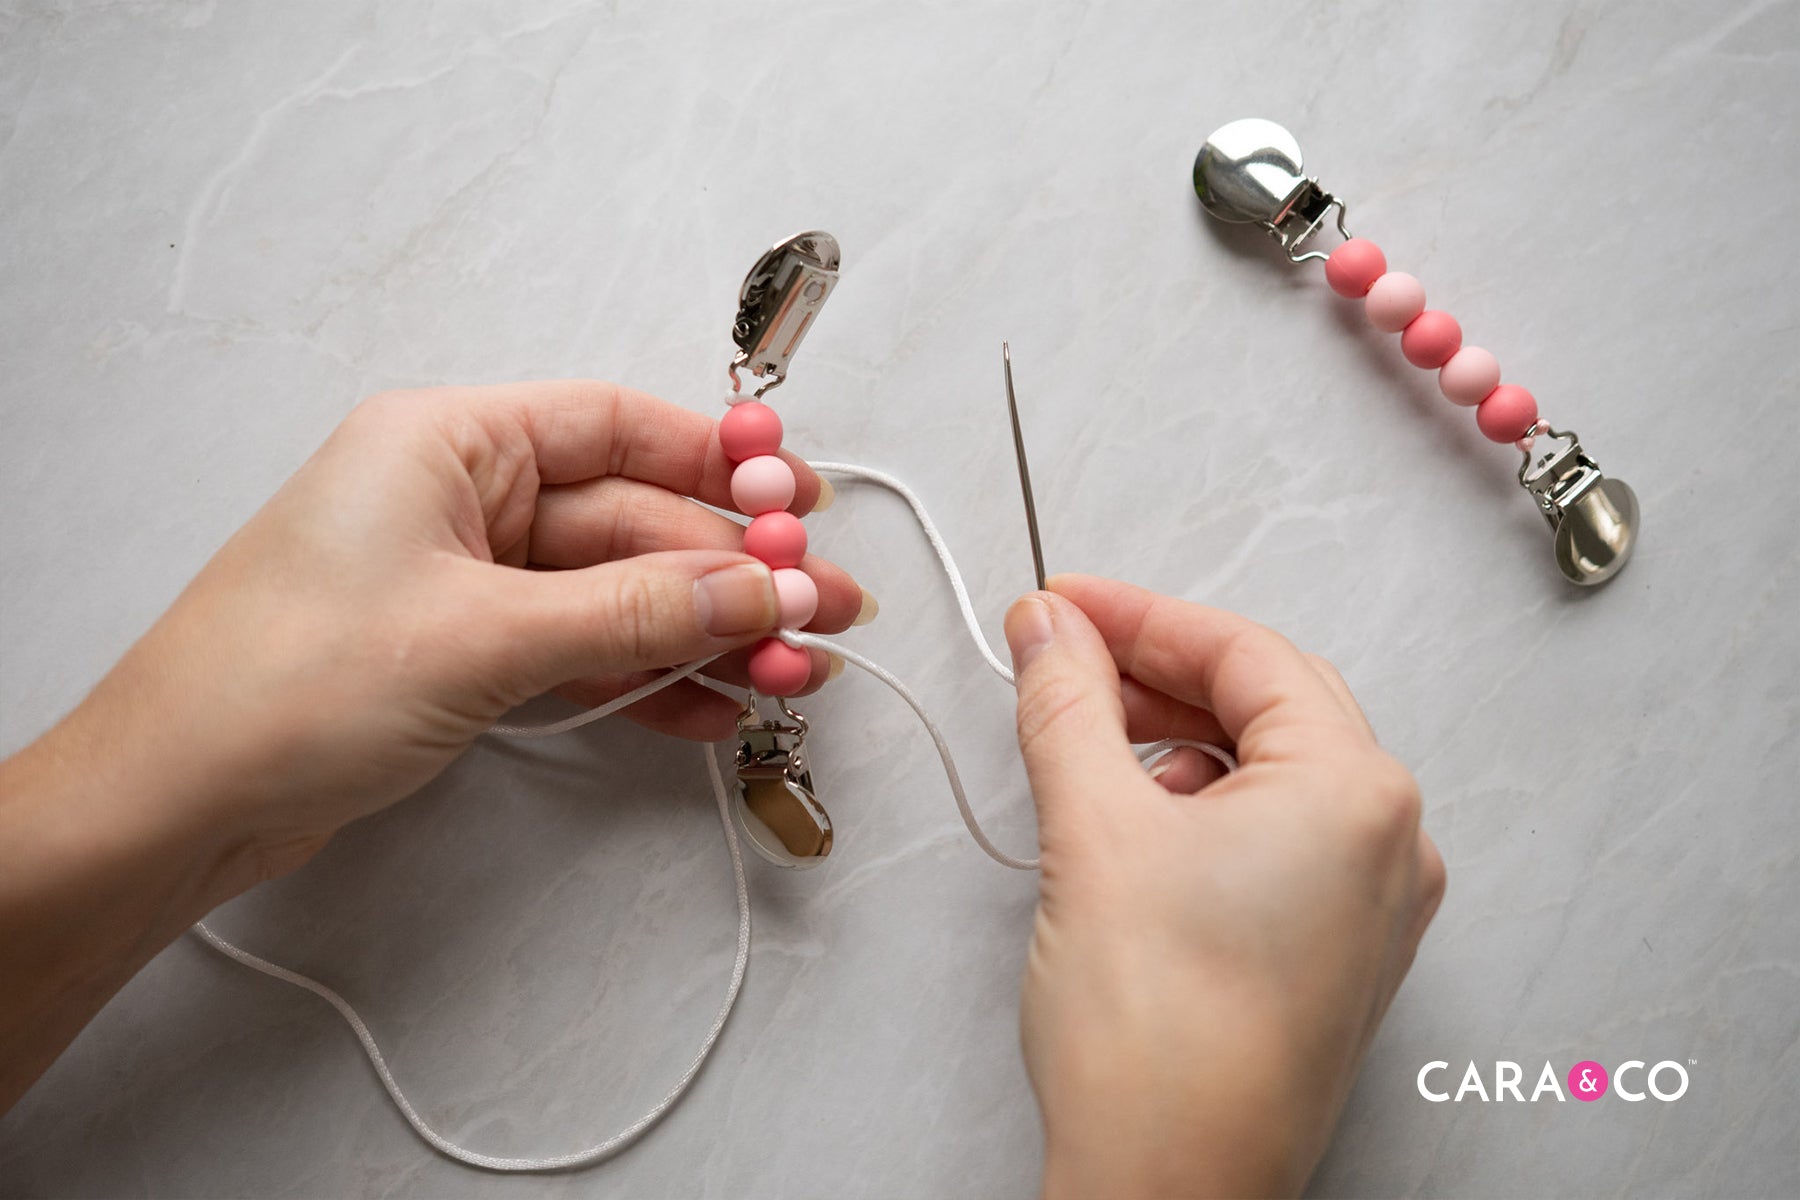

10. Remove your craft needle from the string. Carefully pull the cord in the direction of your first clip (also the direction you fed your needle) to pull the double knot into the fourth bead.

11. Once your knot is hidden, you should have two loose ends of cording coming out before and after the fourth bead. Take a sharp pair of scissors and trim the cording as close to the bead as you can. Lightly run over these ends with your lighter to keep the ends from fraying and also to help shrink them back. If you have any pieces sticking out, just bend your clip and tuck the loose ends into the bead beside them.

12. Voila! You’ve made mitten clip one of two! Repeat all these steps to make your second clip :)

Design 2: Jacket Sleeve Clip
We just HAD to recreate the old school mitten clips we had as kids - it was such a great idea, but there were some serious design flaws ;) ;) We opted for a thick fabric ribbon (as opposed to string yarn our mom’s used) and our strong and grippy metal clips to make mittens removable. With over 21 colors and multiple shape options, these clips are easy to match to your child’s jacket or accessories. And we all know how important the right color or shape is to a kid ;)
Supplies Needed:
- One spool of thick durable fabric ribbon
- 2 x Metal Clips of your choice with either a 20mm or 25mm ring
- Scissors
- Sewing Machine, or needle and thread

Step-by-Step Instructions:
1. Before cutting any ribbon, measure the arm width of your child’s winter jacket. You can find this measurement by taking a measuring tape and running it from the end of one sleeve up through the arm, across the shoulders, and down the other arm to the end.

2. Take that measurement and add about 3” to each side for a total of 6” extra. Cut your ribbon.
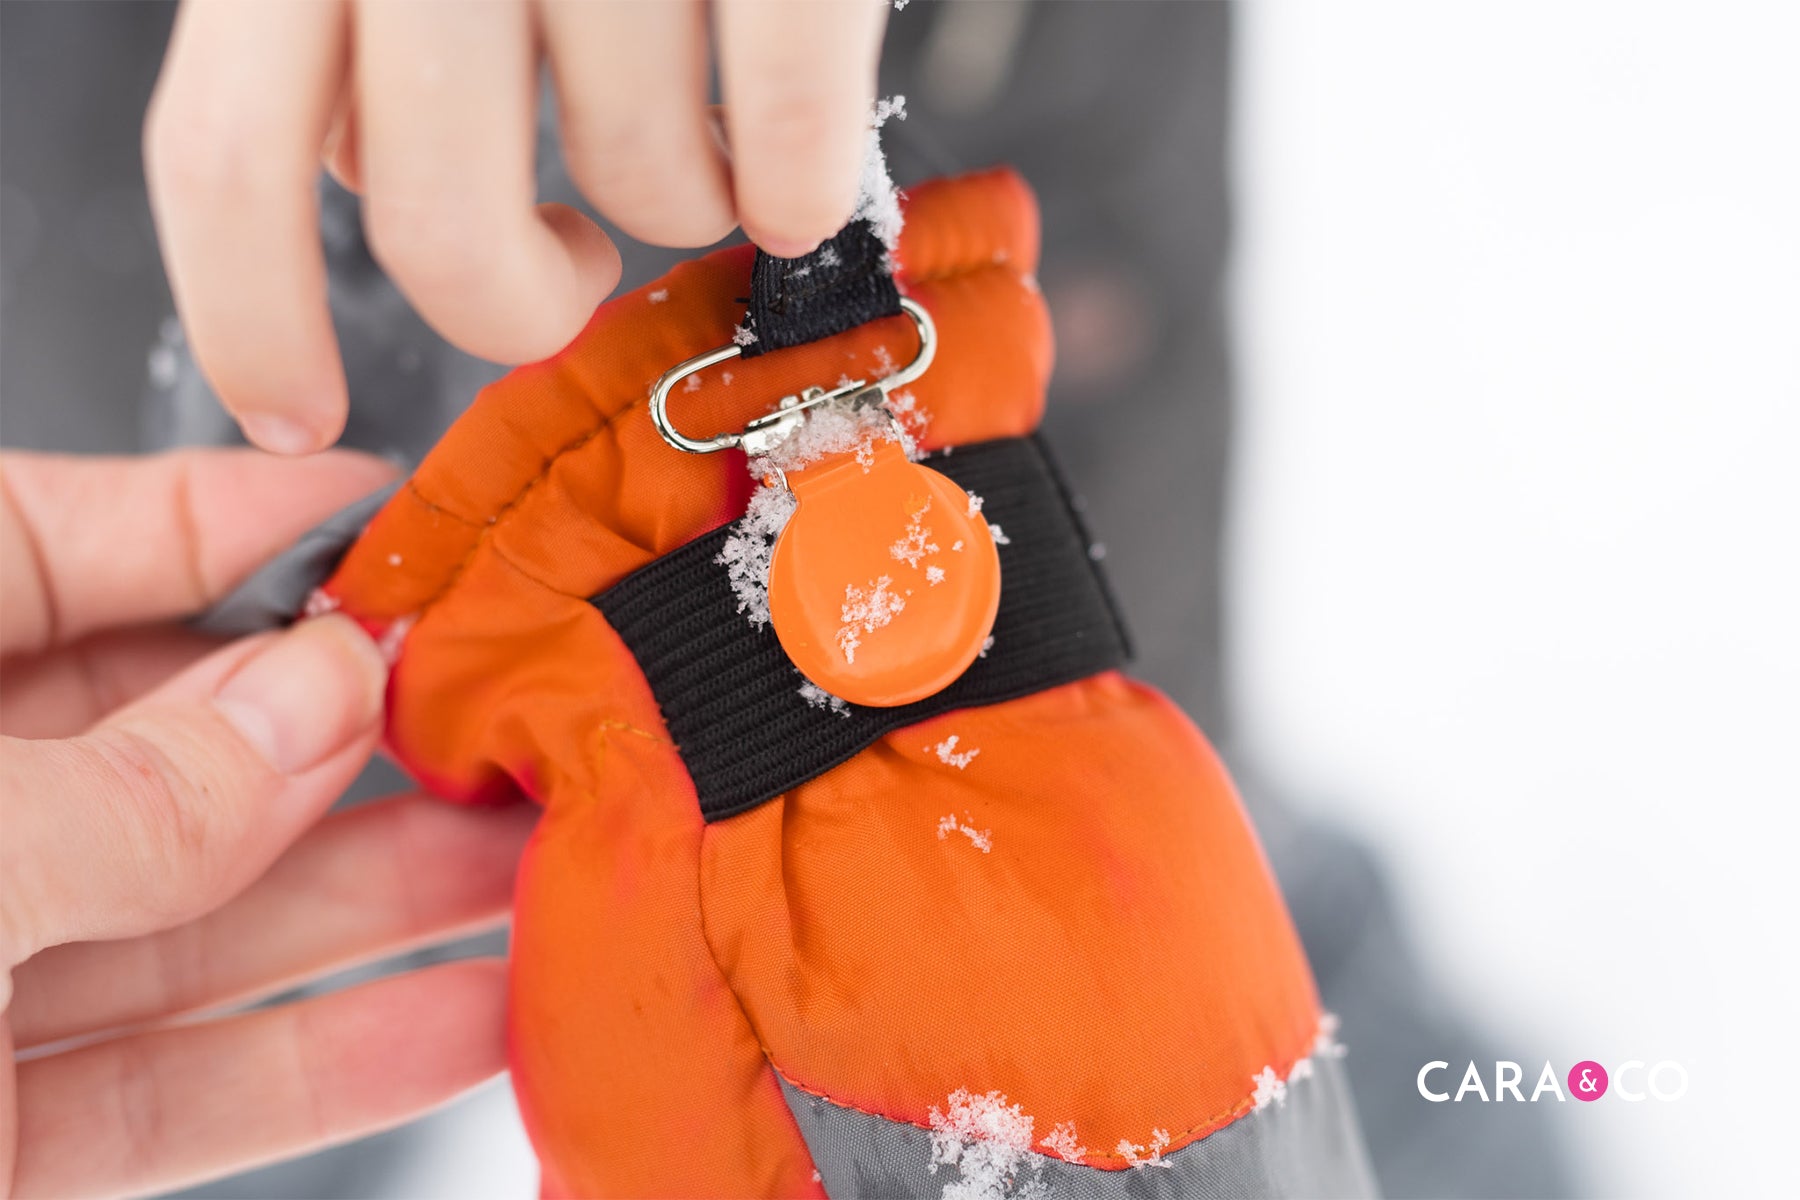
3. Once your ribbon is cut, feed in on to the end of one of your clips. When you have about 1” through, fold it back on itself (about 0.5”) and hold that fold.

4. Bring the bottom of that fold to the ring on your clip, and fold the ribbon again on itself OVER the clip ring. You should not see any ribbon ends. If you need to secure the ribbon folds with sewing needles do so at the top and bottom of the fold.

5. With your sewing machine or by hand, stitch the entire folded portion you’ve just made along the bottom, sides and top. When sewing the top portion, make sure that you sew beside the clip ring to secure it well, and not over it.


6. Repeat steps 3-5 on the opposite end of the ribbon, making sure that you have all your seams and clips facing the same side.

The three little kittens never ended up losing their mittens after all ;)
Our kids are already loving their clips! If you’re planning to make some, make sure you tag us on Instagram using our hashtag #createdwithcarasupply!
We L O V E seeing what you put together!
Happy Crafting!
xo
-the girls
*The products, materials, and supplies sold by Cara & Co. Silicone Craft Supply are intended for use by adults and should never be left unattended with a child.
***Small objects and beads can present choking hazards to young children. Never leave a child unattended with beads or other products. Always dispose of any damaged product. No product is completely indestructible, and fully formed teeth could potentially damage product if chewed aggressively, so responsible attentiveness is needed for any user or purchaser. Customers should always inspect and monitor their products, discontinuing use at the first sight of damage.
****Once our products have been sold and shipped to our customers, Cara & Co Silicone Craft Supply Inc., waives all responsibility and liability from the use of our products. Customers are responsible that their final products made from our supplies meet the appropriate safety requirements for their region. Our buyers understand that by purchasing our products or using suggestions from the above tutorial, the buyer assumes any and all responsibility and liability for the use of the products.
*****Cords, clasps and pacifier clips are not intended to be chewed on and may present choking hazards.