If you haven’t by now seen the ever-so-popular Wristlet, let us introduce you to your new best friend. Wristlets have been saving keys and keychains for months now - it’s usually a simple strand of 19mm beads pulled tightly together in a circle and finished off with the cutest keyring and clip to make attaching your keys a breeze.
We love them here at Cara Supply - every single one of our girls working here has one! They’re so handy to hang up keys at home, find them in a deep dark purse, and almost impossible to lose once on your wrist!

We know you love them too - we’ve seen the beautiful Wristlets you design and sell or make for yourselves! But of course, we always love shaking things up. A simple strand of 19mm beads is beautiful, but what if you could do it differently?
We decided to do some crafting ourselves and came up with three different ways to shake up your Wristlet designs!

Triple Strand Wristlet


A wristlet doesn’t need to be thick and chunky - if detailed and dainty is your jam, this wristlet look is for you!
Supplies Needed:
- 105 x 9mm Beads (3 colors of 35 beads each)
- 1 x Keyring & clip
- 1 x 19mm Bead
- 1 x 60” Length of precut nylon cording
- Sharp scissors
- Crafting needle
- Lighter
Step by Step
1. Trim your cording and lightly melt the ends with your lighter to make threading beads easier.

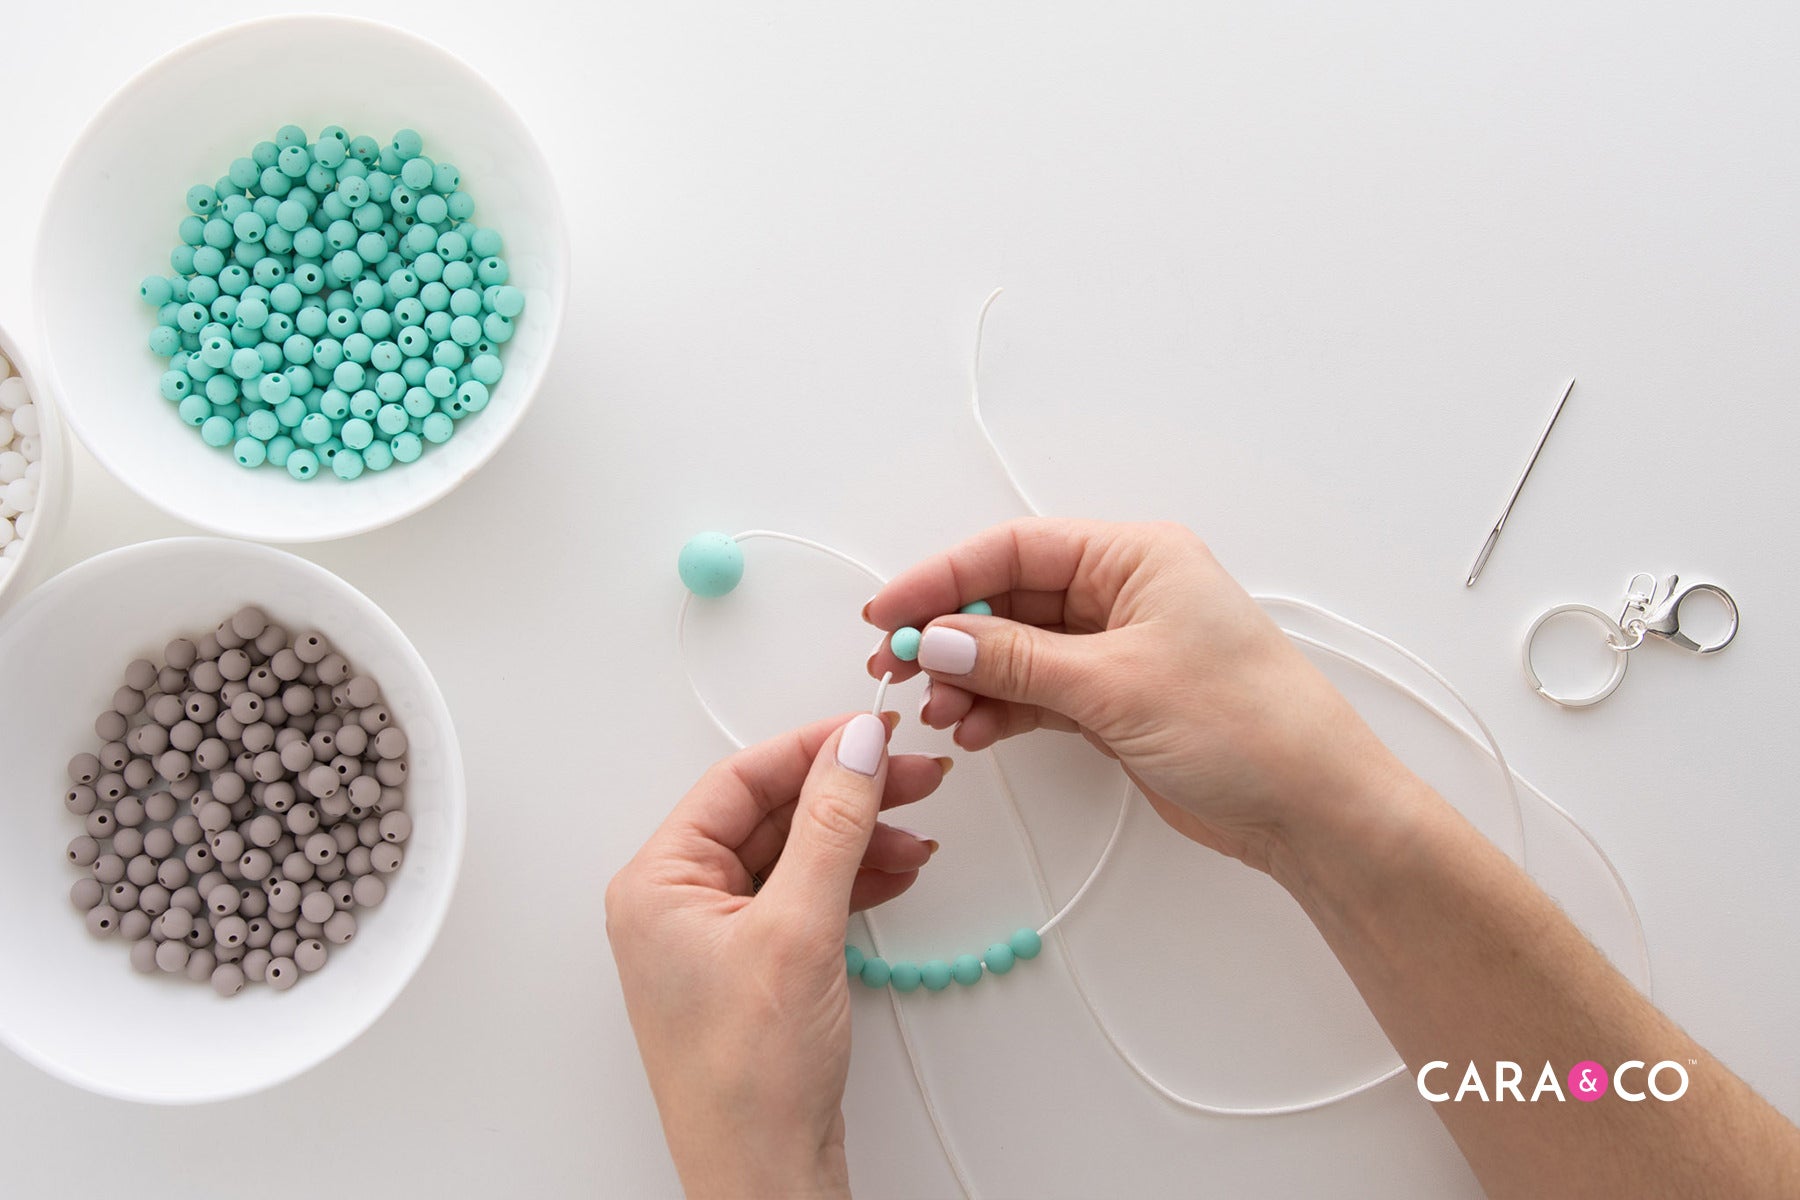
2. Taking your cording, thread on your 19mm bead and slide it to the halfway point on your cording.

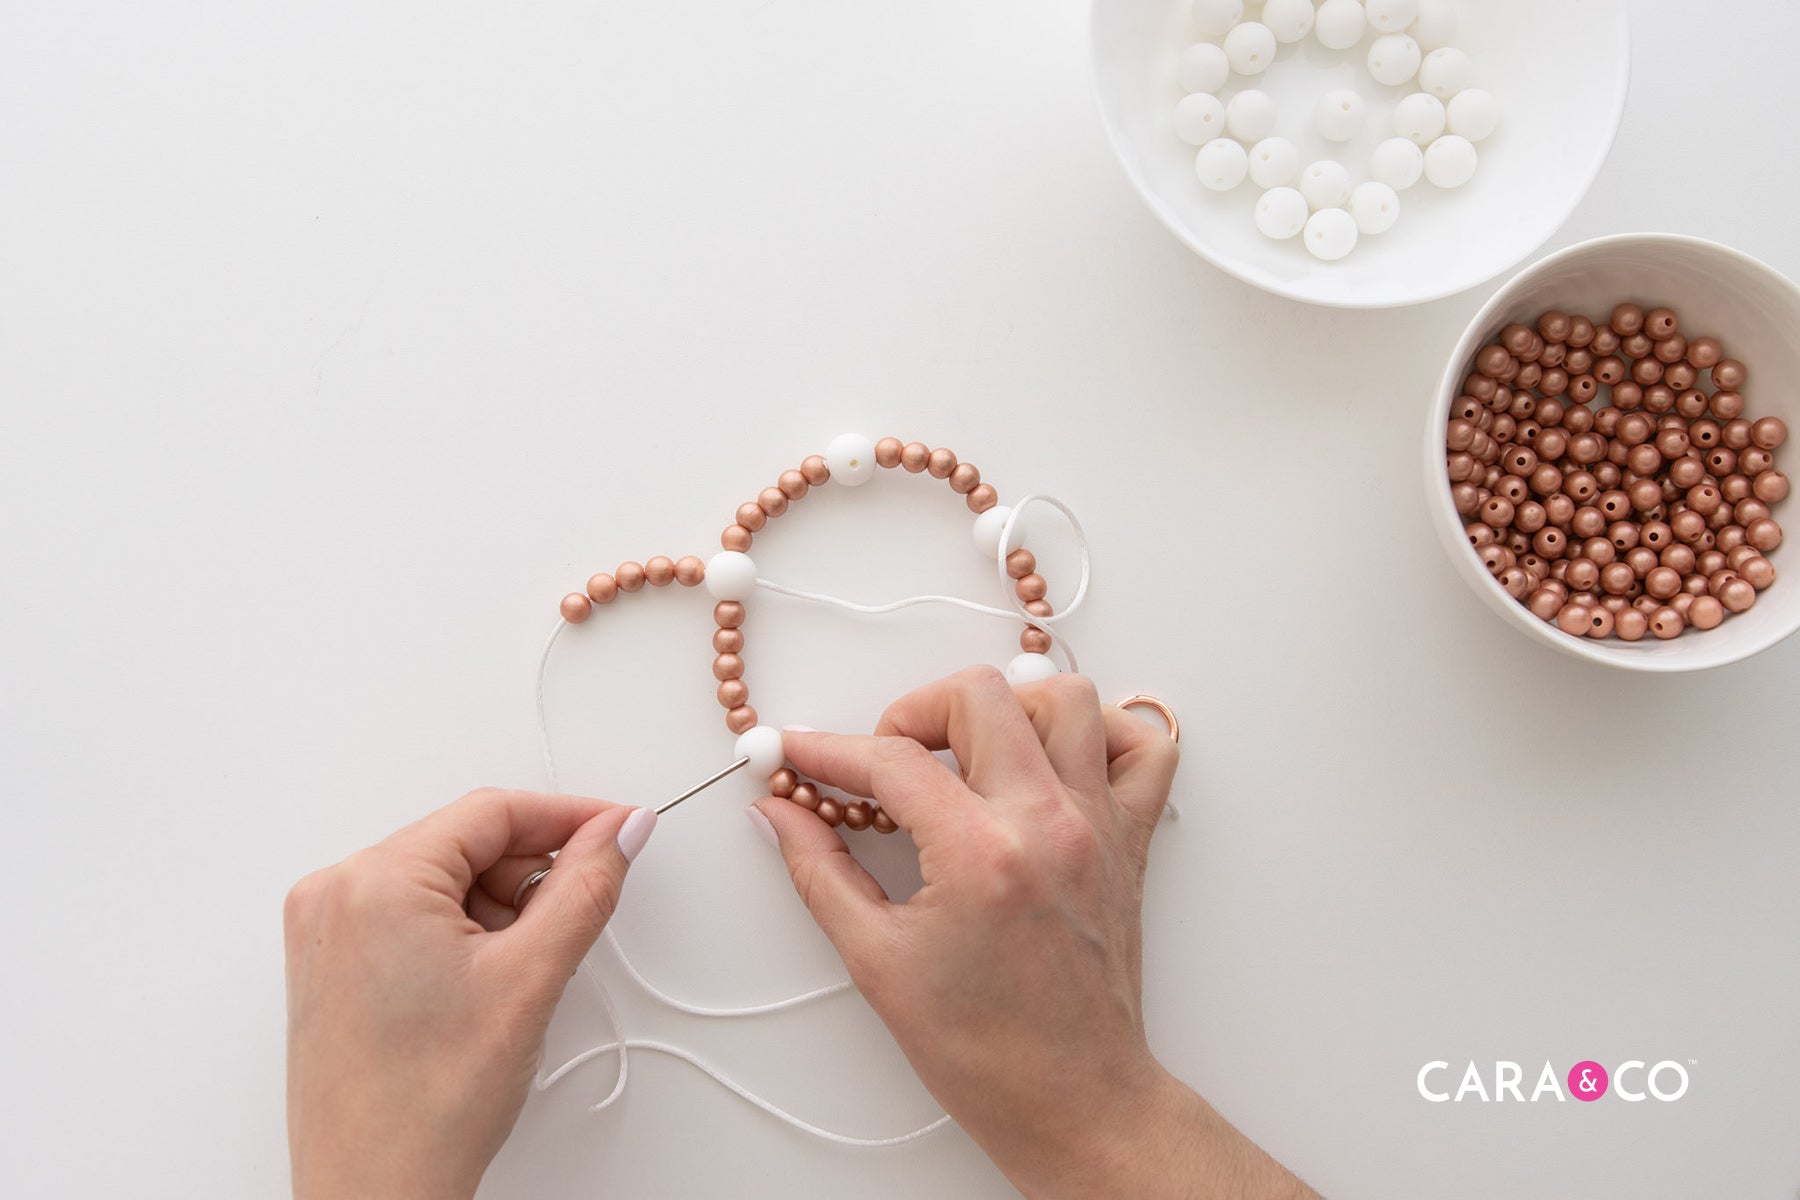
3. On one side of the 19mm bead, thread on 35x 9mm beads in one color. Push them up to the 19mm bead at the halfway point on your cording. Thread on your keyring and clasp as well.
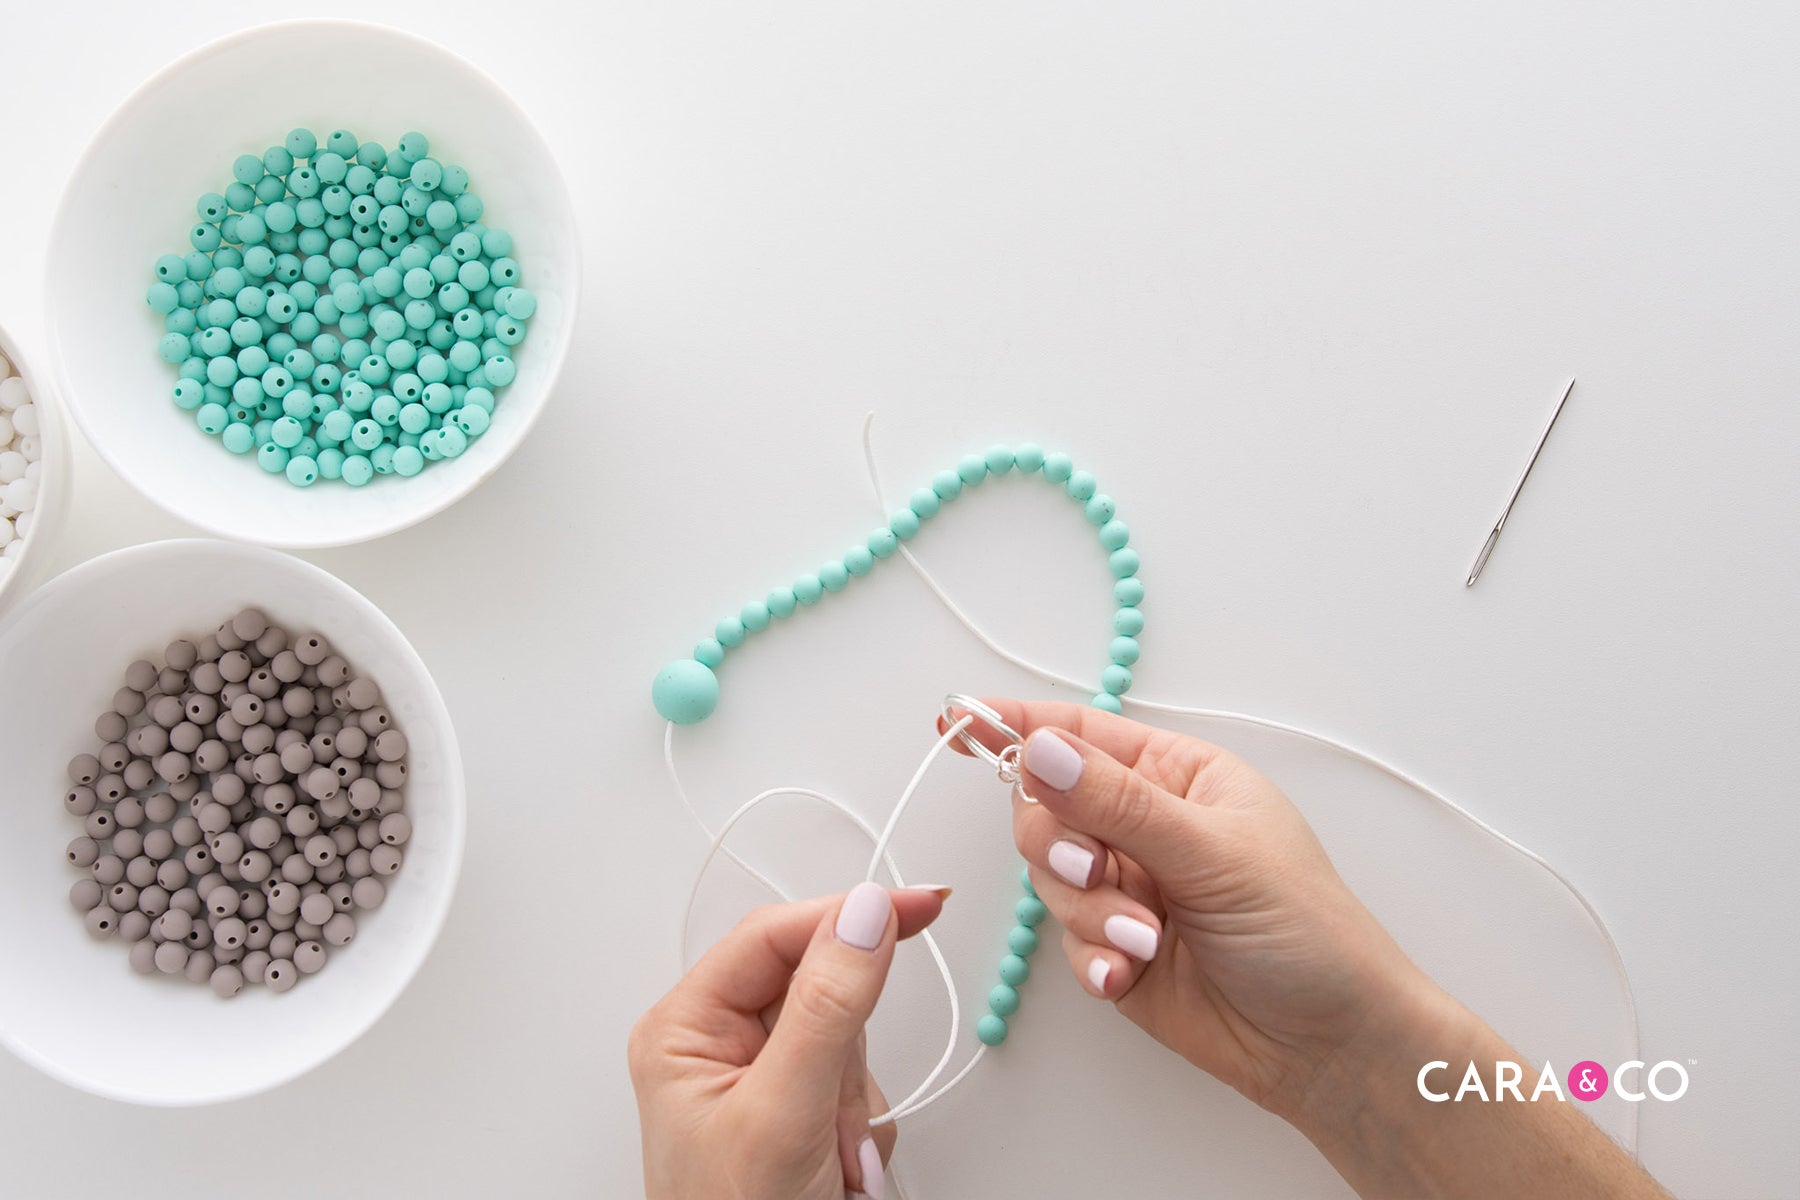
4. On the end of the string you’ve been working with, thread on your crafting needle. Push the needle through the opposite side of your 19mm bead to create a round loop. Pull the string through so that the beads have been pulled taut.

5. Taking the other cording end (which will be a touch longer than the one you just worked with) string on another 35x 9mm beads in another colour. Make sure to feed this strand through the keyring that your other bead strand is already going through.

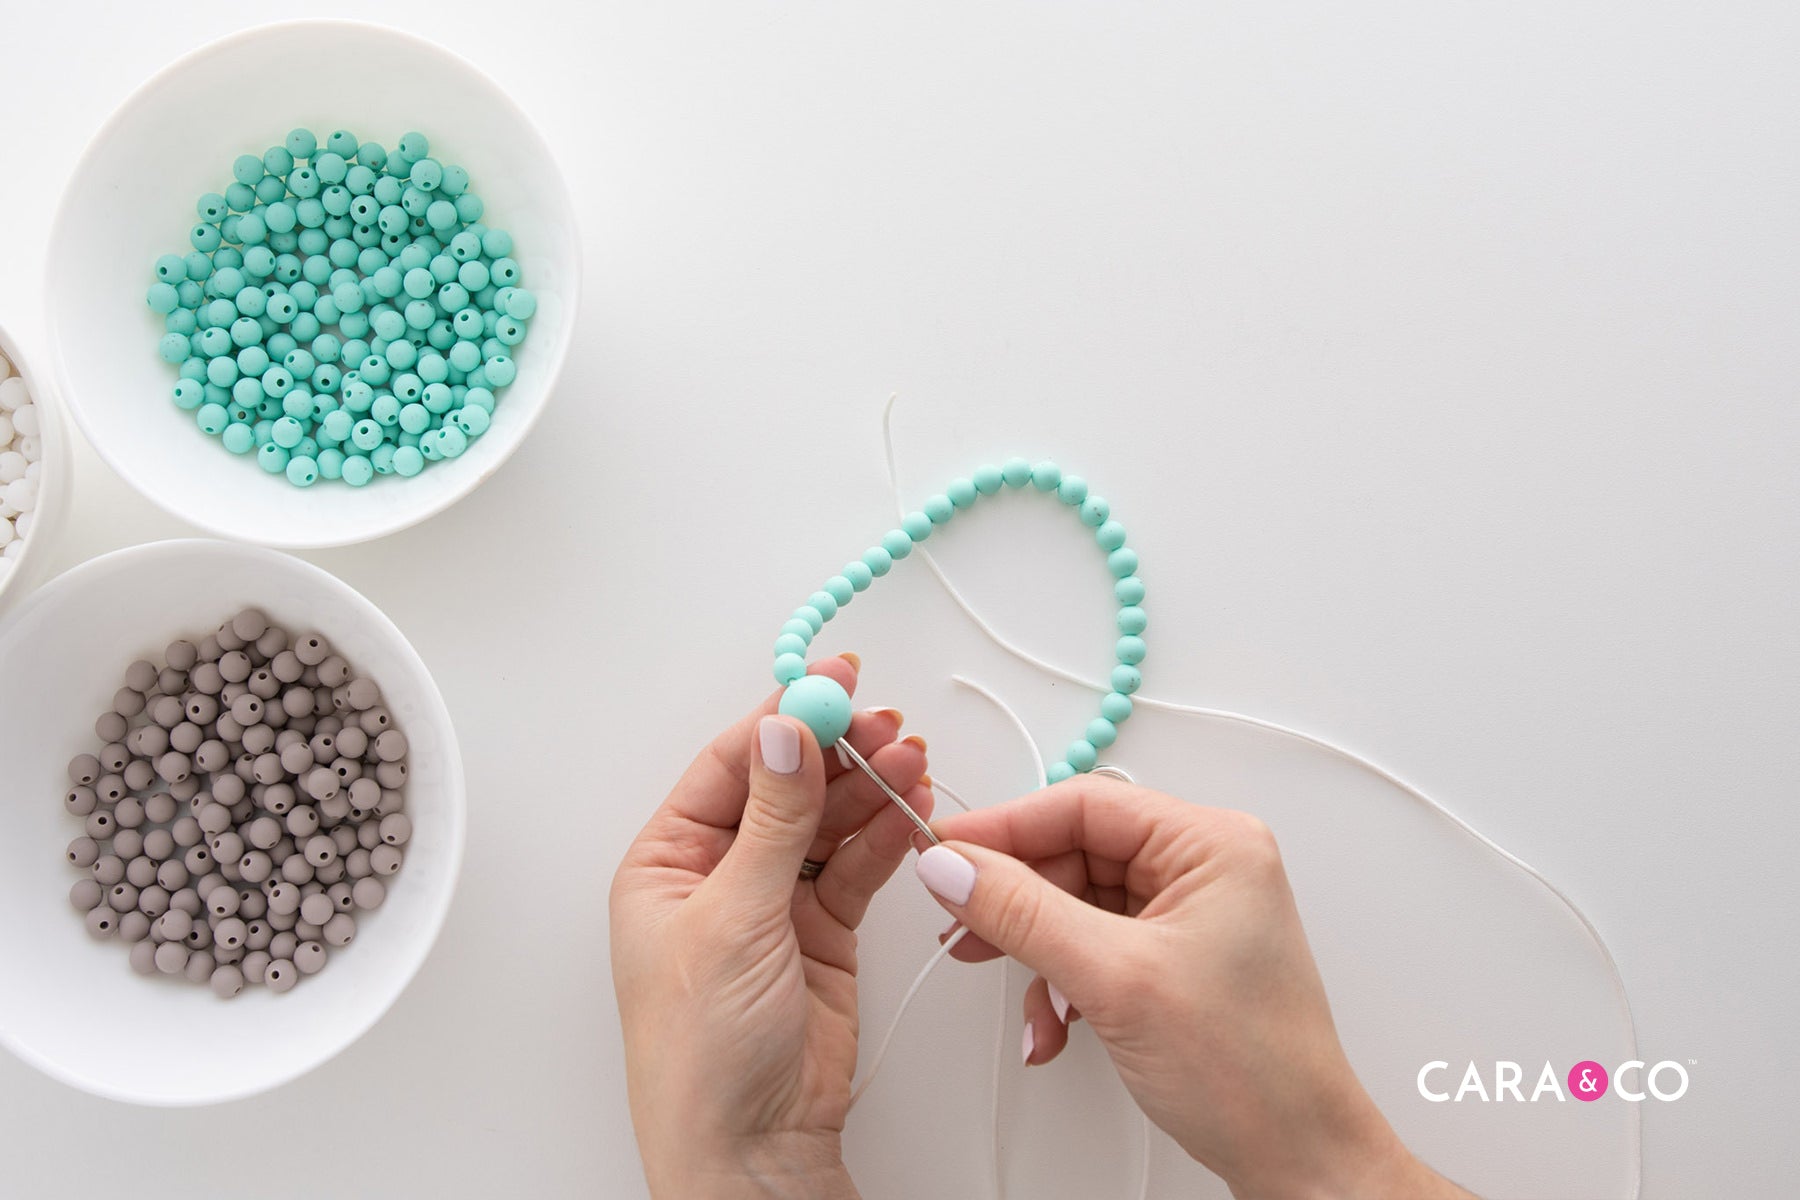
6. Thread your crafting needle on the string you’re working with and pass it the opposite way through the 19mm bead again. You should have three strings passing through this bead now. Pull your strings to tighten up the loops (not so tight that the beads misshapen, but until they’re snug against each other).


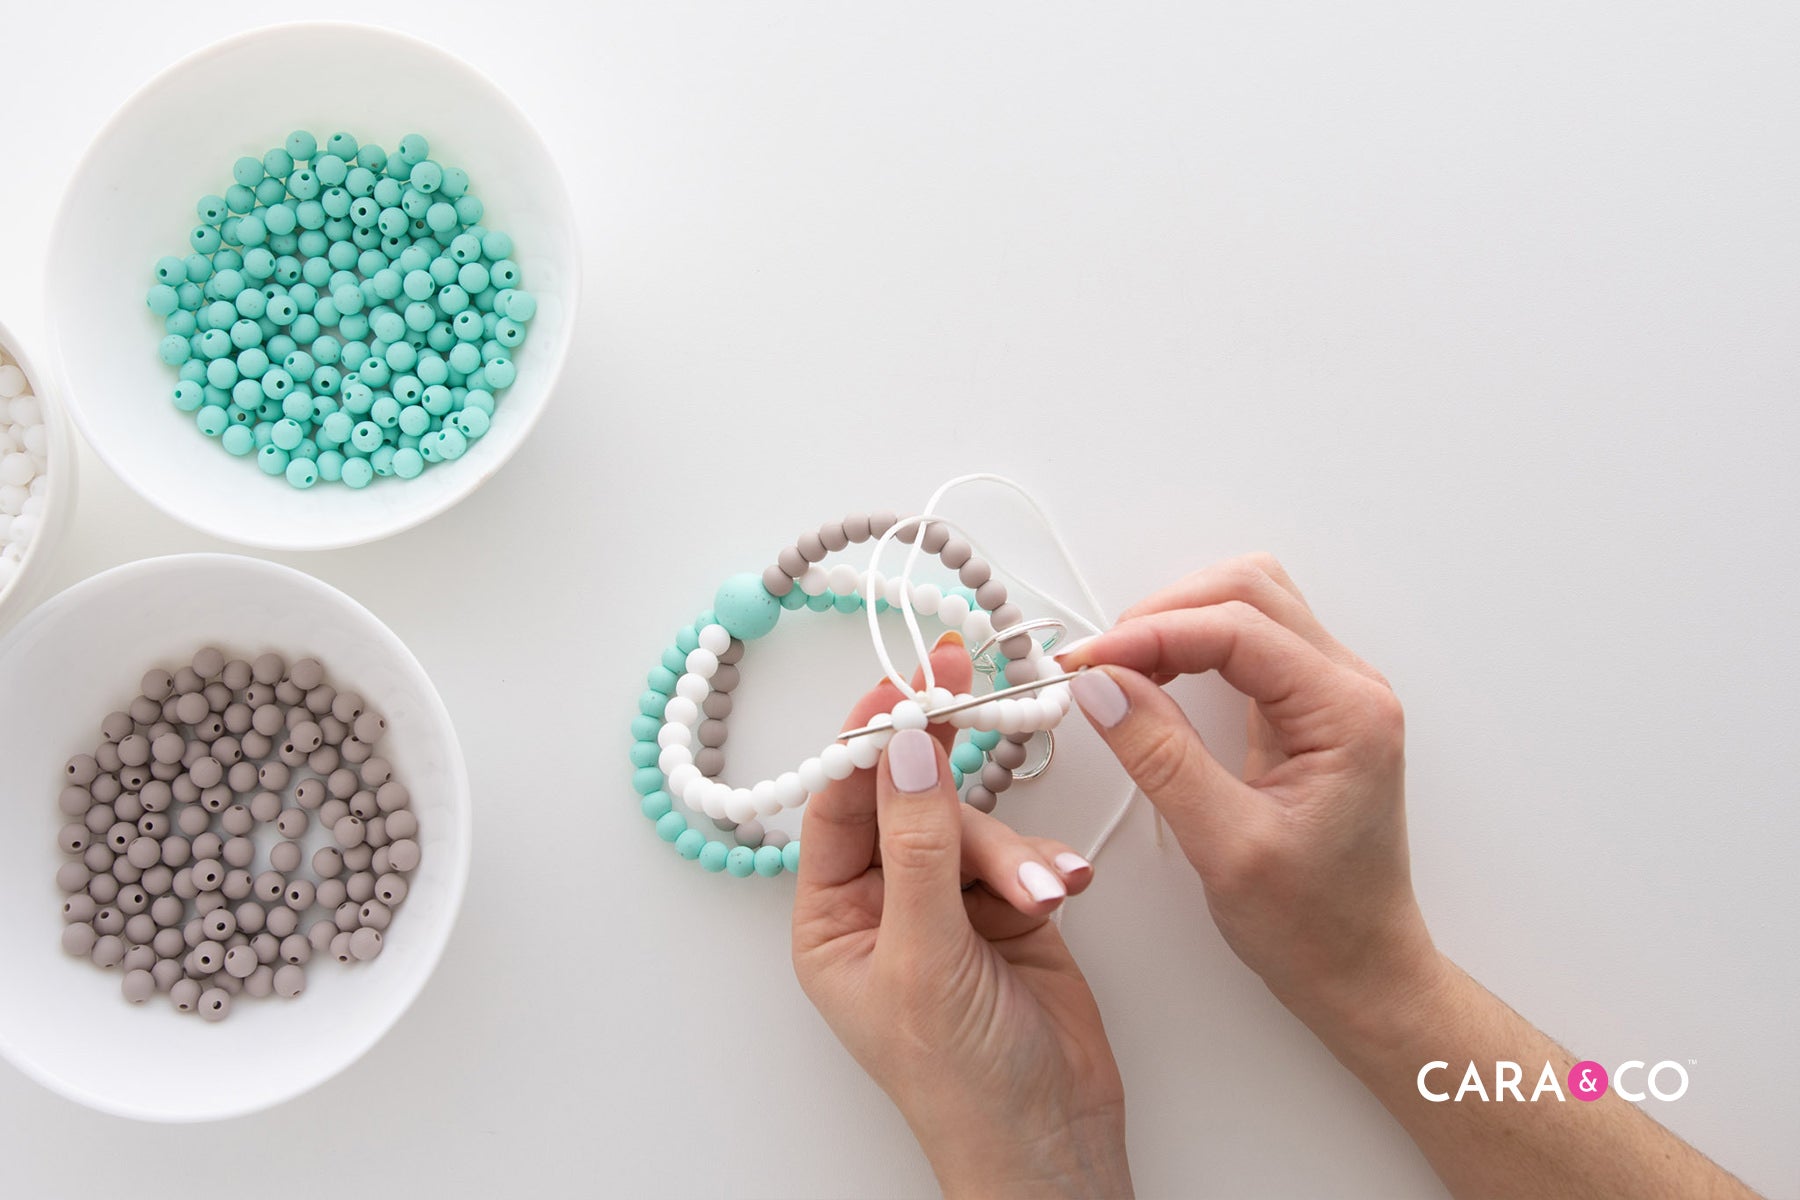
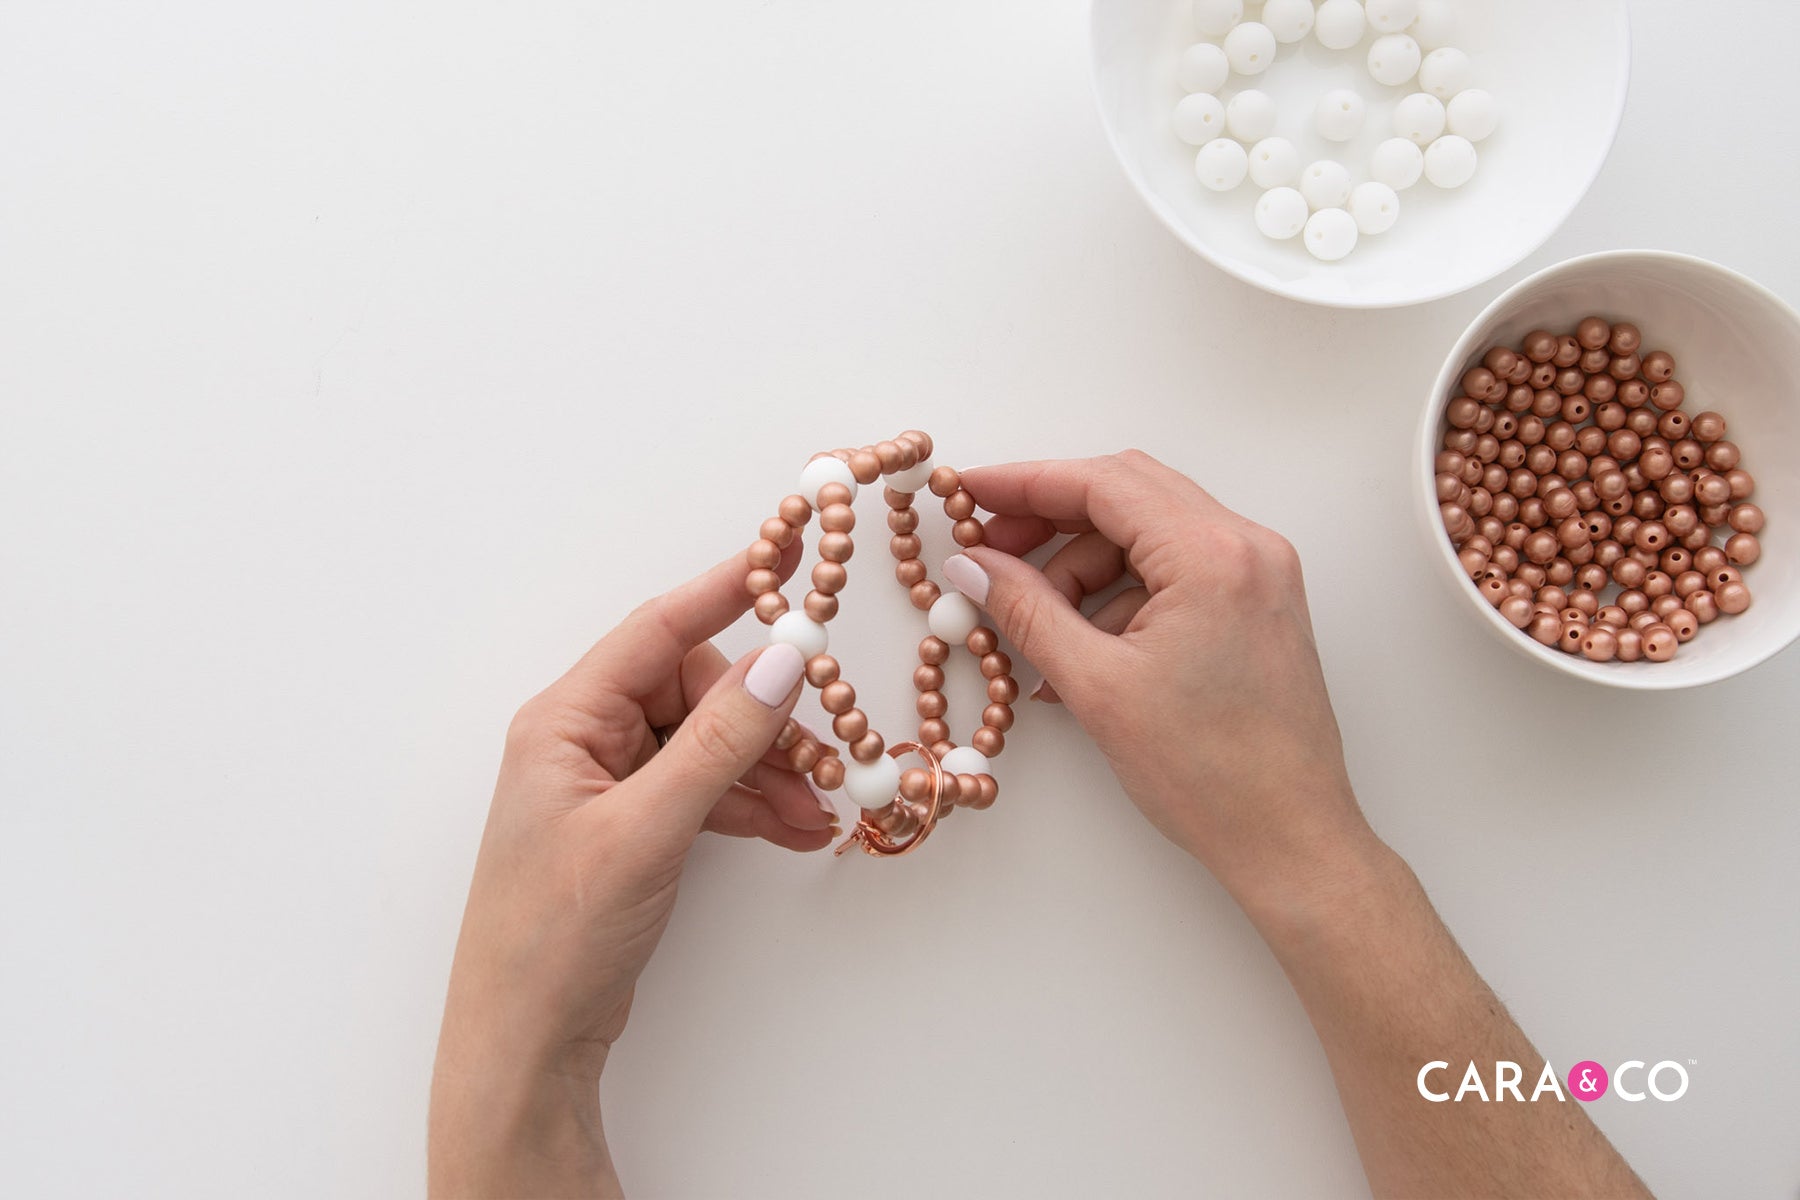
7. Take the end you’ve been working with and thread on 17x 9mm beads in your third color. On the other string end thread on your last 18x 9mm beads, passing the strand through the keyring.

8. Tie the two ends together in a double knot. Ensure that your tension is the same as the other strands you’ve done. Lightly run your lighter flame over the knot to ensure that the cording will hold.

9. Thread on your crafting needle to one cording end and pass the needle through one of the neighboring beads beside the knot. Gently pull your knot into the center of the 9mm bead to hide it.

10. Trim and melt your ends to hide them.

Chunky Pattern Wristlet

There’s no step by step for this design! If you’ve followed our tutorial on how to make a simple beaded Wristlet (click here to see it again!), all that’s different with this design is playing around with the shapes and variations! For this design we chose 30 x Coin Beads and 10 x 15mm Round Beads.

Making a pattern with the coins created an extra chunky and fun design and we are HERE for it!! Check out your bead stash at home or take a look through our Silicone Beads page to see what bead shapes you could introduce into your Wristlet Design!
Double Hole Crossing Wristlet


A twist on a classic wristlet shape, using our exclusive double hole beads!
Supplies Needed:
- 6 x 15mm Double Hole Beads
- 60 x 9mm Regular Round or Metallic Round Beads
- 1 x Keyring & Clip
- Sharp scissors
- 2 x 35” lengths of regular cording
- Crafting needle
Step by Step
1. Trim your cording and lightly melt the ends with your lighter to make threading beads easier.

2. Thread on to your cording a double hole bead, followed by 5 x 9mm beads. Do this a total of 6 times. You should have 6 double hole beads and 30 x 9mm beads.


3. Thread on your keyring. Take both ends and tie them off together in a double knot. Your loop should be tight enough to bring the beads together without seeing any cording in between.


4. Run your lighter over the knot to secure it. Thread your crafting needle on to your cording. Push your needle through the double hole bead and gently pull the knot inside the double hole bead. Trim and melt the ends to hide the knot.


5. Take your second cording length, trim and lightly melt the ends.

6. Thread on your crafting needle to your cording, and pass it through the crossing channel hole of one of your double hole beads. We suggest picking a different bead than the one that you just hid a knot in.
7. Leave about 6” of cording on the one side to tie off with at the end. On the working end of your cording, thread on 5x 9mm beads.

8. Skip down to the next double hole bead and pass your needle through it, moving in the opposite direction that you just came from on the previous bead. Your cording will be weaving back and forth through the double hole beads.
9. Once through, add on another 5x 9mm beads, and pass the needle and cording through the next double hole bead in the opposite direction.

10. When you get to the keyring, make sure that your weaving also passes through the keyring hole.

11. You should end up with two strands coming out on the same sides of your design. Add 5x 9mm beads to one string. Tie off the two pieces together with a double knot.


12. Using your lighter, melt and fuse the double knot. Thread on your crafting needle to one cording end. Pass the needle through the double hole bead beside the knot, and gently pull the knot into the bead to hide it.
13. Trim and melt the ends to keep them from fraying.
There’s so many ways to shake up your Wristlet Designs, but if you try any of these styles make sure you tag us using our hashtag #createdwithcarasupply

We love coming up with new designs for you to try out! Do you have any ways that you like to make your products unique to your shop or personal style?? Pop a comment below! As always, we LOVE seeing what you come up with when following our tutorials, be sure to tag us in your creations on instagram at #createdwithcarasupply.
Enjoy, and happy crafting!
Xo
-the girls
*The products, materials, and supplies sold by Cara & Co. Silicone Craft Supply are intended for use by adults and should never be left unattended with a child.
***Small objects and beads can present choking hazards to young children. Never leave a child unattended with beads or other products. Always dispose of any damaged product. No product is completely indestructible, and fully formed teeth could potentially damage product if chewed aggressively, so responsible attentiveness is needed for any user or purchaser. Customers should always inspect and monitor their products, discontinuing use at the first sight of damage.
****Once our products have been sold and shipped to our customers, Cara & Co Silicone Craft Supply Inc., waives all responsibility and liability from the use of our products. Customers are responsible that their final products made from our supplies meet the appropriate safety requirements for their region. Our buyers understand that by purchasing our products or using suggestions from the above tutorial, the buyer assumes any and all responsibility and liability for the use of the products.
*****Cords, clasps and pacifier clips are not intended to be chewed on and may present choking hazards.